Define user roles
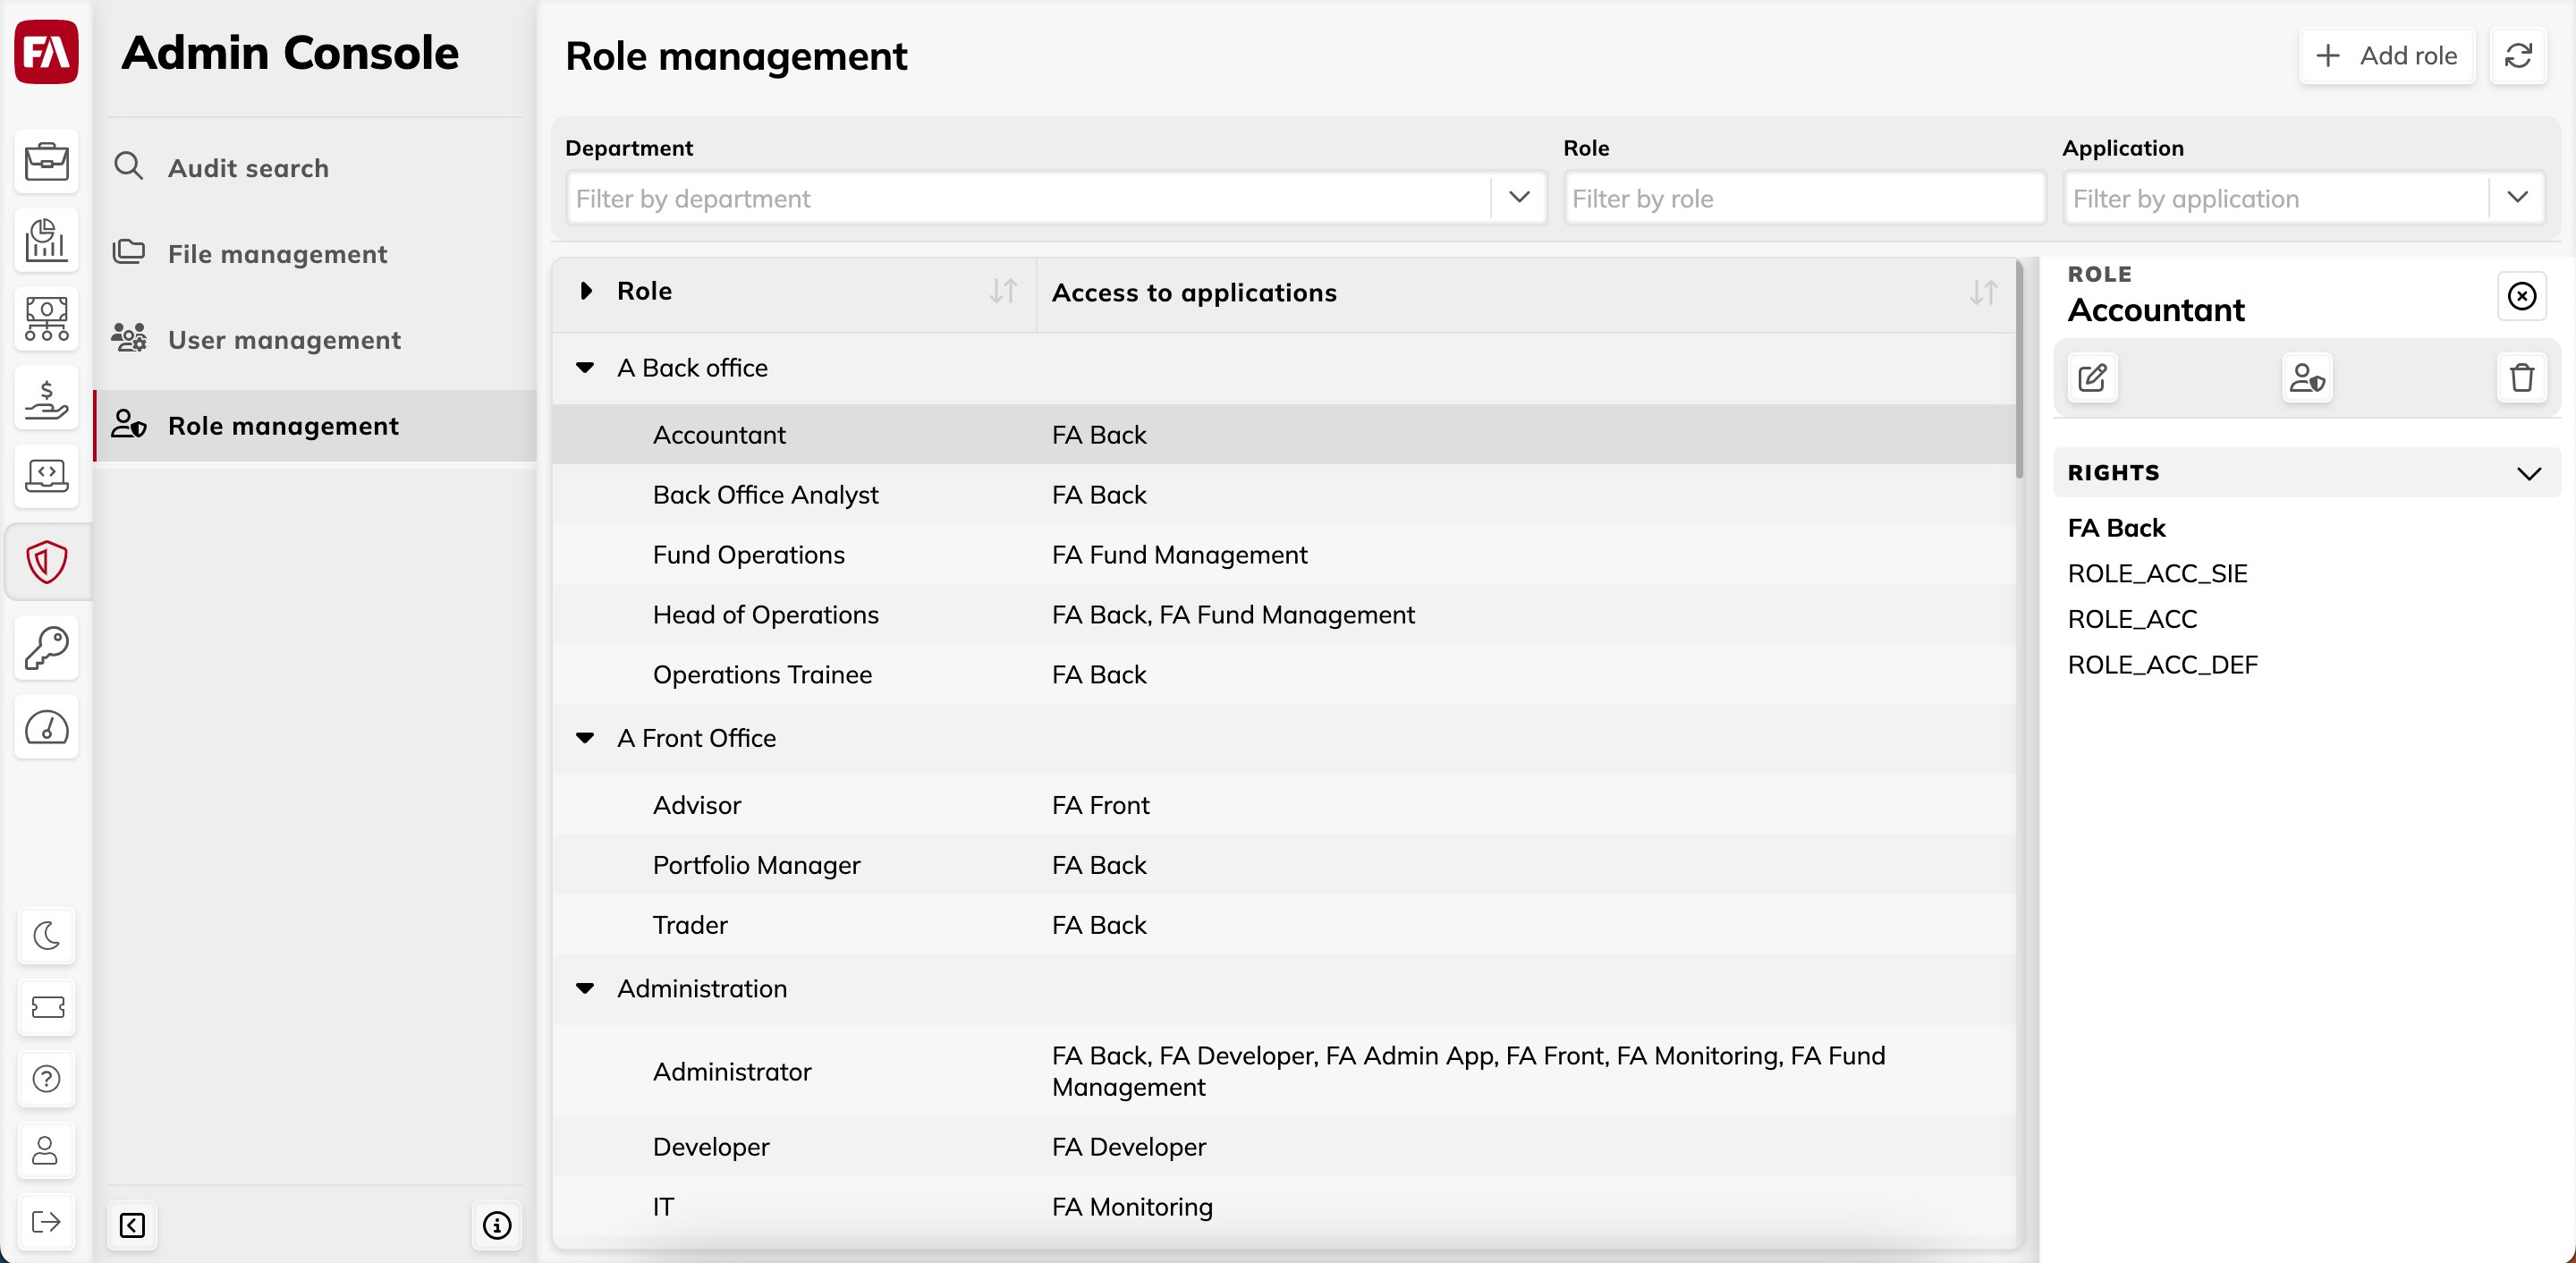
User roles define which applications a user can access and what user rights they have within applications. Roles are grouped by department. For example, the "Back office" department group might include the "Accountant", "Back office analyst", and "Fund operations roles", with each role providing access to certain apps and actions within those apps.
You can add, edit, delete, and group user roles into departments in the Role management view of FA Admin Console. You can filter the list of roles by department, role name, and application with the fields at the top of the view.
 |
Add user role
To add a user role:
Go to the Role management view in the FA Admin Console and click Add role.
Fill in the fields:
- Department
The department where the role belongs. Choose the department from the list or create a new one by typing it in.
- Role
The name of the user role.
Click Submit.
Set the role rights by selecting the role and clicking
 to open the Rights window. Use the toggles on the right to choose rights that are included in the role.
Click Save.
After you define a user role, you can assign it to users. For details, see Assign user roles
Edit user role
You can change the role name, the department it belongs to, and the rights provided by the role. To edit a user role, do the following:
Go to the Role management view in the FA Admin Console and click the role from the list to open the Role pane.
To edit the role name or change the department, click
 . To edit the rights provided by the role, click and select the rights in the Rights window that opens.
Edit department name
To edit the name of a department, do the following:
Go to the Role management view in the FA Admin Console and click the department to open the Department pane.
Click
to edit the department name.
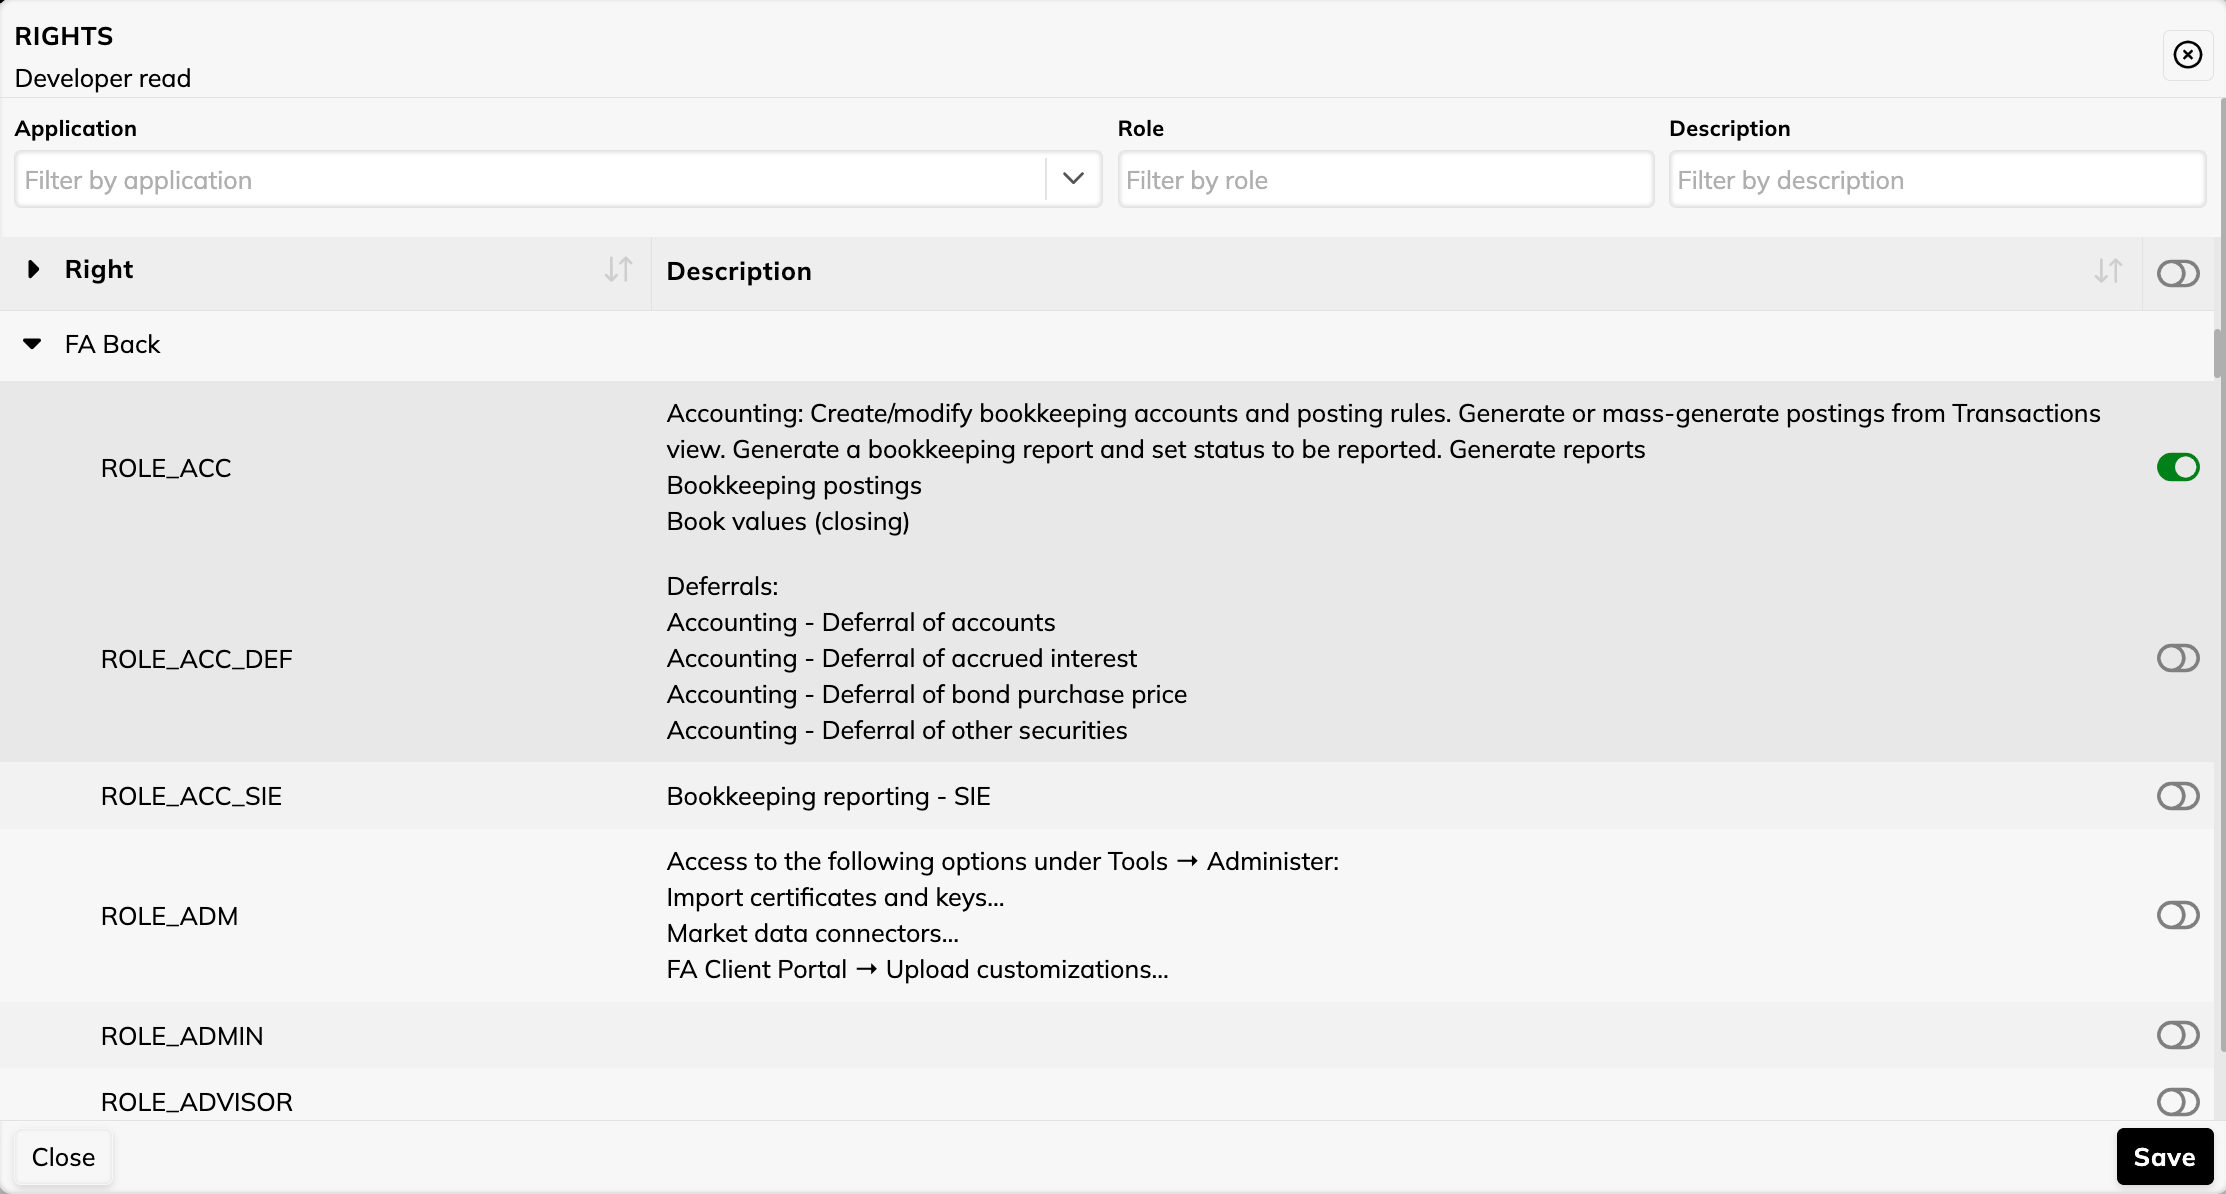
Edit rights included in a role
You can edit what rights a role includes in the Rights window. You can filter and search user rights by application, role, or description. You can also filter the list to only view rights that work with limited visibility. The list of user rights shows the name of each right in the system, its description and the permissions it provides, and if the right works with limited visibility (indicated by a green checkmark in the "Limited visibility" column).
To edit the rights included in a role, do the following:
Click on a role in the Role management view to open the Role pane.
Click
to open the Rights window and use the toggles on the right to choose which rights are included in the role.Click Save.
 |