Send MiFIR transaction reports
MiFIR transaction reporting is based on certain fixed values (details about the reporting entity) and some changing values (transaction and execution details). To start using MiFIR transaction reporting, first configure the fixed values.
To use this functionality, you should have role REP_TRS .
Prerequisites
The majority of the features come pre-installed. Please ask FA to install MiFIR reporting automation route from FA Standard Setup (Optional packages) if you want to use the automated sending functionality.
Configure MiFIR transaction reporting
To configure MiFi transaction reporting,
Go to Tools → Administer → Transaction reporting → Manage.
Fill in the fields:
Sender LEI code. The Legal Entity Identifier (LEI) code of the company doing the reporting.
Receiving country and Receiving authority for the report.
Alternative sender ID for CSSF or CySEC (optional, only used when the authority is CSSF or CySEC).
Executing party contact ID. The party that executes the trades. The company should be stored as a contact in FA Back (enter contact ID).
Is the executing party an investment company? is used to define whether the executing party is an investment company or not.
Country of reporting branch. Usually the same as the Receiving country.
Package the file into ZIP . An option to produce a ZIP file containing the report, instead of just the report. This option is valid only when sending the file manually. The automatic file transfer described below handles the file zipping automatically.
The file is provided with the upper case file extension (ZIP), which is a requirement by FIVA. Other authorities, for example, FI in Sweden, requires the file extension in lower case (zip), so you need to change the extension manually.
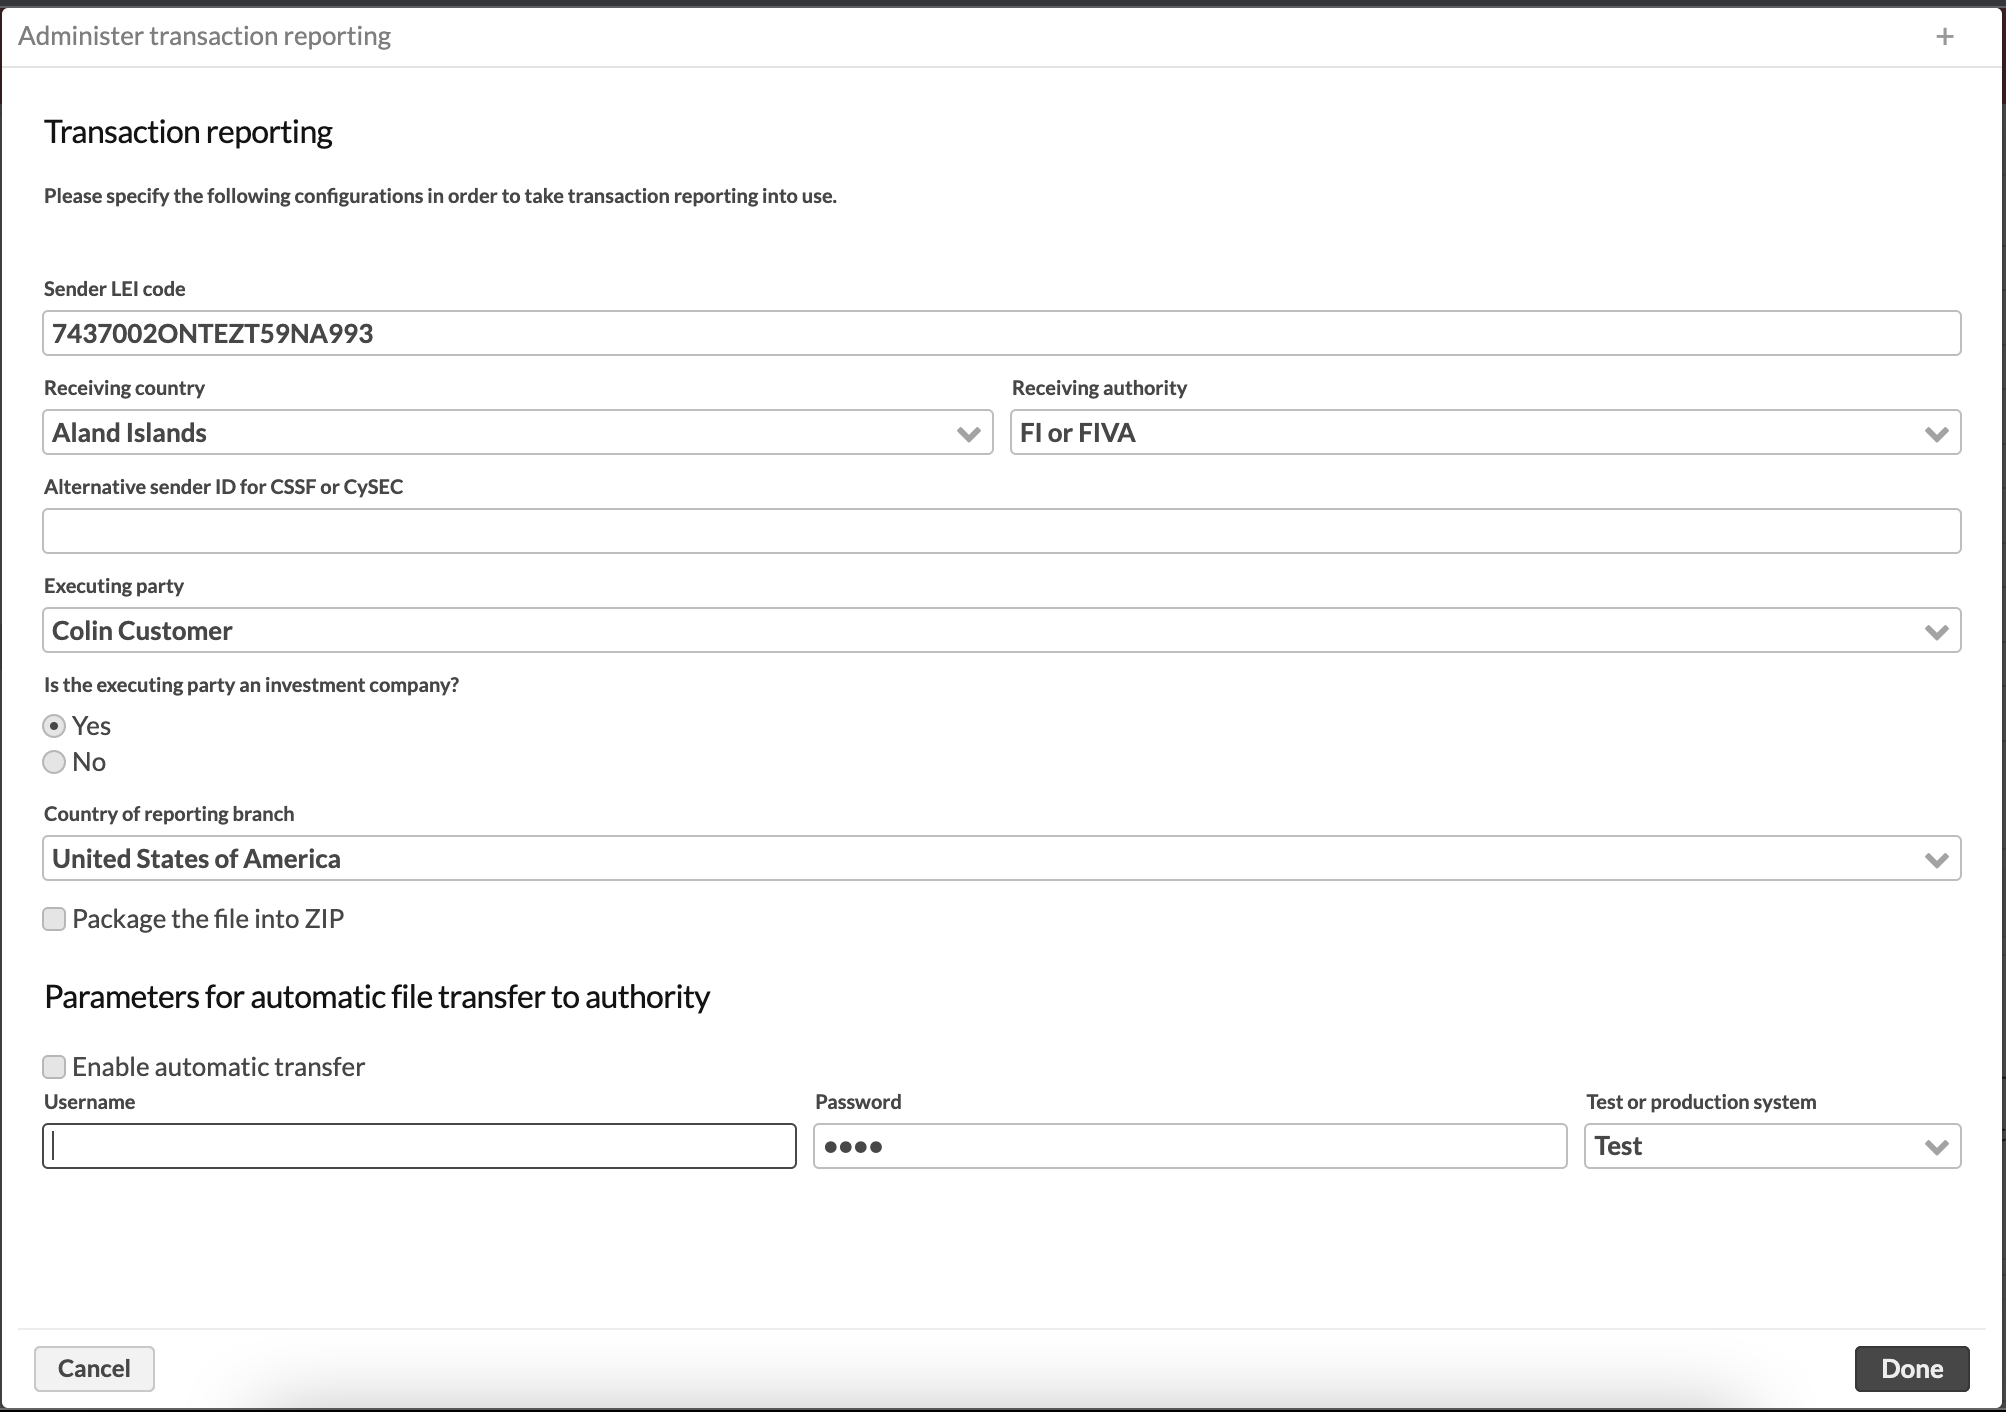 |
Enable automatic file transfer to authority
Note
This feature is supported only when reporting in Finland or Sweden.
To use automatic file transfers to and from the authority:
Choose Enable automatic transfer in the Administer transaction reporting window ( Tools → Administer → Transaction reporting → Manage). With automatic transfer enabled, you will also be able to download the file to your computer before sending.
Fill in the fields:
Username. Username for connection.
Password. Password for connection.
Private key password. Private key passphrase, if the private key is used for connection (for example, Finanssivalvonta requires authentication with a private key). Follow the instructions below to upload the private key in FA system: Upload private key when required by the authority.
Test or production system. A choice to transfer files between the test or the production system provided by the authority.
Note
In most cases you need to inform the authority from which IP address you send the reports so that they can allow the transfer through their firewall. Make sure that this whitelisting is in place. Usually from production systems, the IP to whitelist is 51.124.71.179.
Upload private key when required by the authority
Some authorities, such as Finanssivalvonta, provide an SFTP connection that requires a private key for authentication. To upload your private key, follow these steps.
Go to Administer → Transaction reporting → Upload private key and choose Transaction reporting.
Click Choose files and upload the private key file from your computer. The private key should be named
private.pem. You can either rename it before uploading or use the Edit icon (the icon with the notepad and pen) to rename it between clicking Upload and Confirm Upload.
Fill in data required for transaction reporting
Follow the instructions provided in MiFiR reports to enter the data required for the transaction reporting.
Send the transaction report
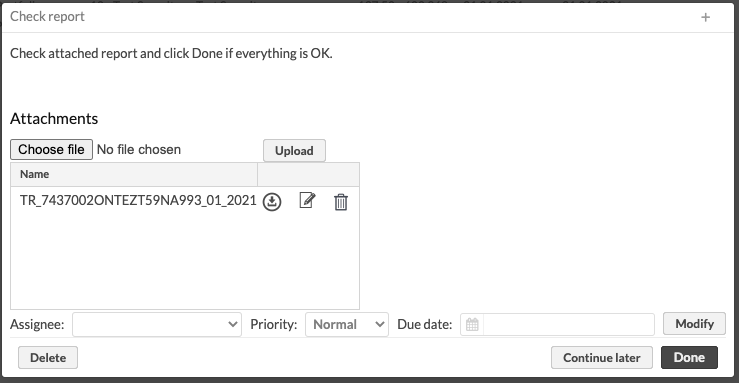
When the setup is done and the transactions, security, contact and portfolio information and tags in place, the report is sent from the Transactions view by searching for the transactions to report and clicking Create report → Transaction report. The transactions to be reported need to have the tag MiFIR-Report as described in MiFiR reports to be included. In the following window you can download the report file, cancel the reporting by clicking Delete and send in the report (if using automatic file transfer) by clicking Done. If the report is sent manually, it should to be downloaded to the local machine before clicking Done and then uploaded to the authority via the service they provide.
 |
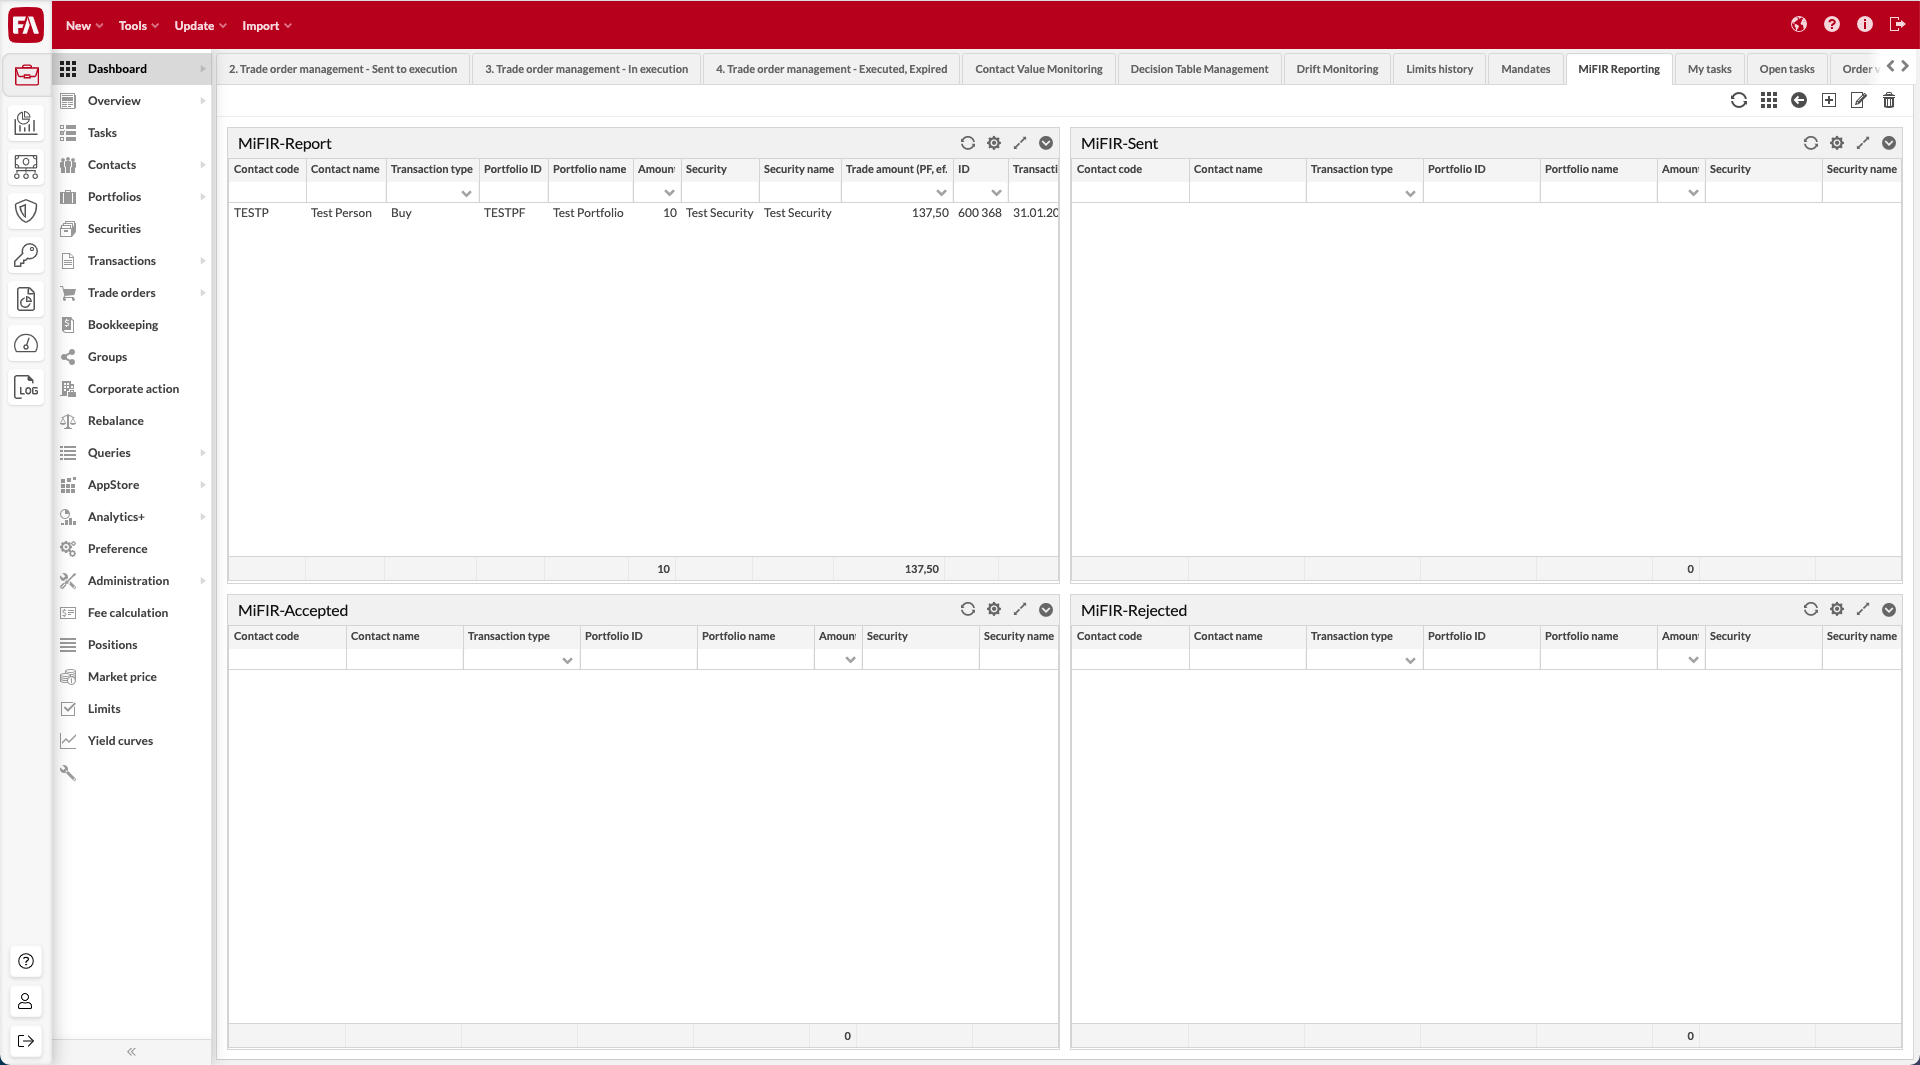
Follow up on the status of the transactions
You can follow the status of your transactions using the Dashboard called MiFIR reporting. You can see the transactions waiting to be reported under MiFIR-Report, the ones already sent but with no response from the authority under MiFIR-Sent and the ones that are accepted (MiFIR-Accepted) or rejected (MiFIR-Rejected).
 |
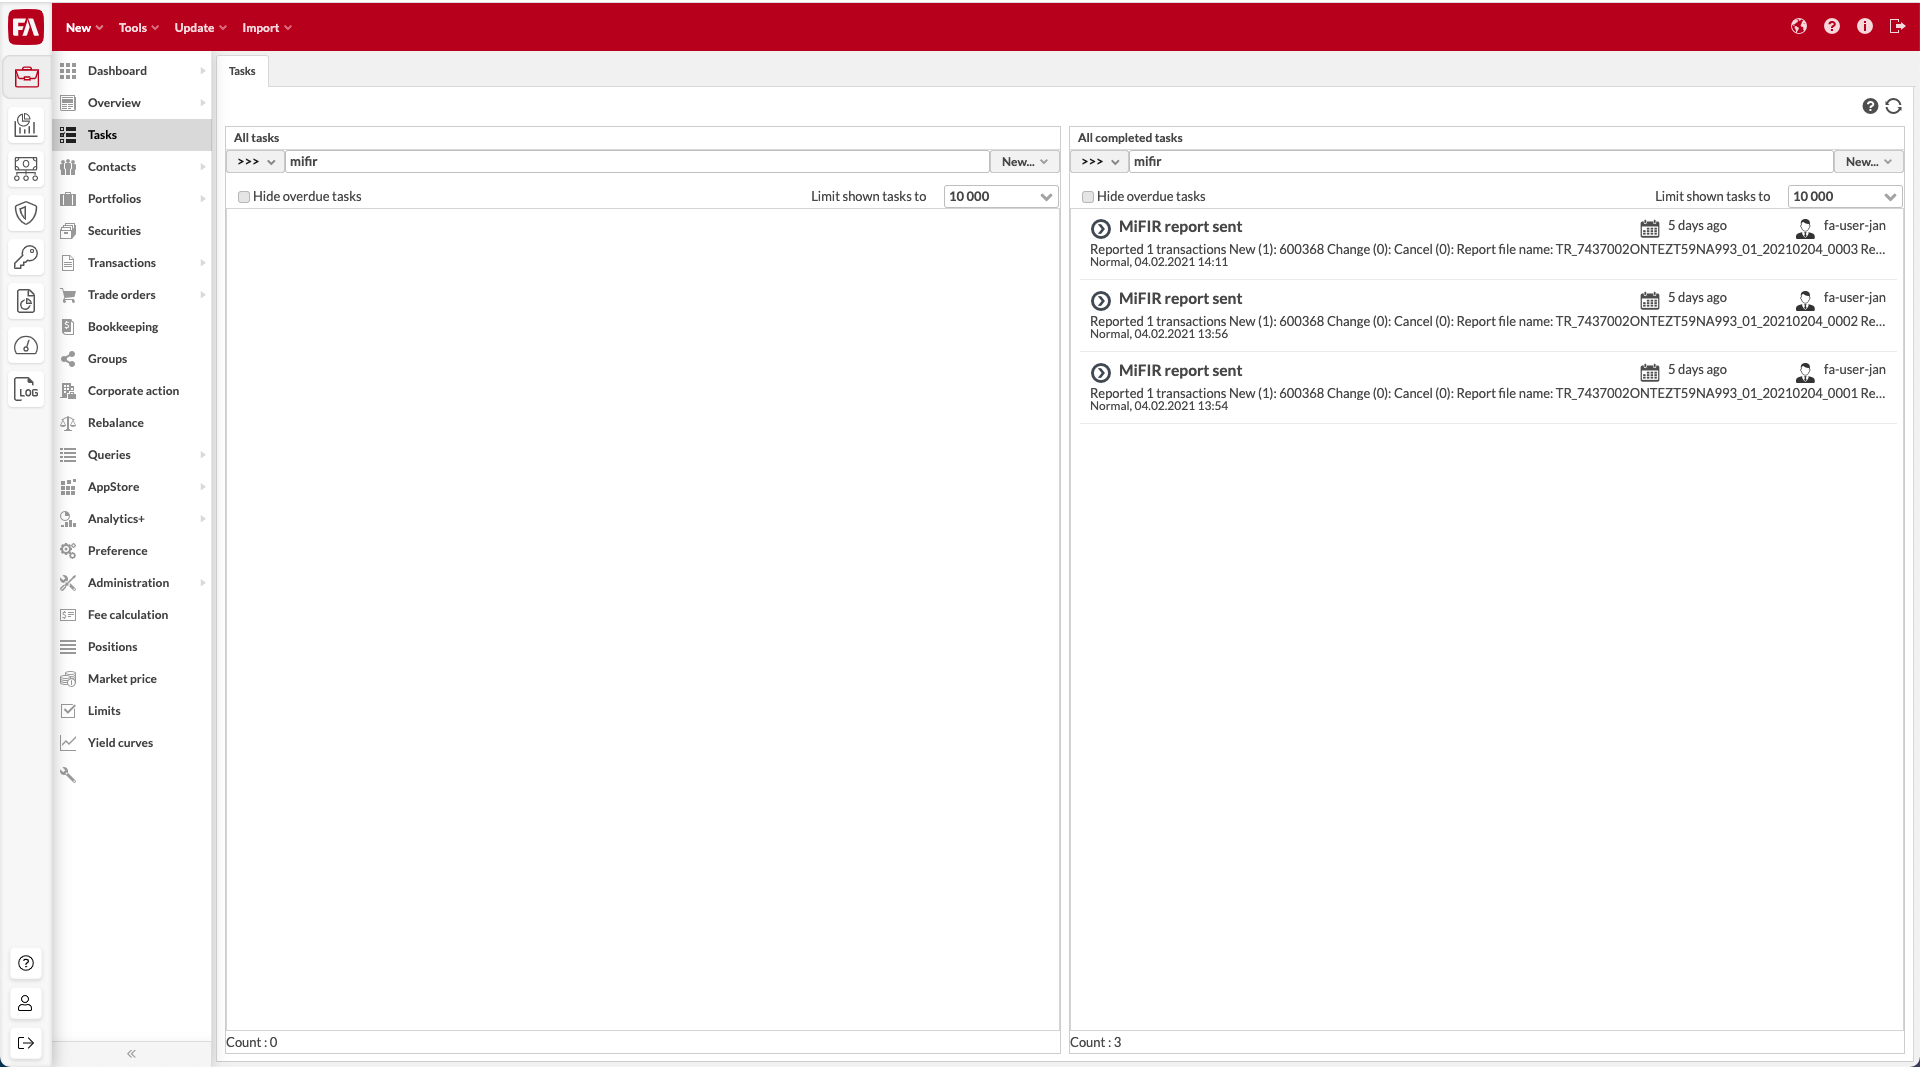
You can always check which reports have been sent or received from the Tasks view by selecting the lists All tasks and All completed tasks and filtering with the search string MiFIR, as shown below. The task titles explain what the task is about.
Task title | Description |
|---|---|
MiFIR report sent | The report attached to the task has been generated and sent to the authorities if automatic transfer is in use. |
MiFIR response received | The authorities have sent a response to the report and the transactions are tagged accordingly. |
MiFIR report failed | The report attached to the task was not sent to the authorities due to validation errors. Usually this is due to missing information either on the transaction, security, portfolio or contact. |
 |