Create a contact
This tutorial provides instructions on how to create a custom process that adds a contact in FA. You could think of it as the first part of a complete onboarding process that starts with collecting your end client’s personal information to create a contact in FA based on it.
In short, you need to:
Create a form for the user to enter the contact information.
Create two processes to display the form to the user and to import the input data.
Upload a user interface (HTML) to initiate and display the process to the user.
Access and run the custom process.
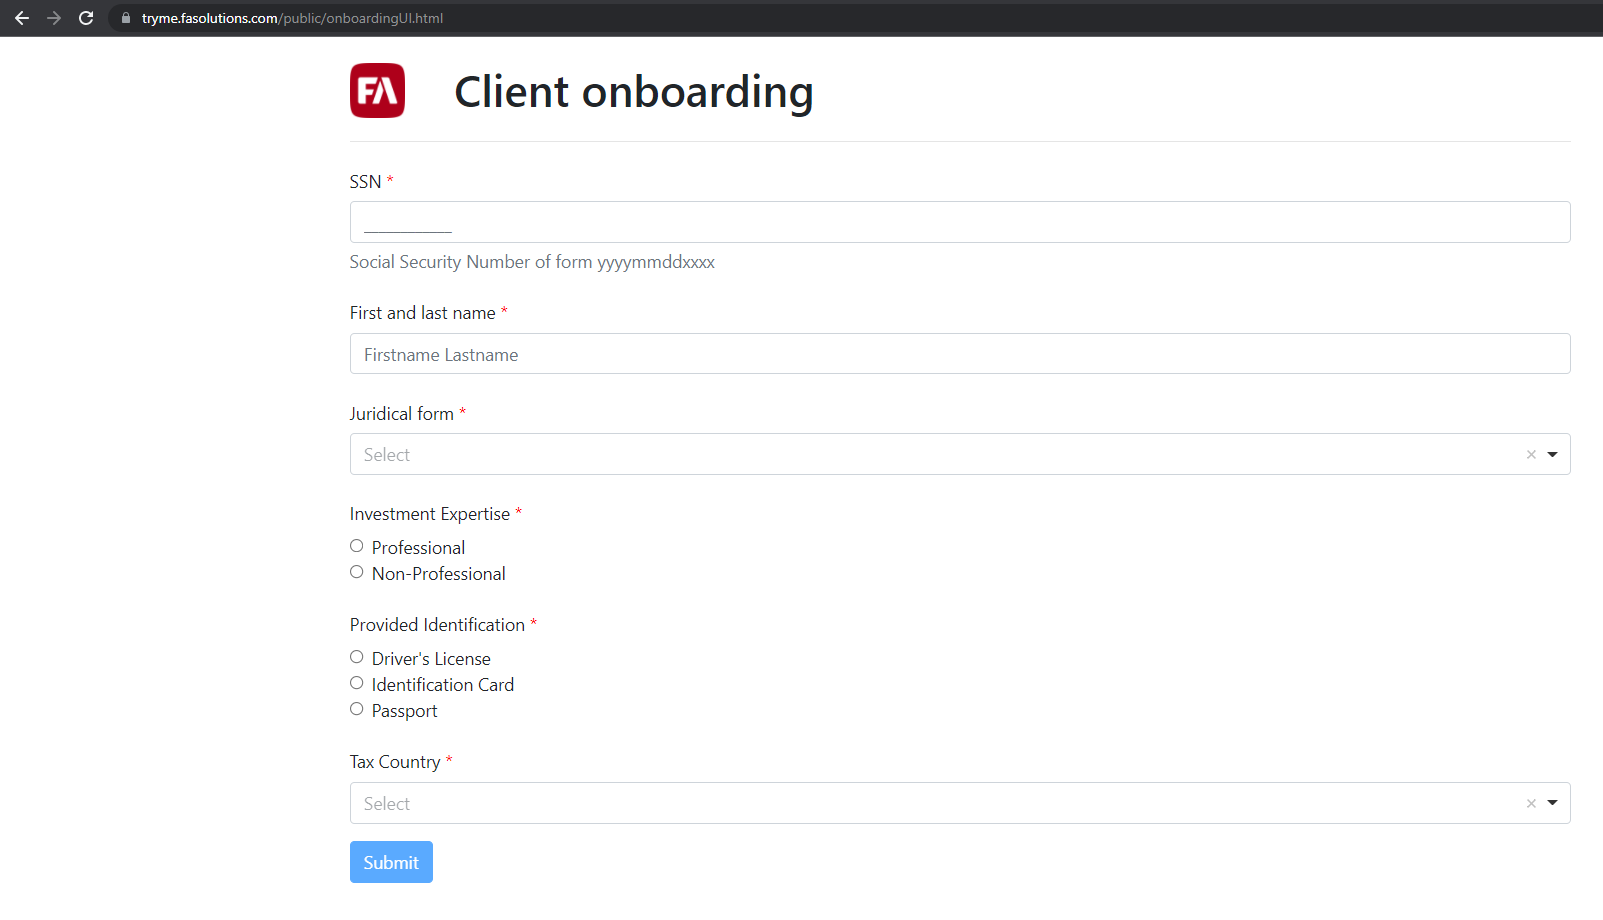
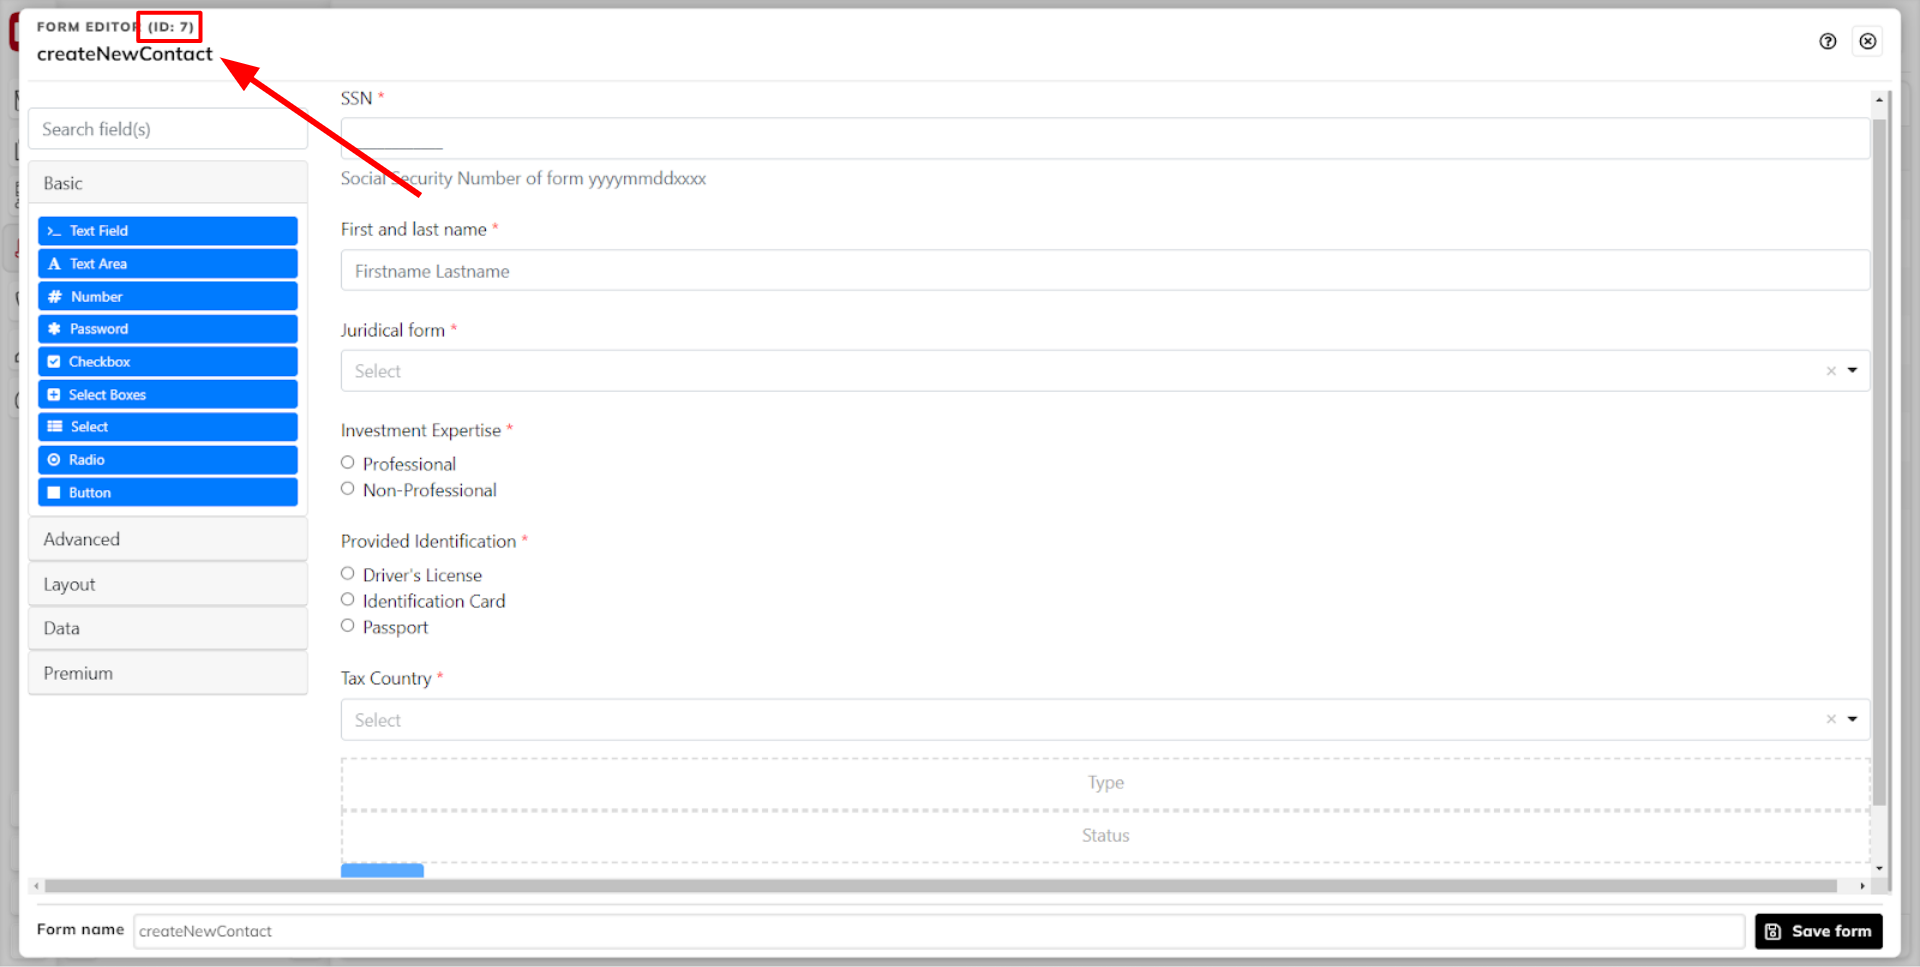
The result will look like this:
 |
Step 1.1 - Navigate to Forms in FA
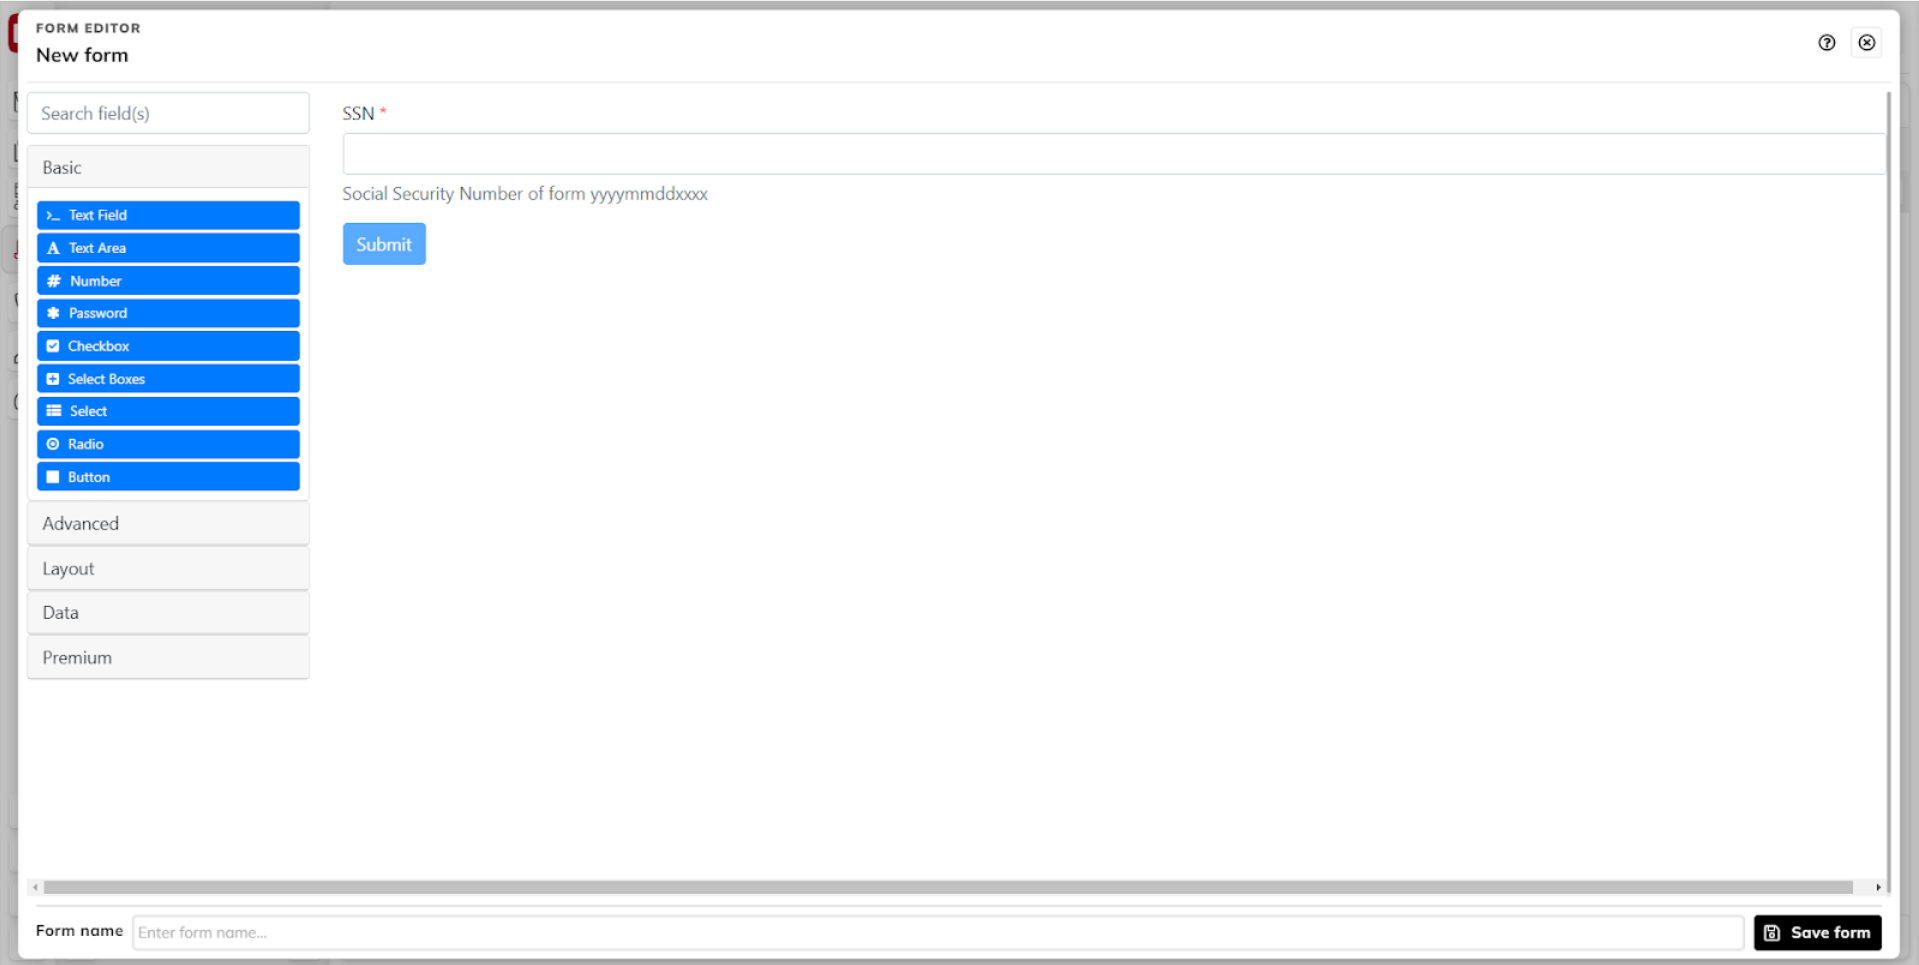
Navigate to the FA Developer app and choose Forms. Click Add form to start the configuration of a new form.
This is what your form should look like after completing this step.
 |
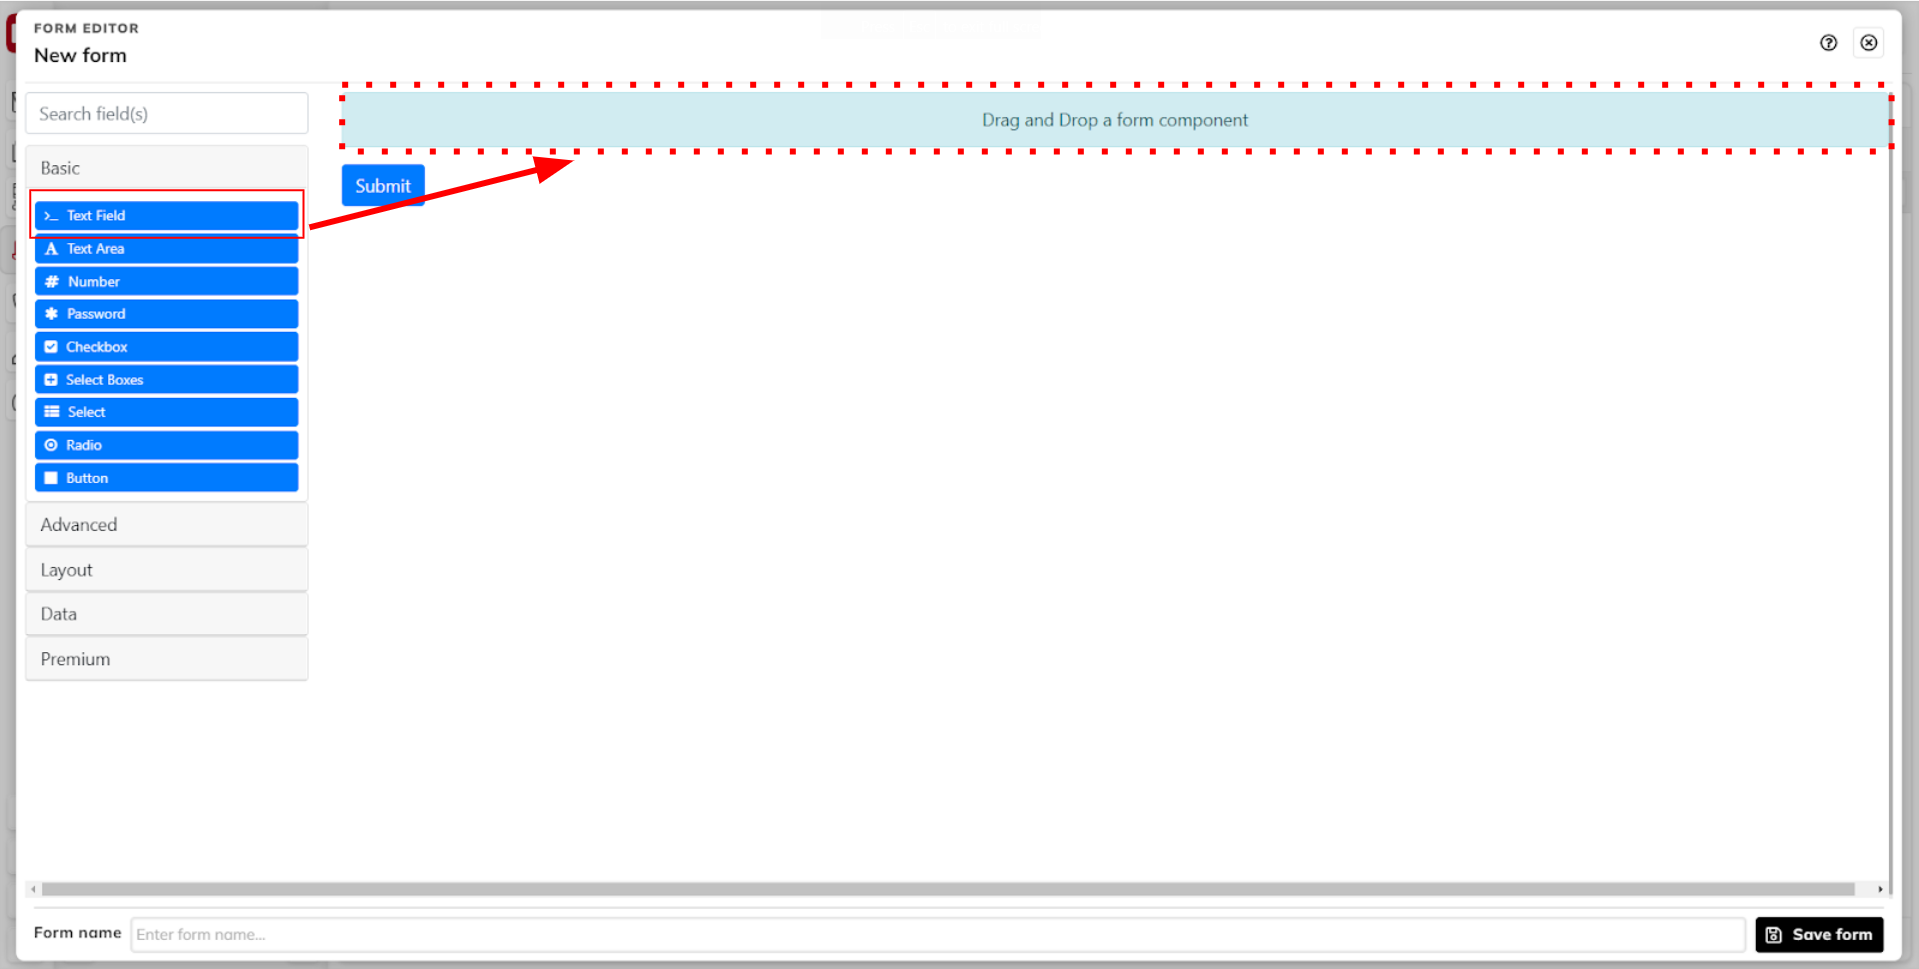
Step 1.2 - Create the Social Security Number text field component
Drag a text field component to the form area. The text field component allows the user to input text.
 |
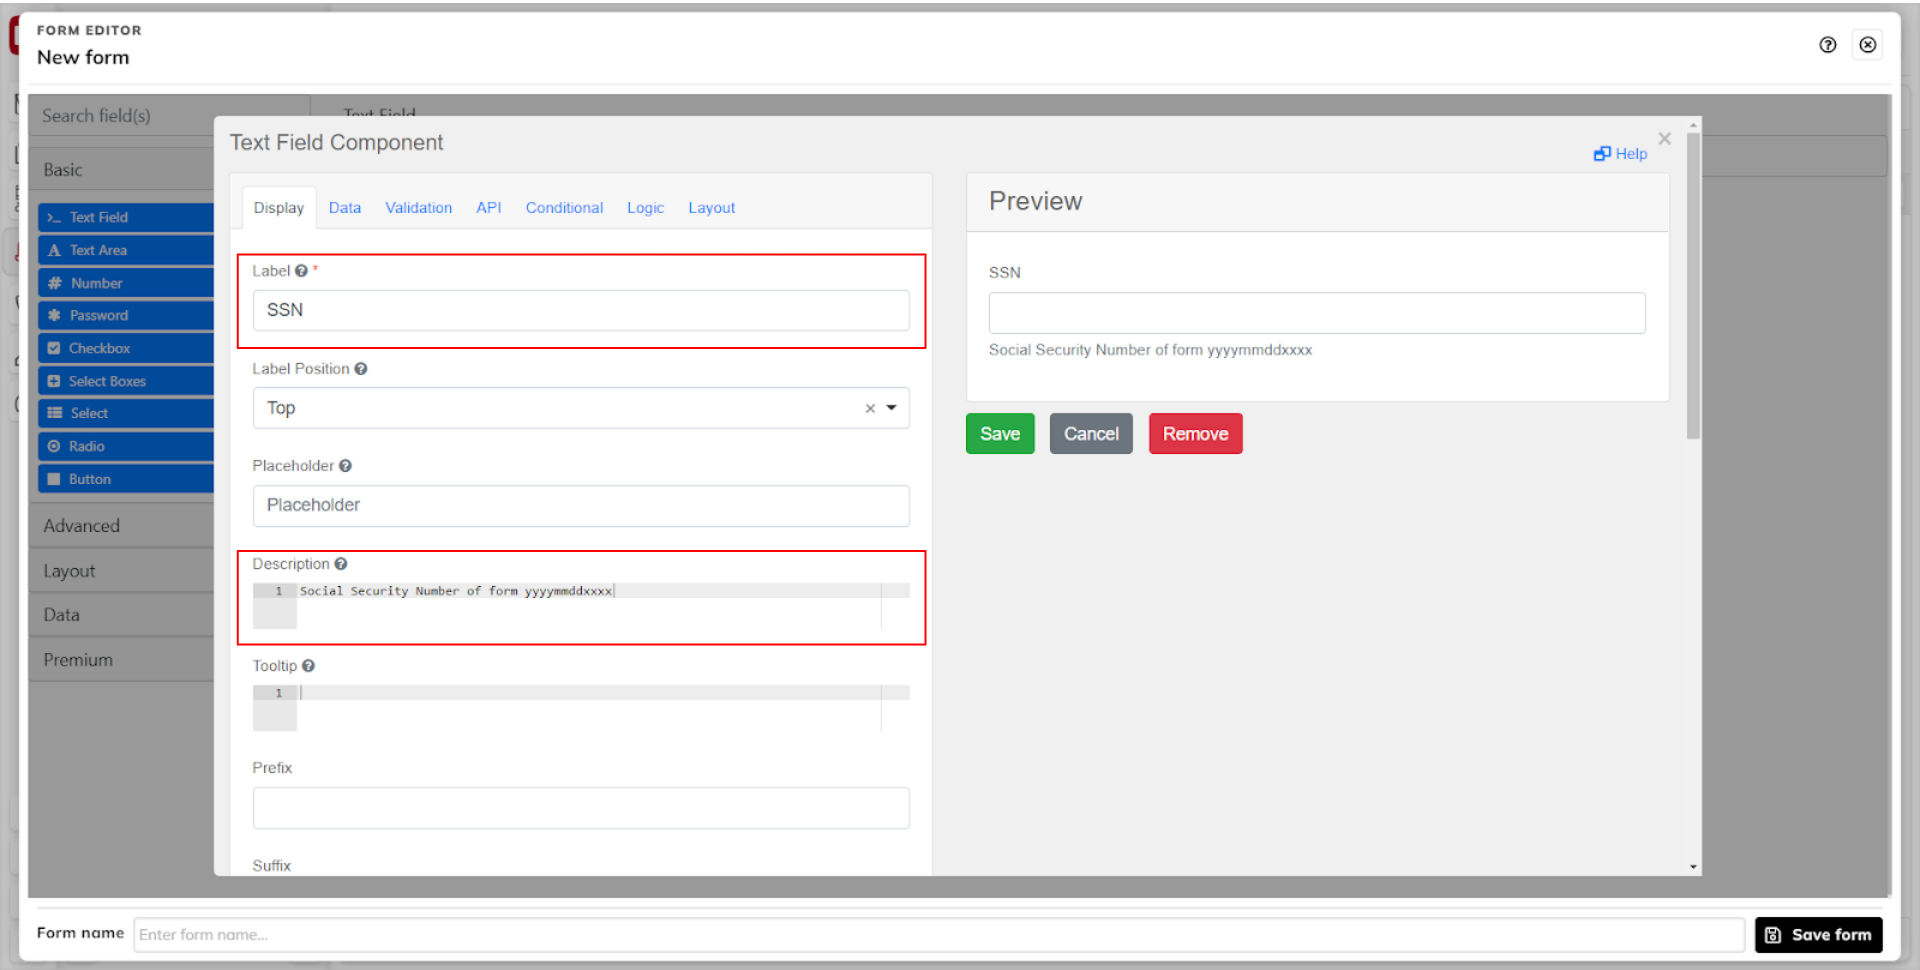
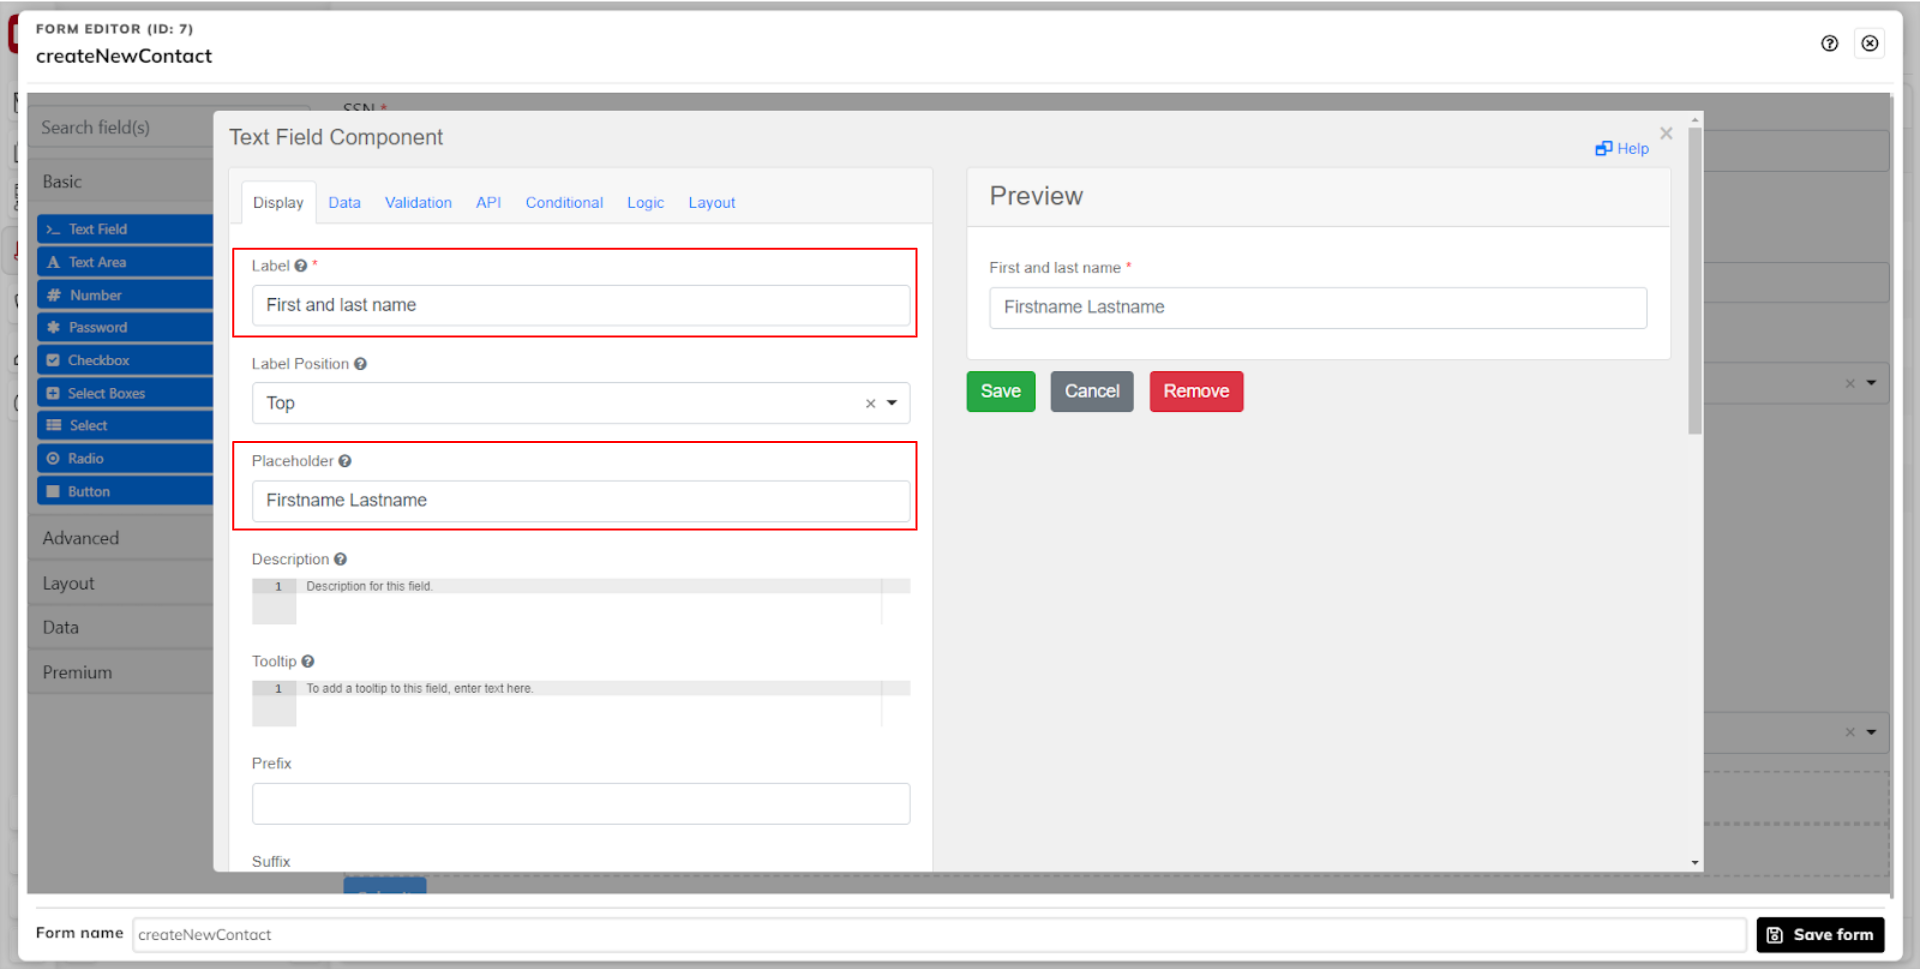
Add a label and description to it. You can preview the text field component in the form in real-time in the Preview section on the right.
 |
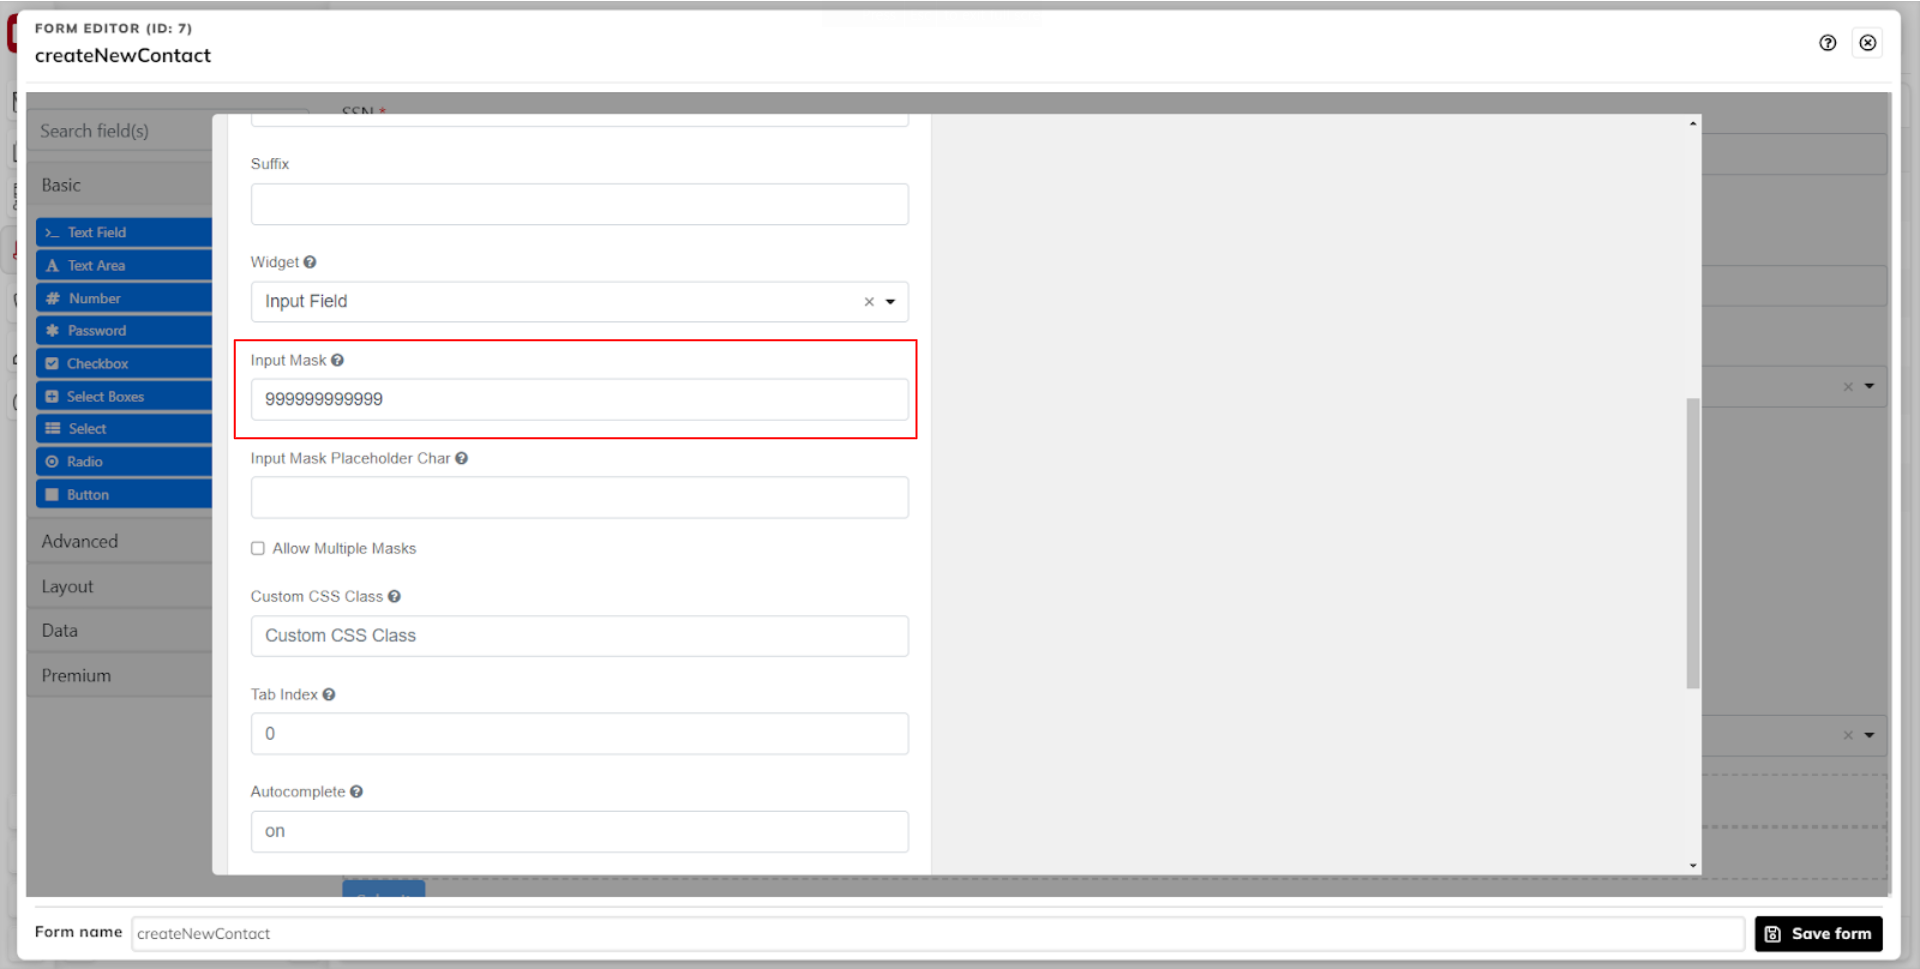
(Optional) add an input mask – a pattern the user input must follow. In this tutorial we define it as 999999999999, which means that the 12 first characters must all be numbers. The intention is to validate Swedish SSN, which can be represented as 12 consecutive numbers, e.g. 198501014421. You are free to add your own input mask to check for some other SSN format, or simply skip it.
 |
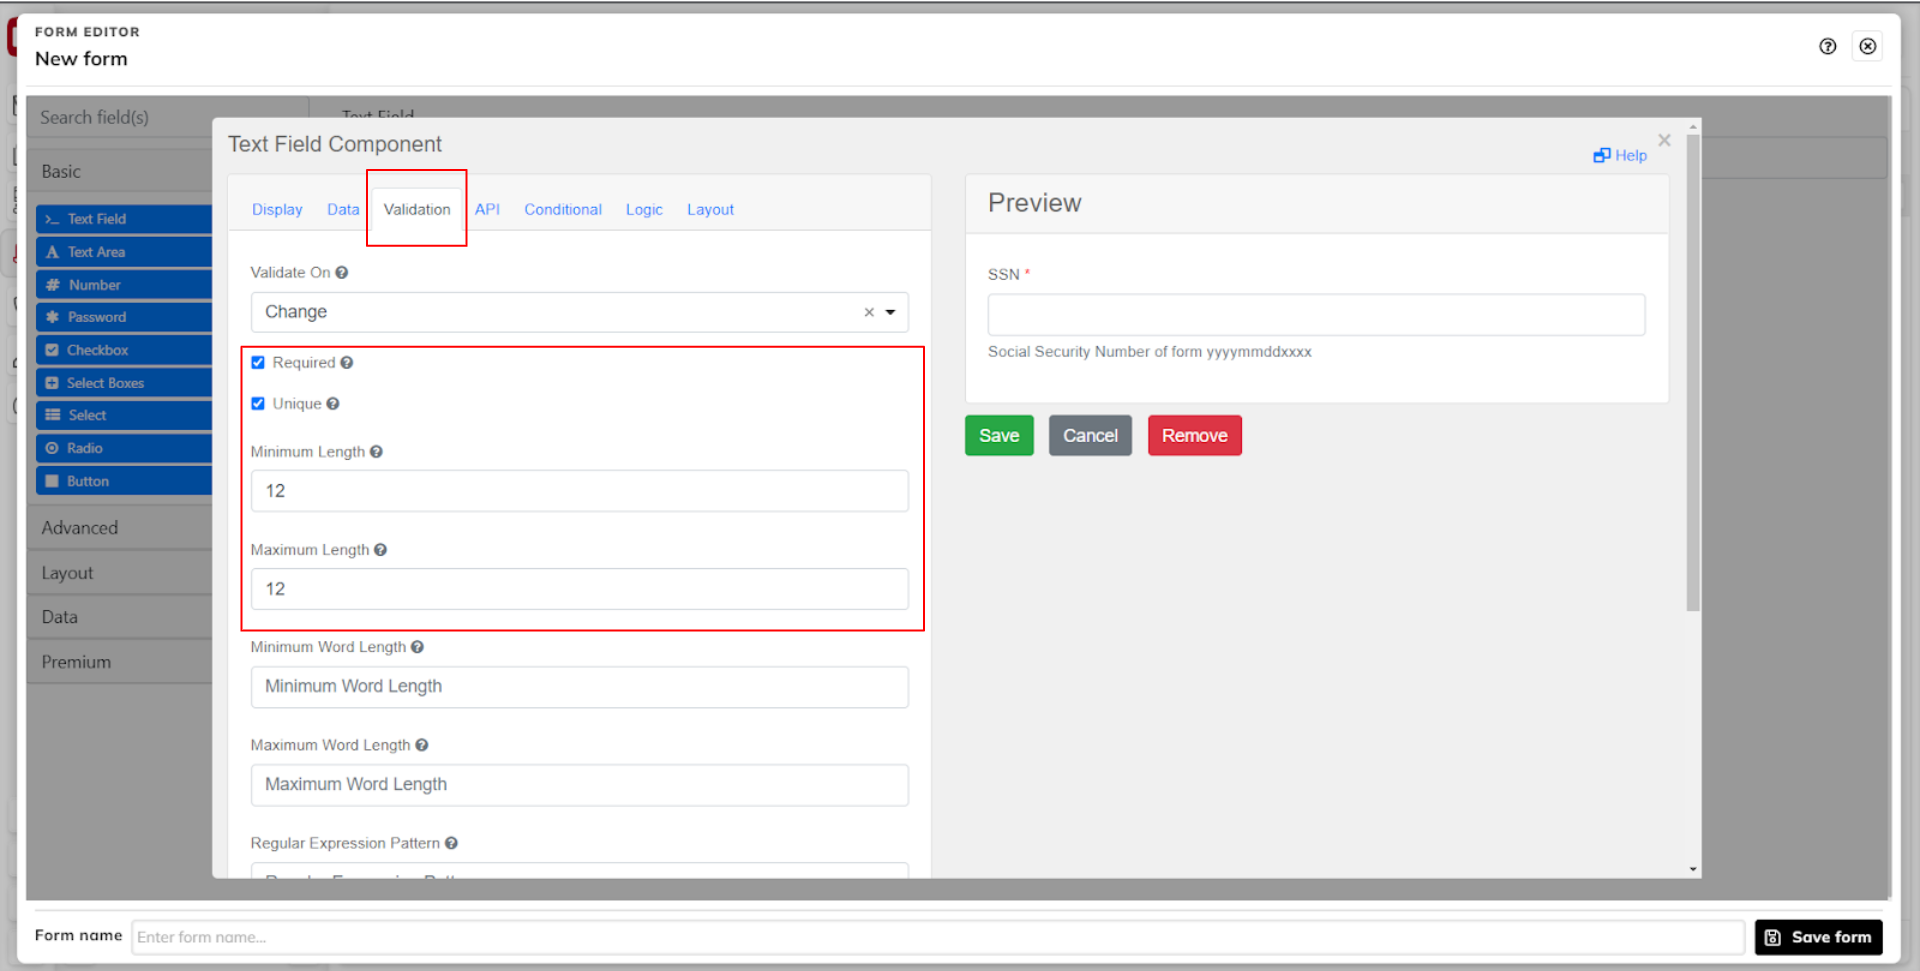
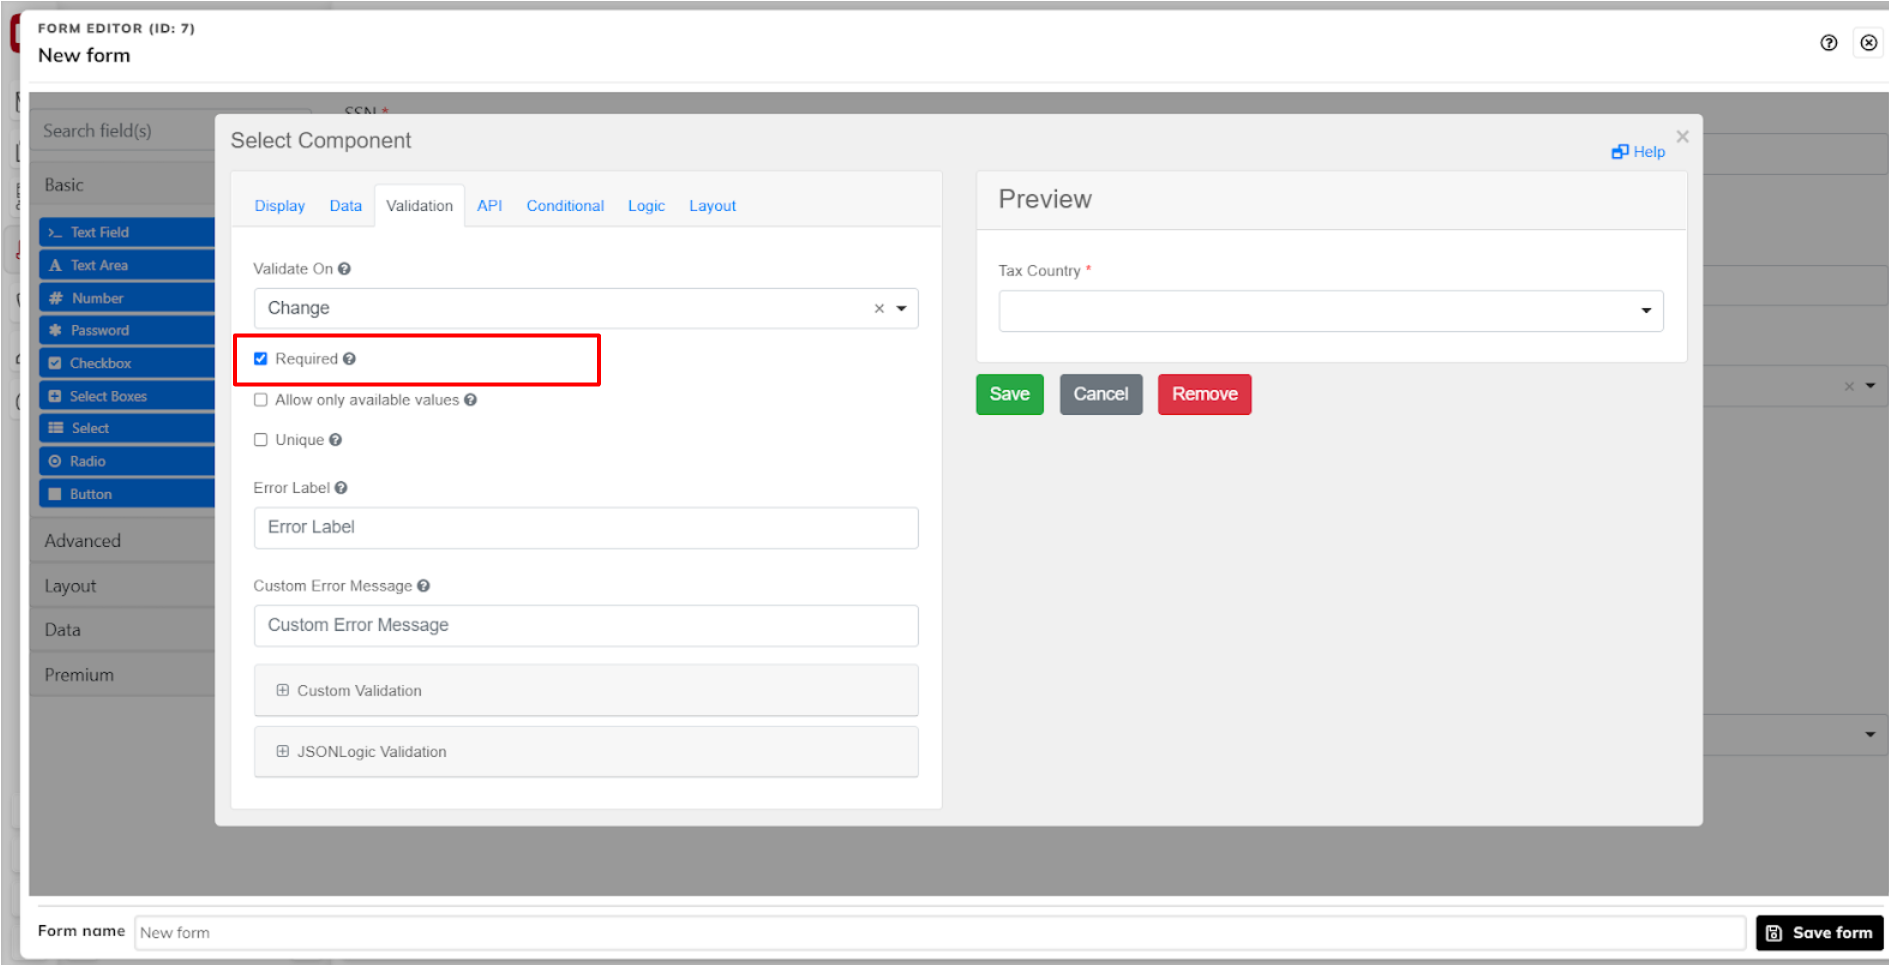
Go to the Validation tab and mark this component as a required field by checking the Required checkbox. If Required is checked, the form can't be submitted without a value in this field.
(Optional) define a maximum and minimum length of the SSN. This example allows the user to input an SSN which is exactly 12 characters long.
 |
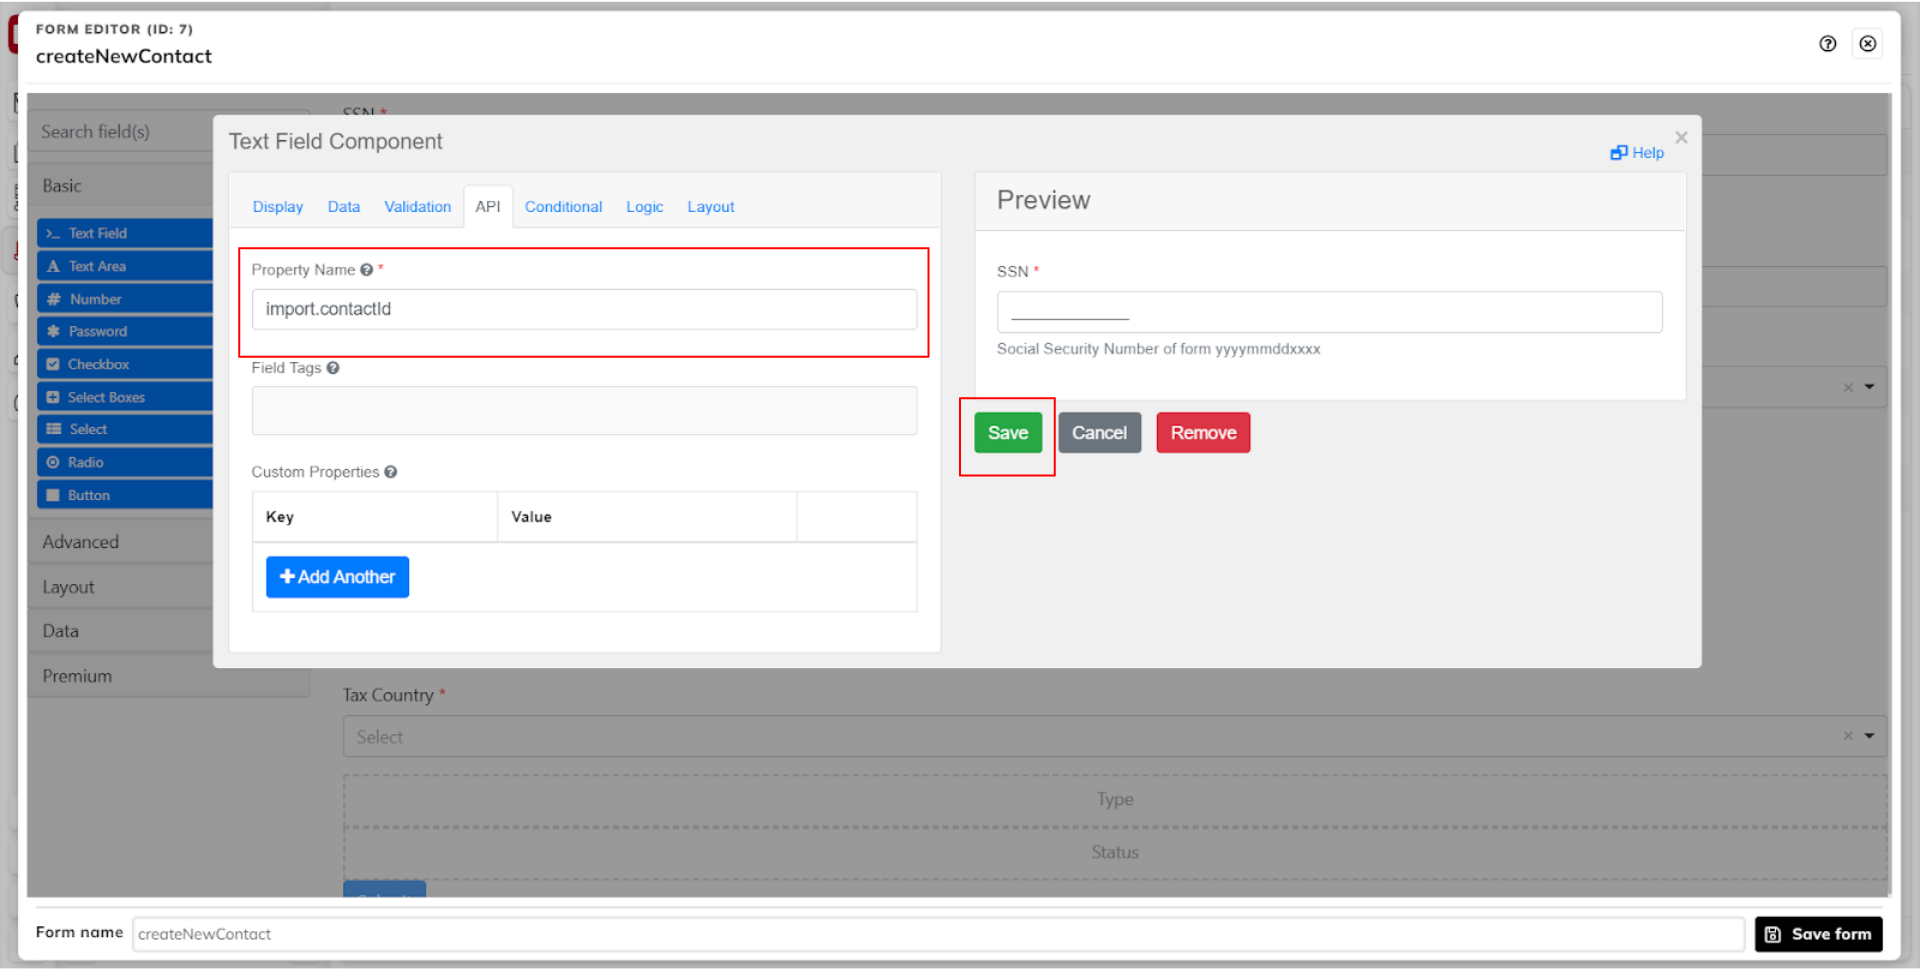
Go to the API tab and input the import key for this field:
import.c_contactId
This is used by FA to import the input value of this component to the new contact's Contact ID field.
Enter a name for the form at the bottom of the screen (if not there already), and click Save form, to save your progress.
 |
You created the first input component of the form. This is what your form should look like after completing this step.
 |
Step 1.3 - Create the Name text field component
Drag a new text field component to the form area.
Add a label and a placeholder in the component.
Make it a required field by checking the Required checkbox.
 |
(Optional) add validation to check that the name is at least 2 words.
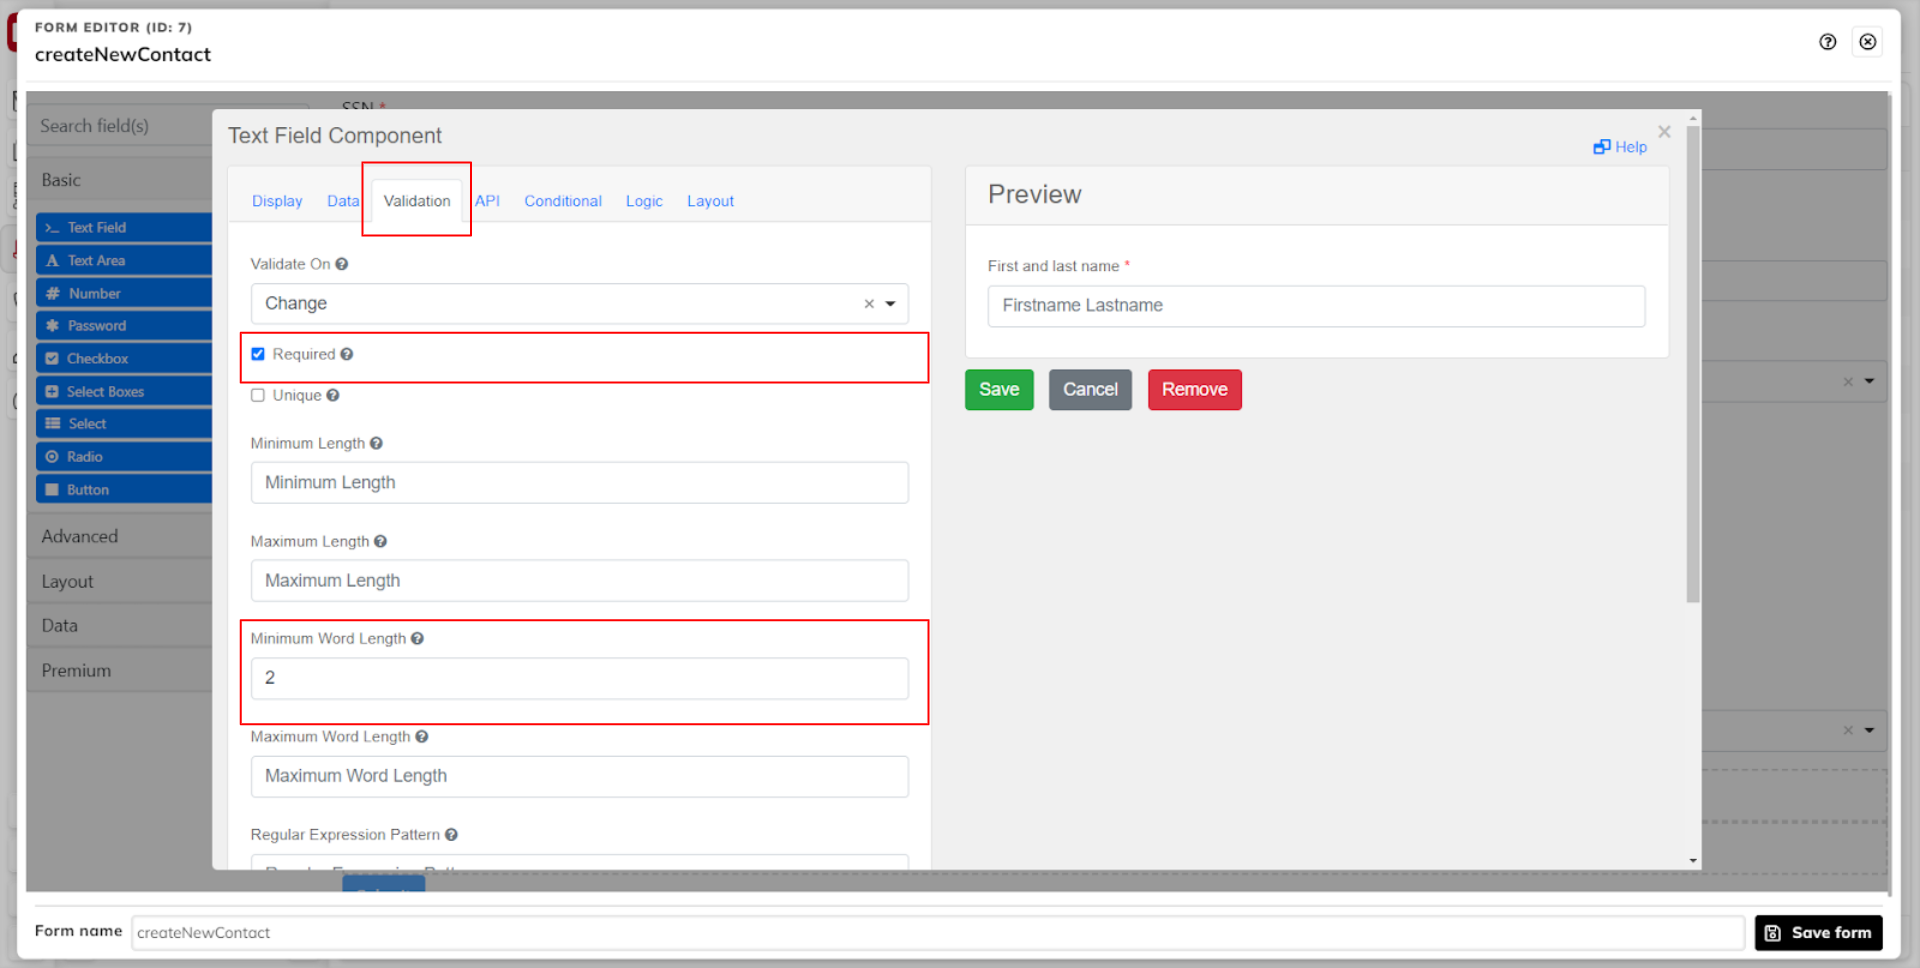 |
Add the import key for the contact name.
import.c_name
Save the component.
 |
This is what your form should look like after completing this step.
 |
Step 1.4 - Create the Juridical select component
Drag a select component to the form area. Add a label and a placeholder.
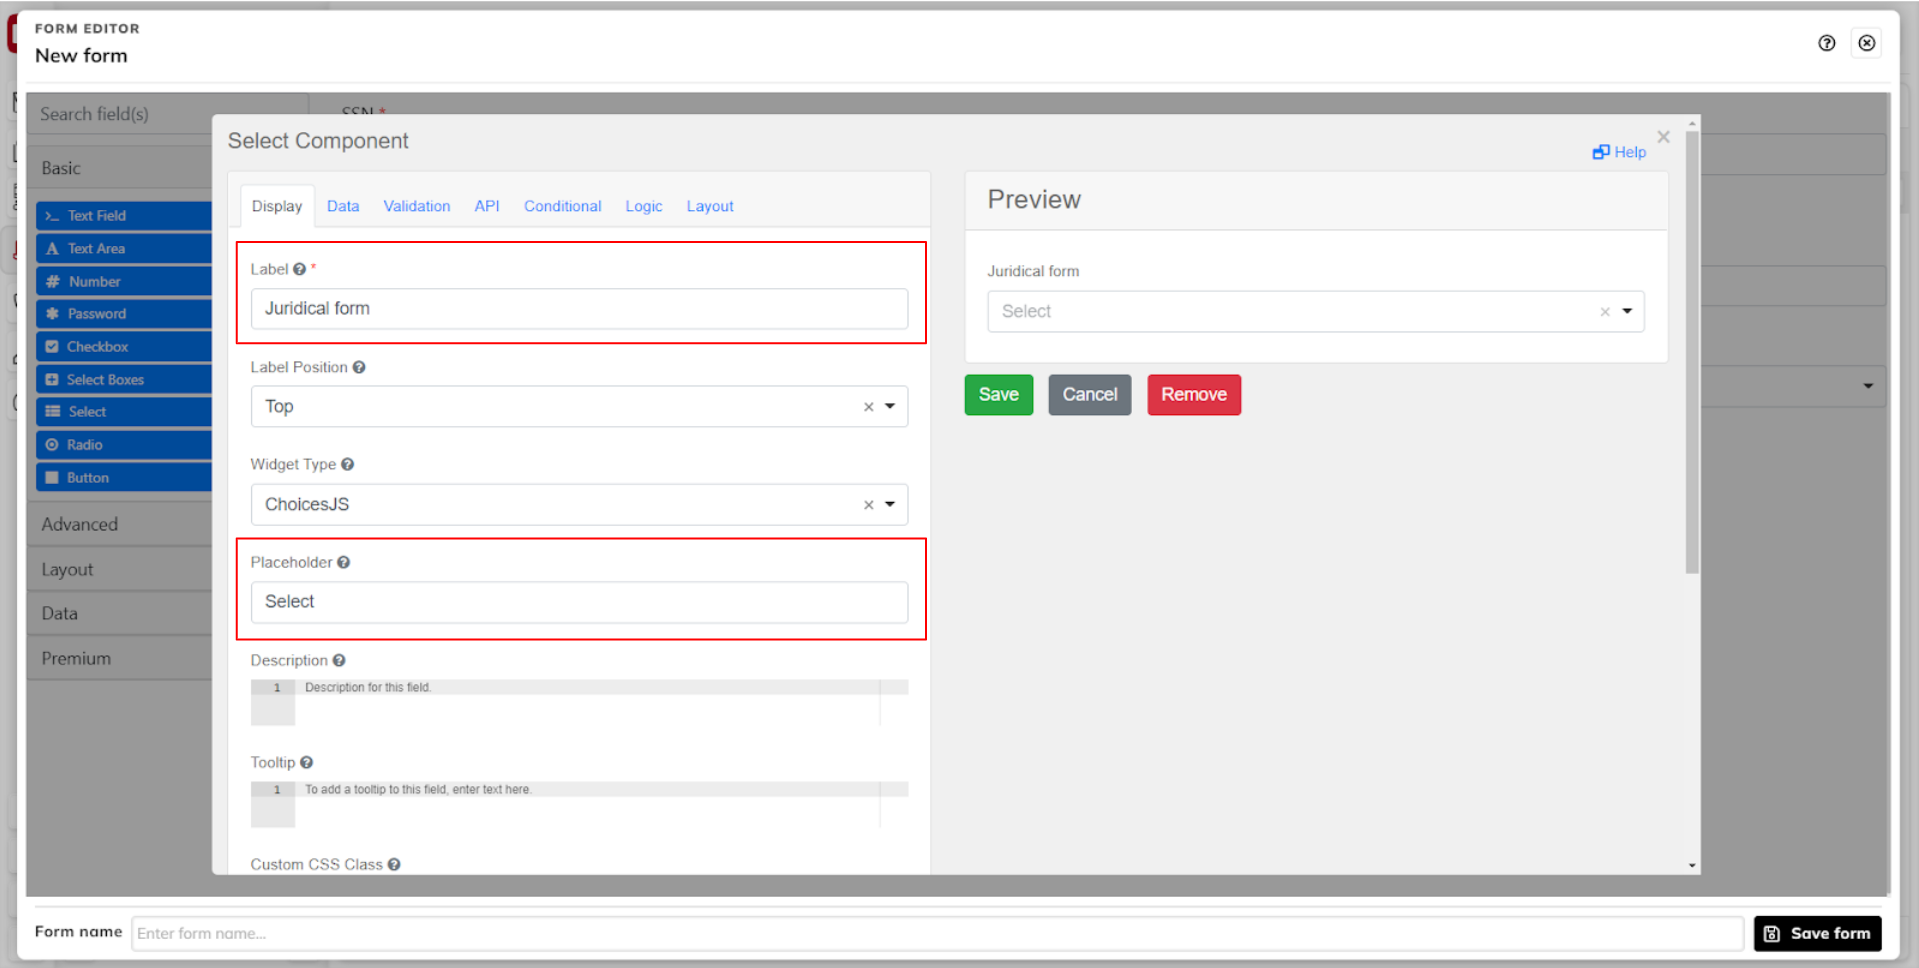 |
Go to the Data tab and add data source values by clicking + Add Another. This example adds some of the FA standard Juridical definitions for a contact.
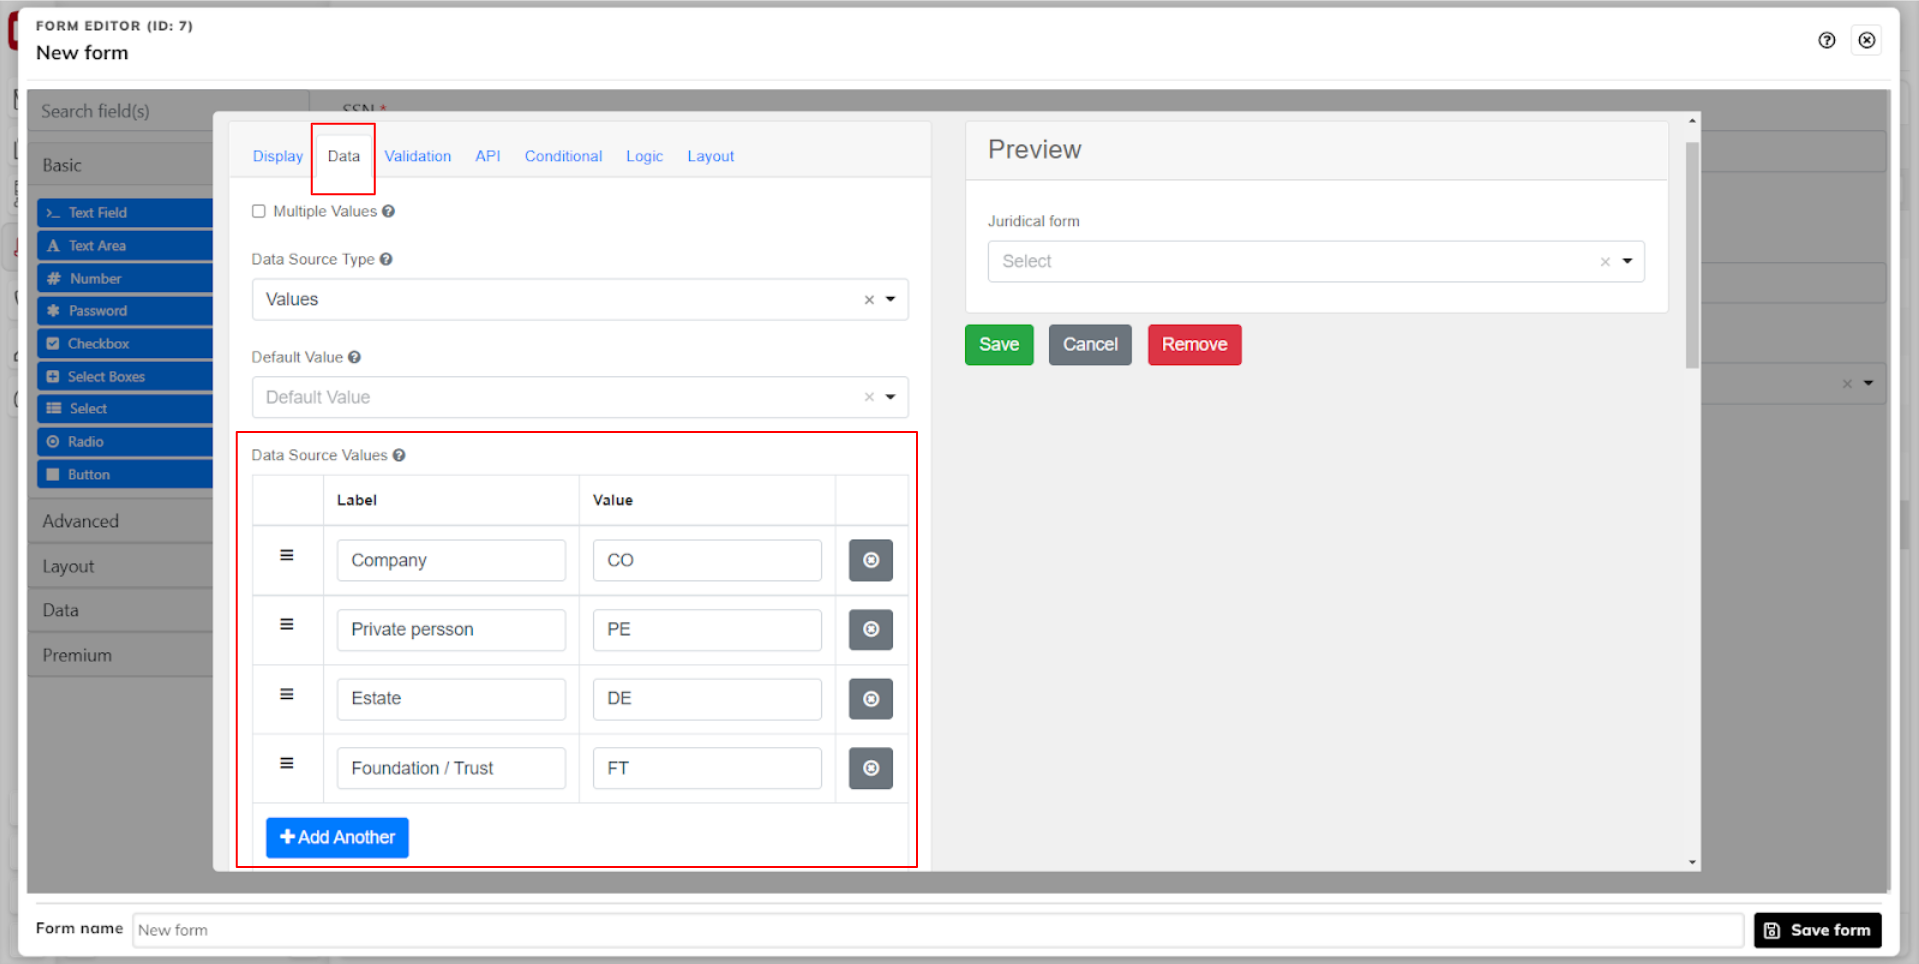 |
Make it a required field by checking the Required checkbox.
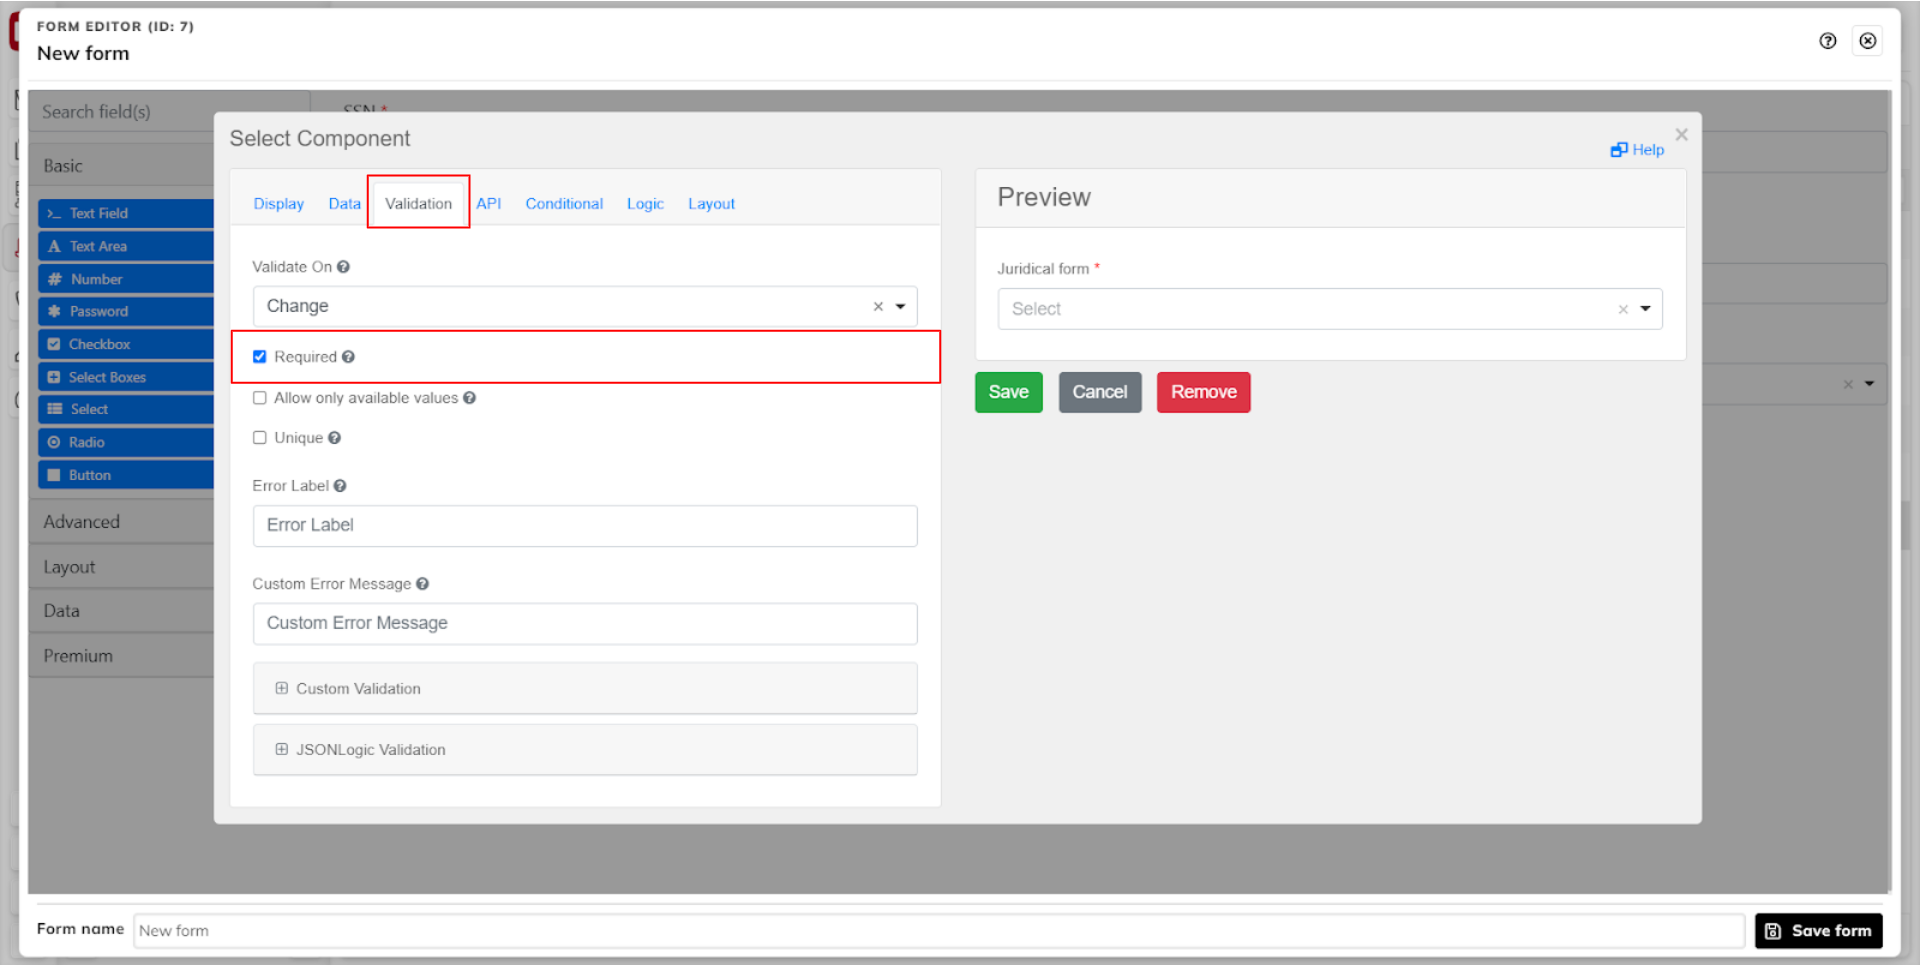 |
Add the import key for the contact juridical definition.
import.c_juridical
Save the component.
 |
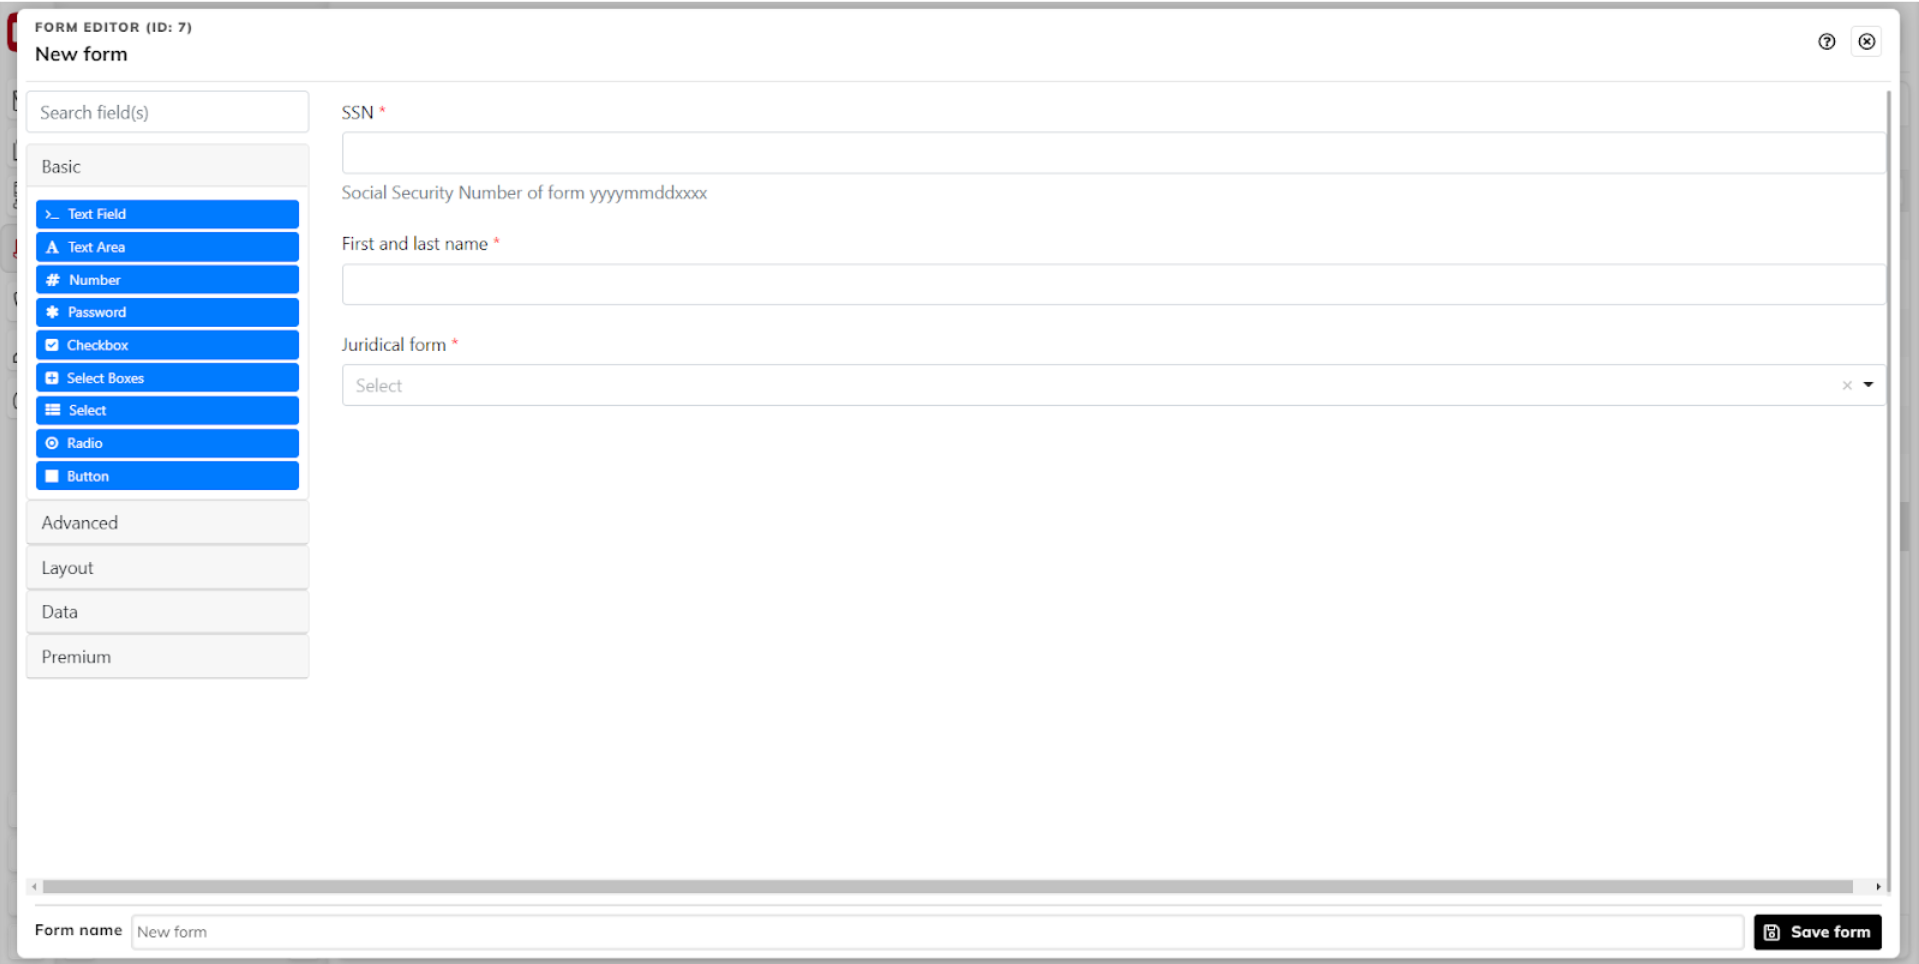
This is what your form should look like after completing this step.
 |
Step 1.5 - Create the Classification radio component
Drag a radio component to the form area. Add a label.
 |
Go to the Data tab and add data source values by clicking +Add Another. This example adds some of the FA standard classification definitions for a contact.
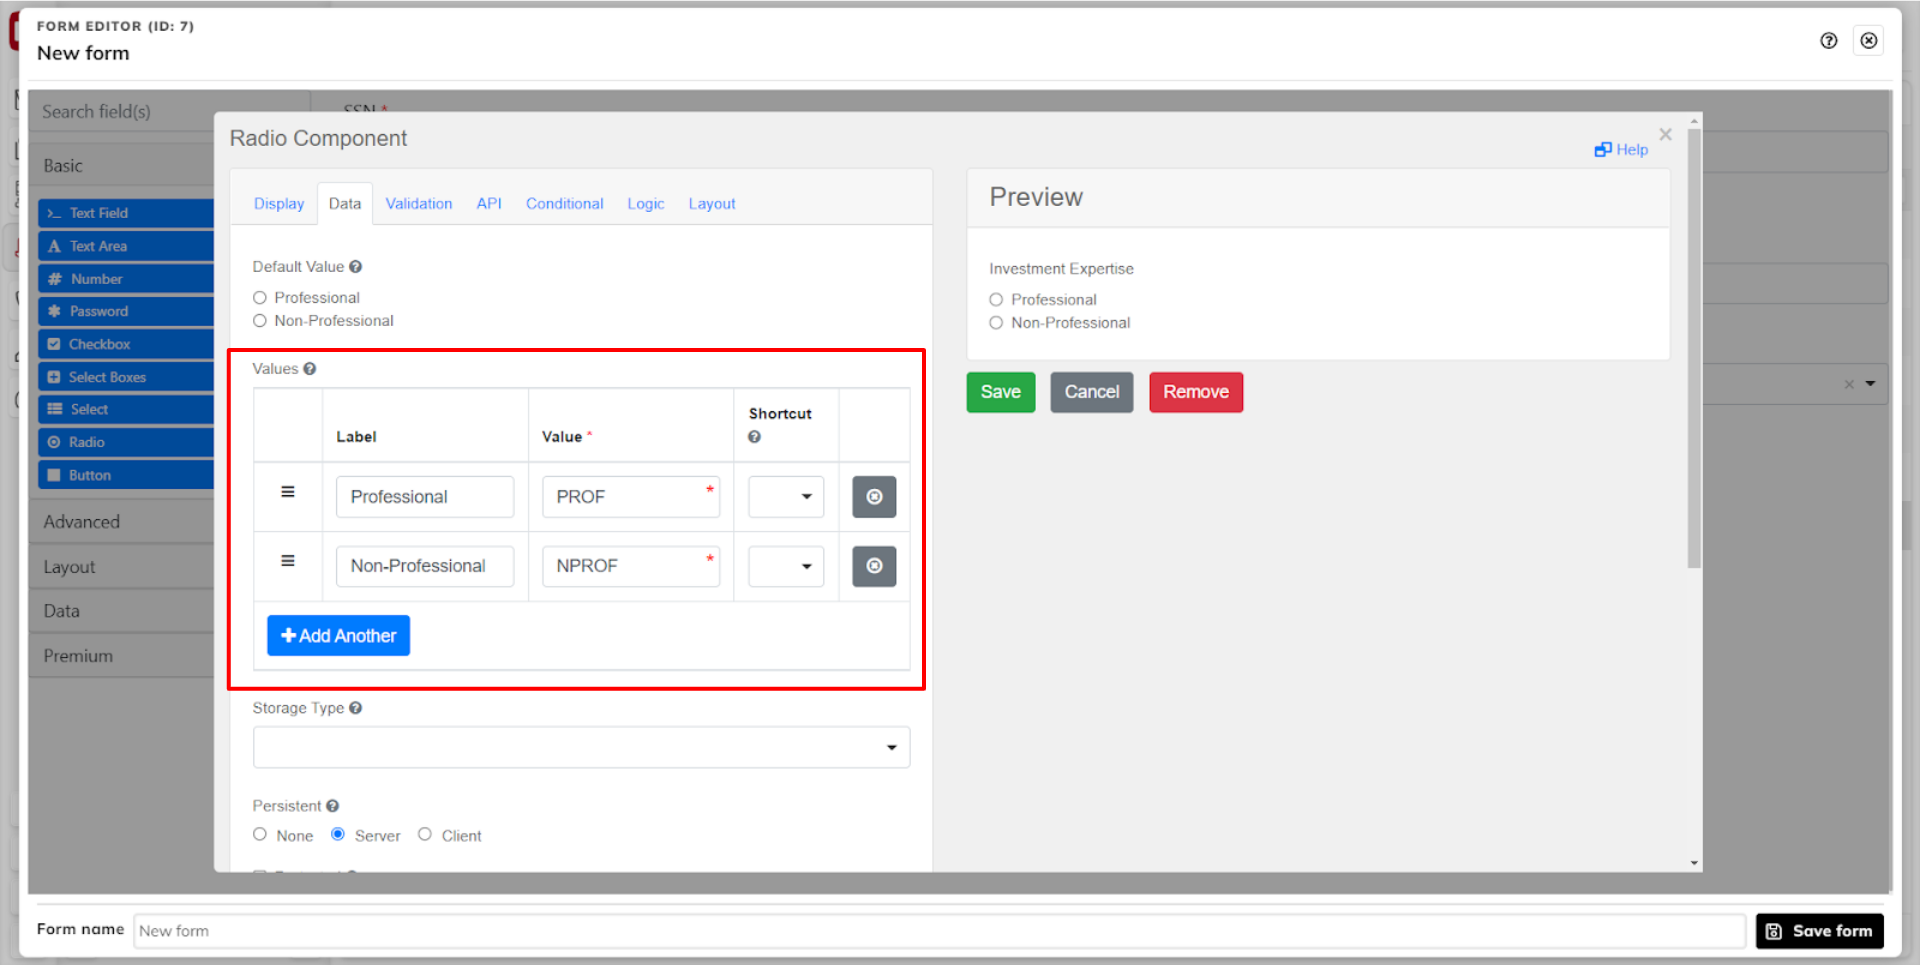 |
Make it a required field by checking the Required checkbox.
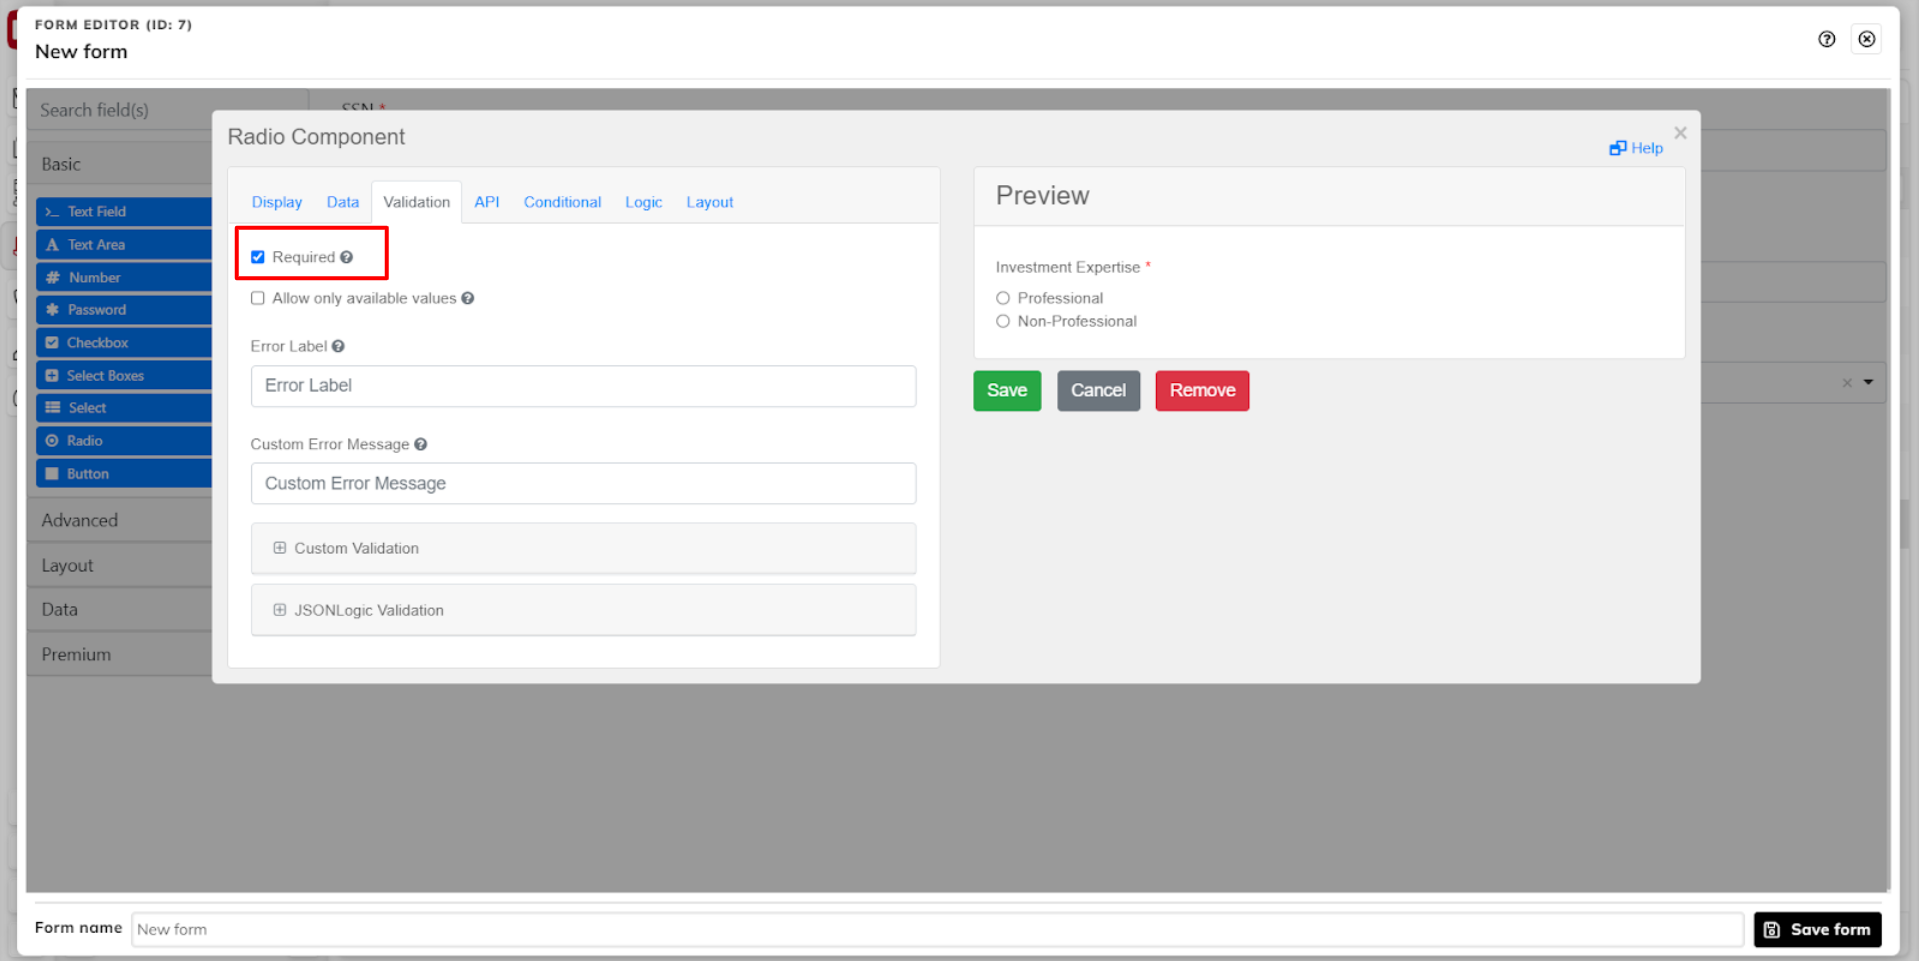 |
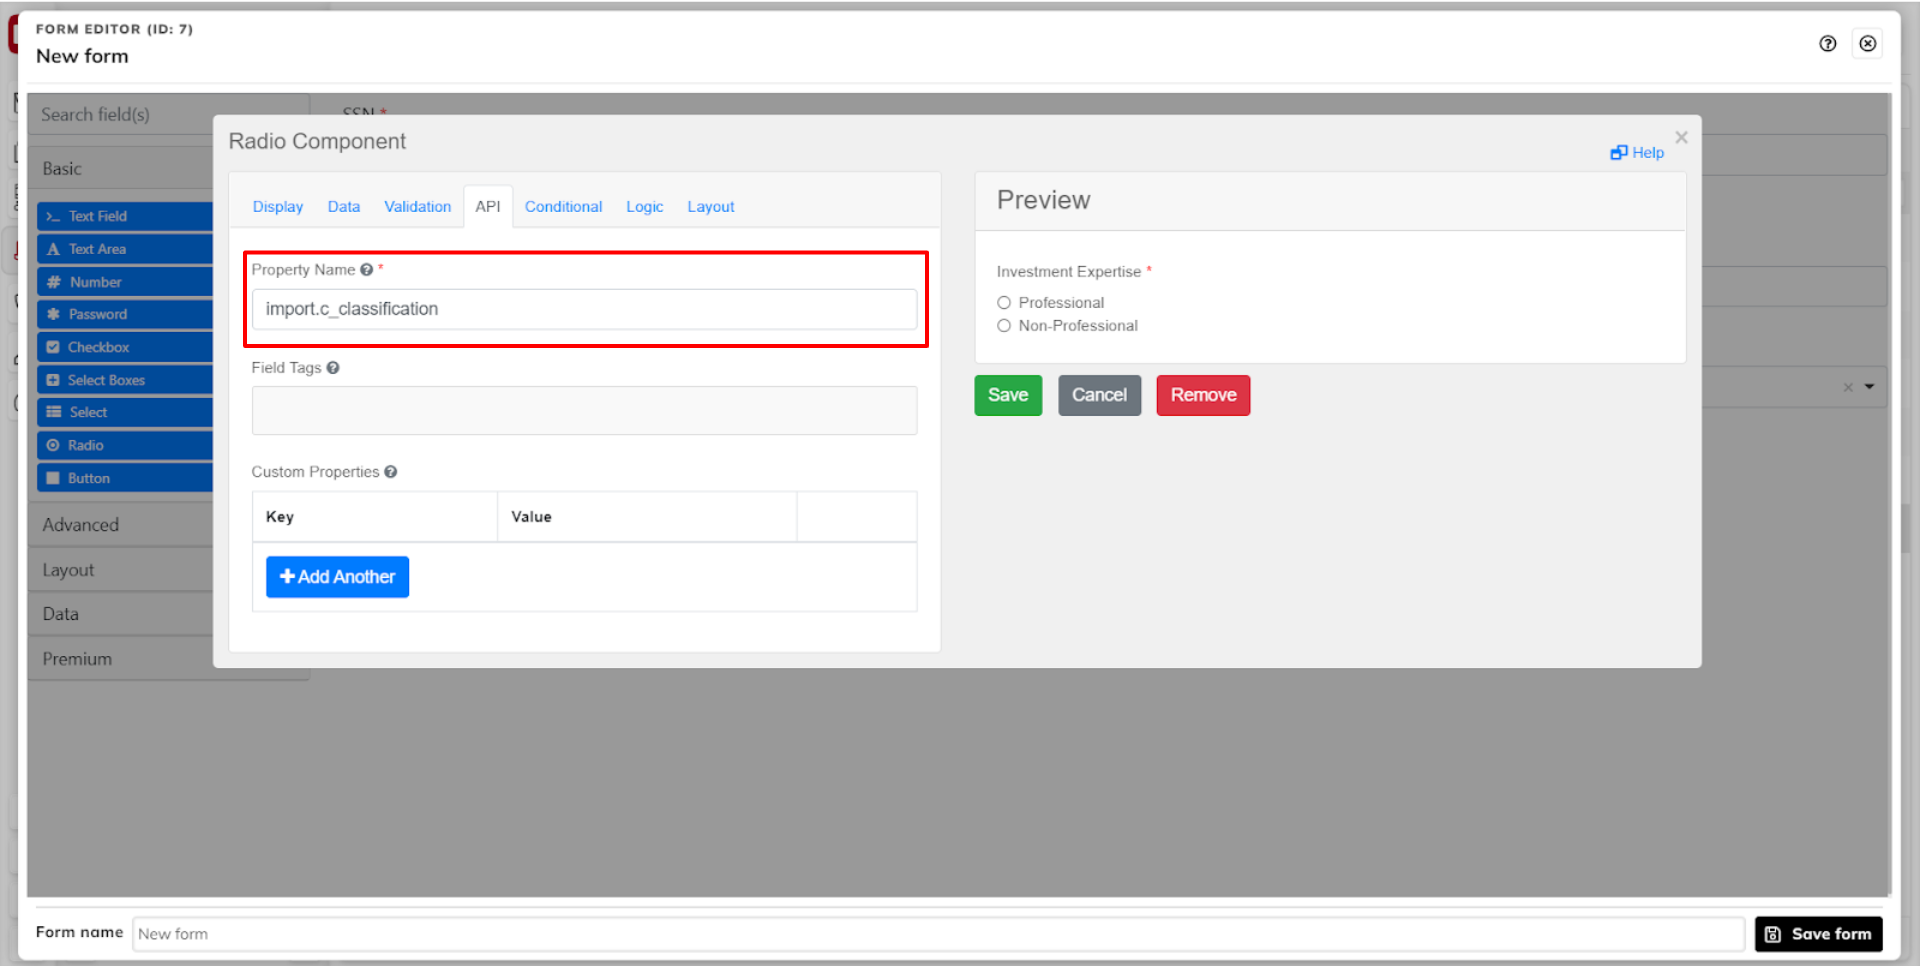
Add the import key for the contact classification.
import.c_classification
Save the component.
 |
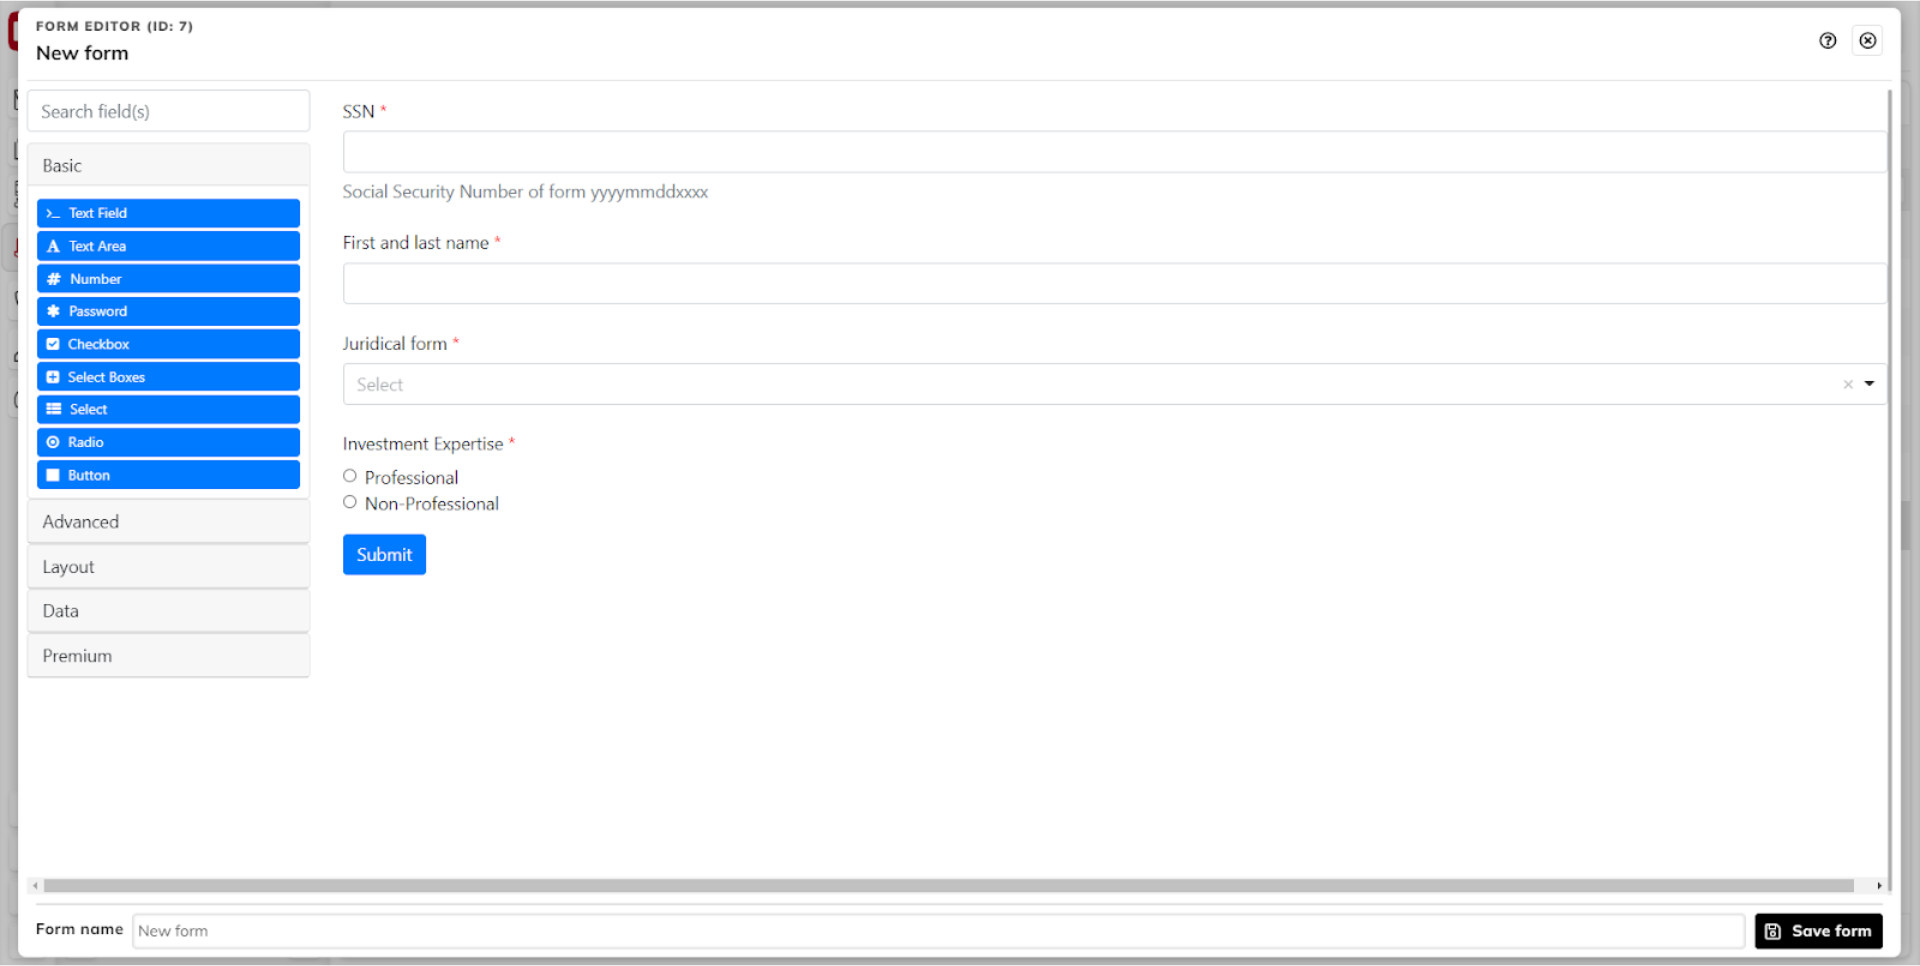
This is what your form should look like after completing this step.
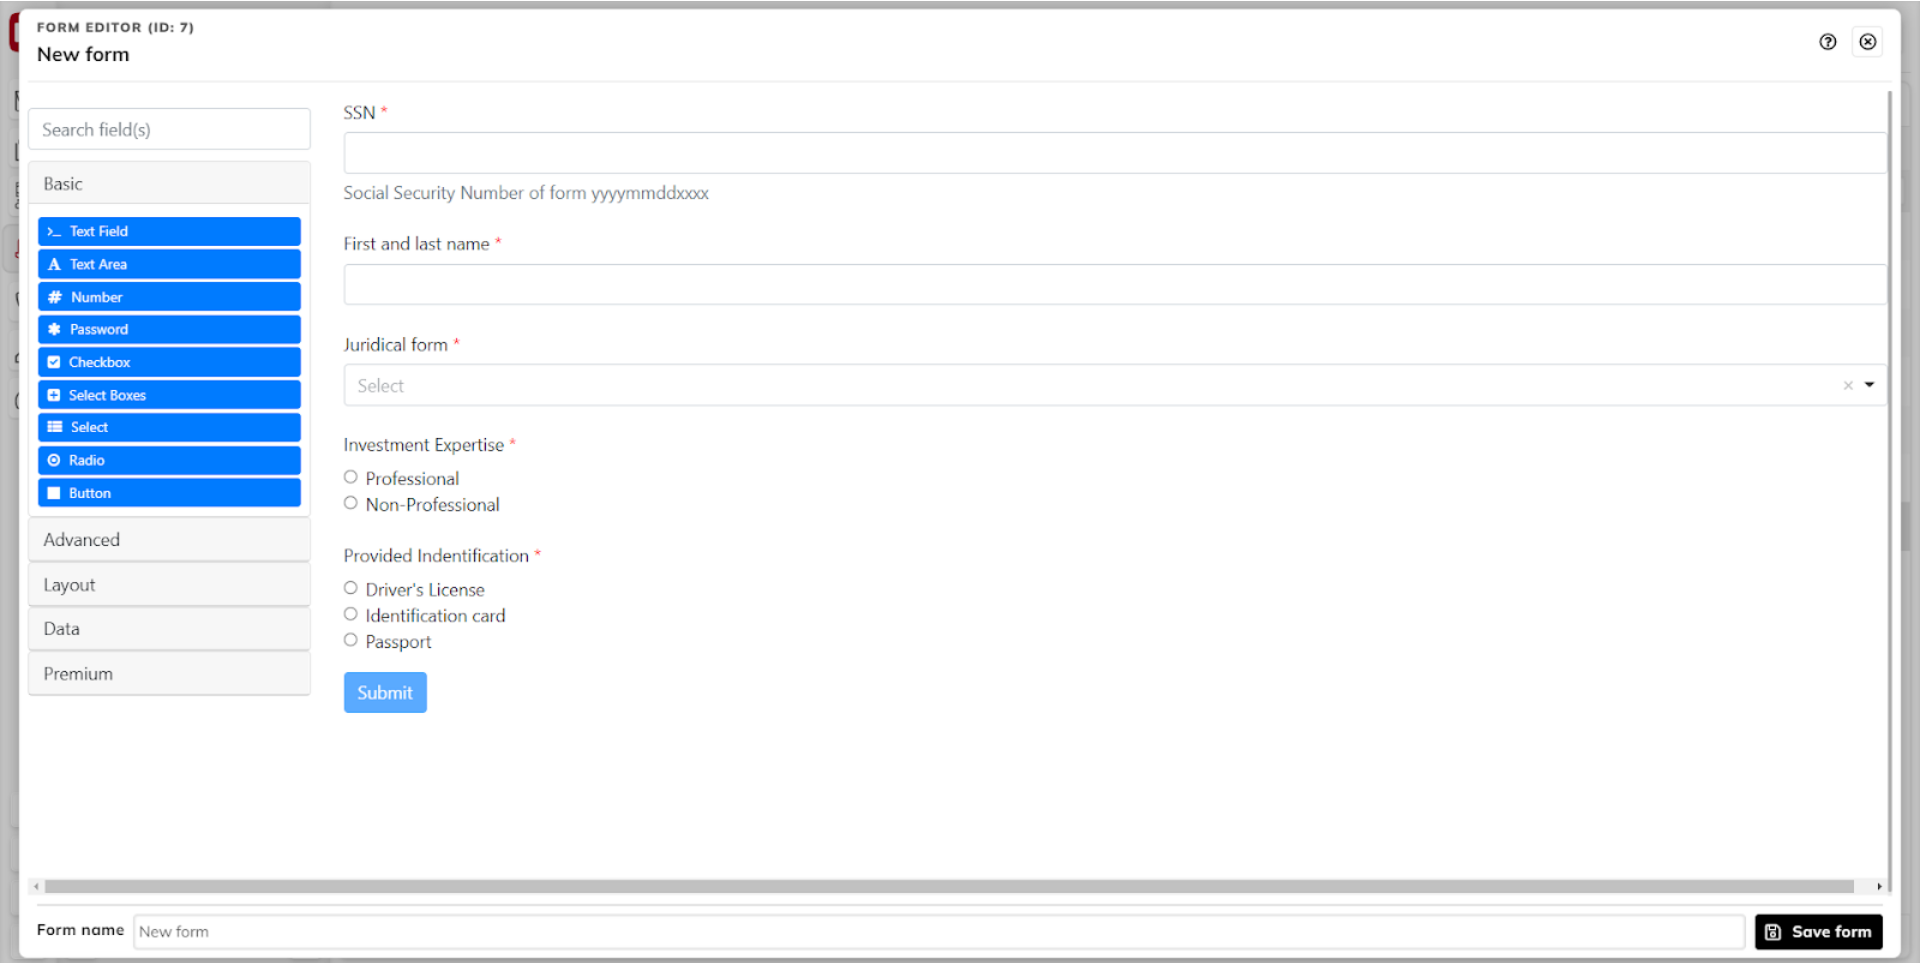 |
Step 1.6 - Create the Identification radio component
Drag a new radio component to the form area. Add a label to it.
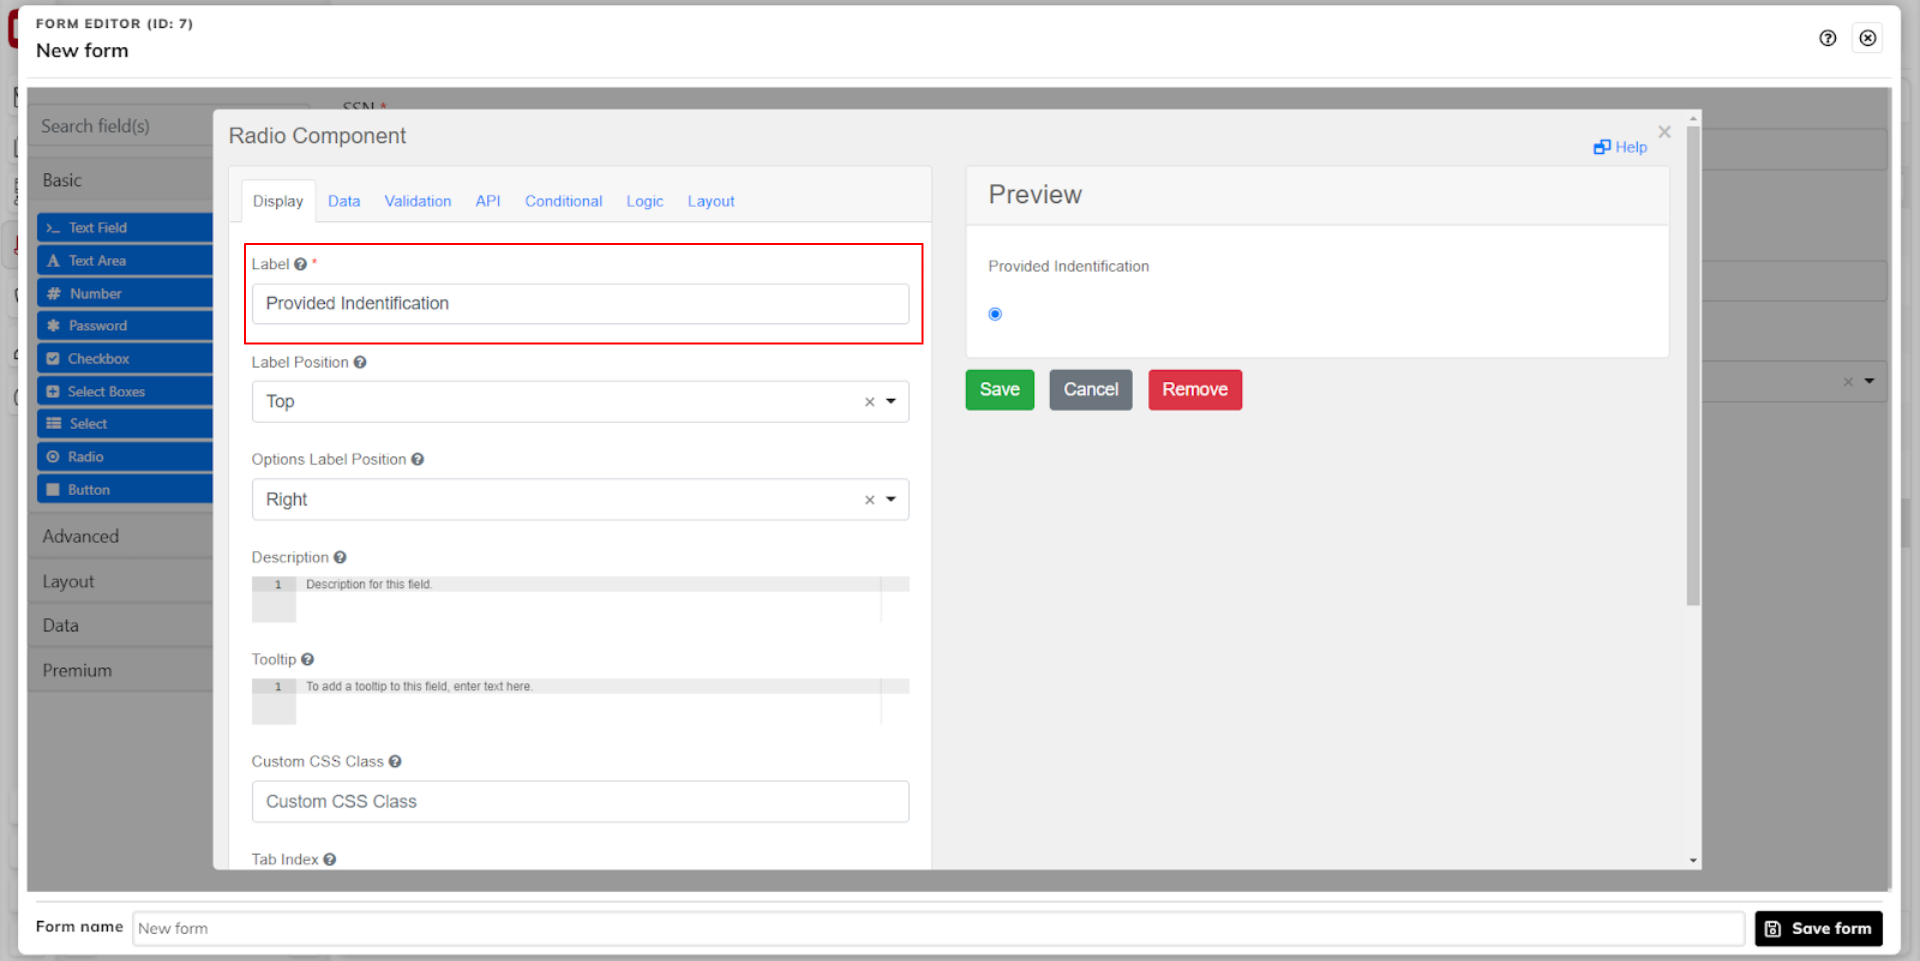 |
Go to the Data tab and add values by clicking +Add Another. This example adds some of the FA standard Tax Country definitions for a contact.
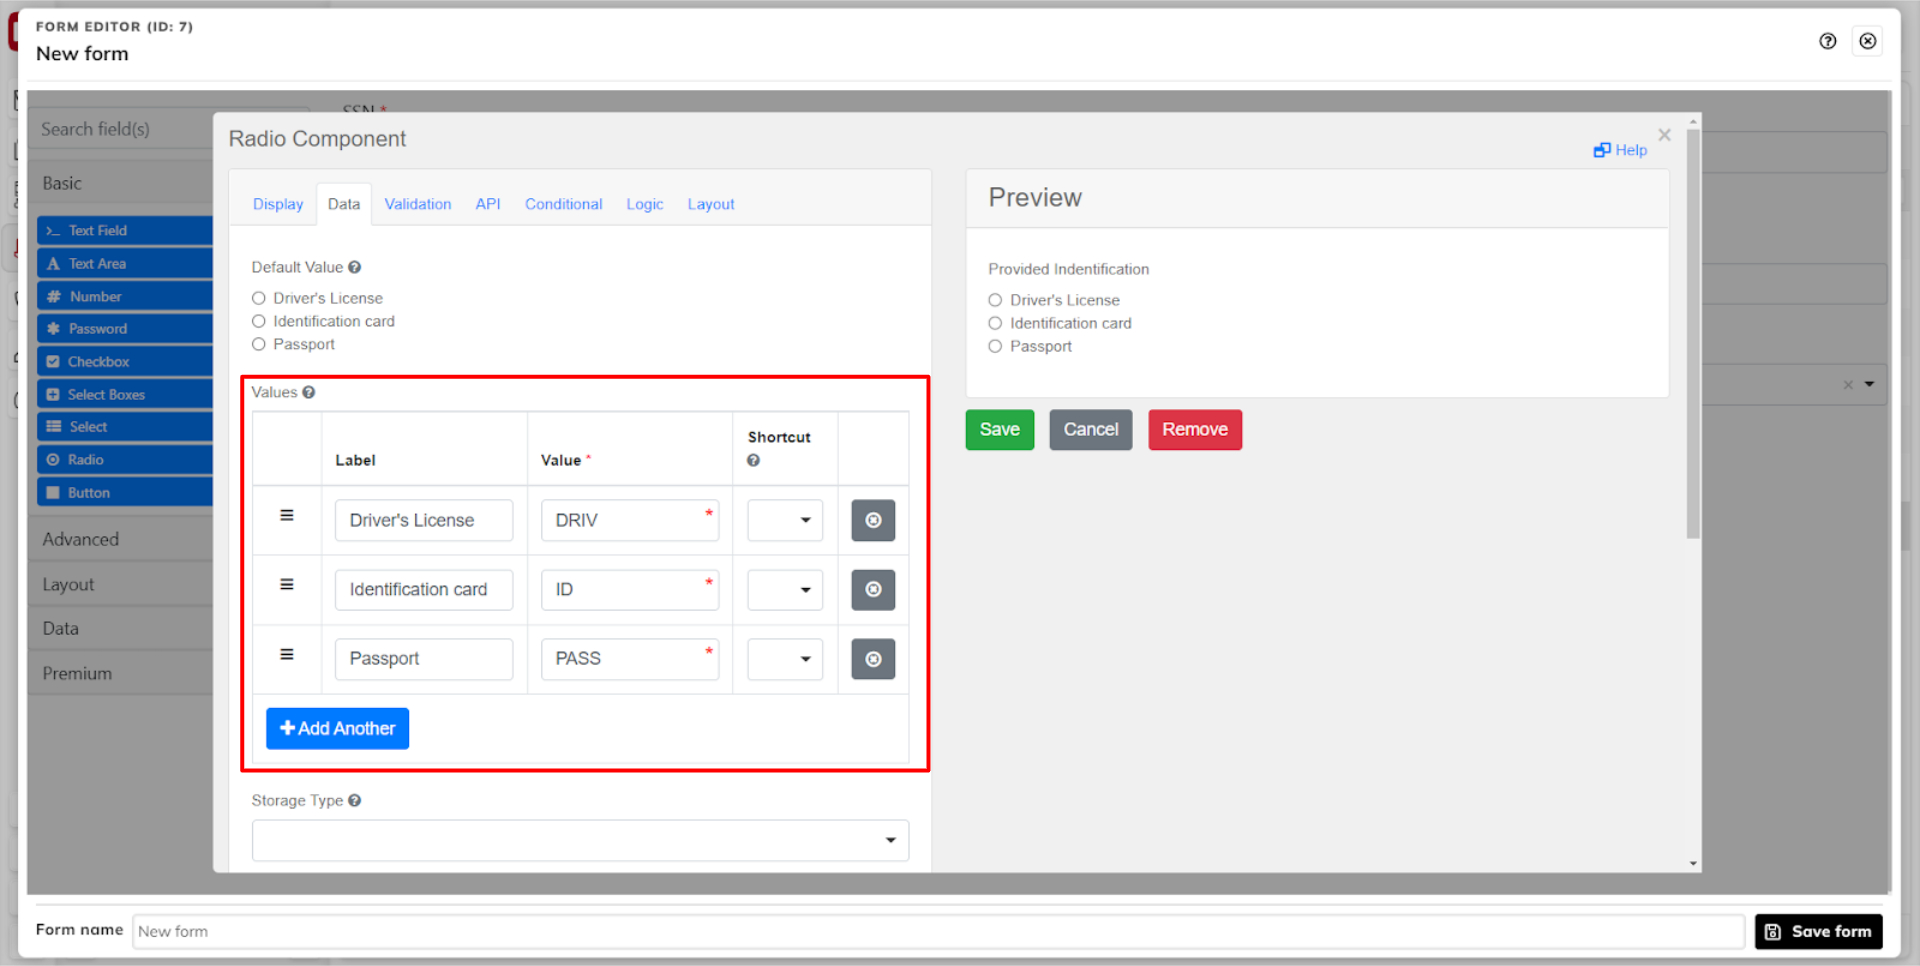 |
Make it a required field by checking the Required checkbox.
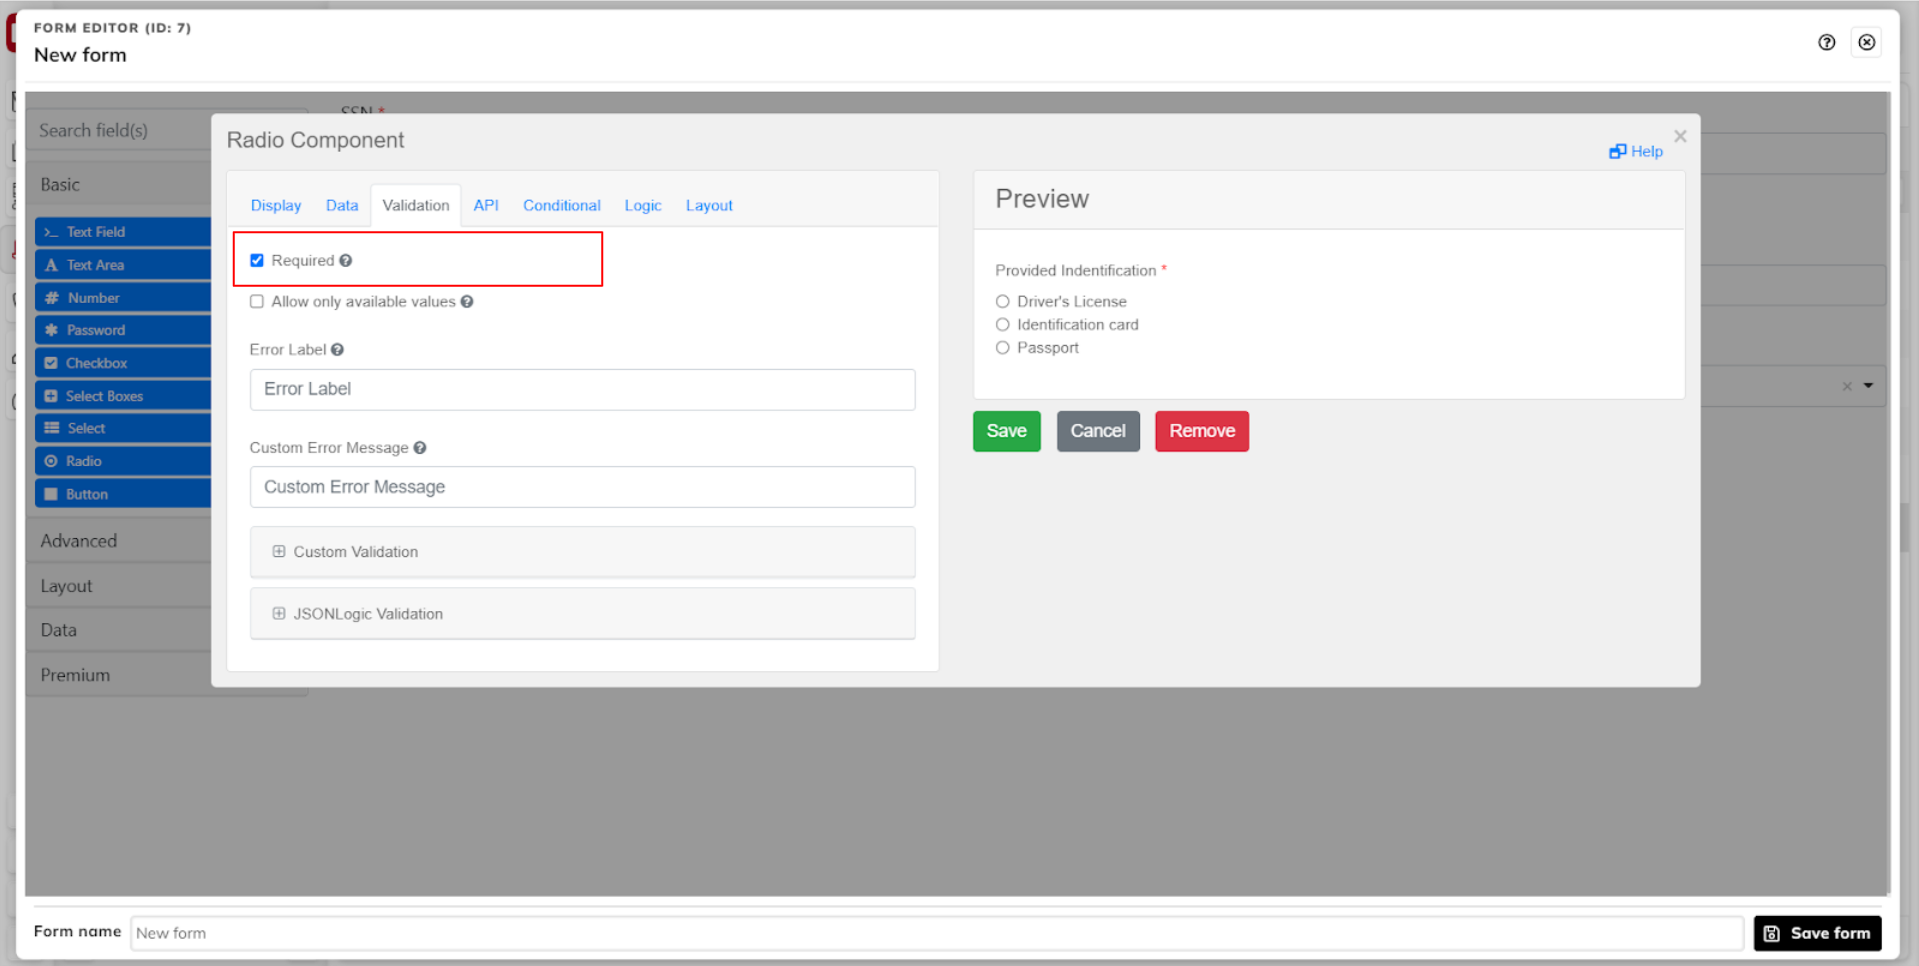 |
Add the import key for the Contact identity. This is used by FA to import the input value of this component to the new contact's Identity field. Save the component.
import.c_identity
This is what your form should like after completing this step.
 |
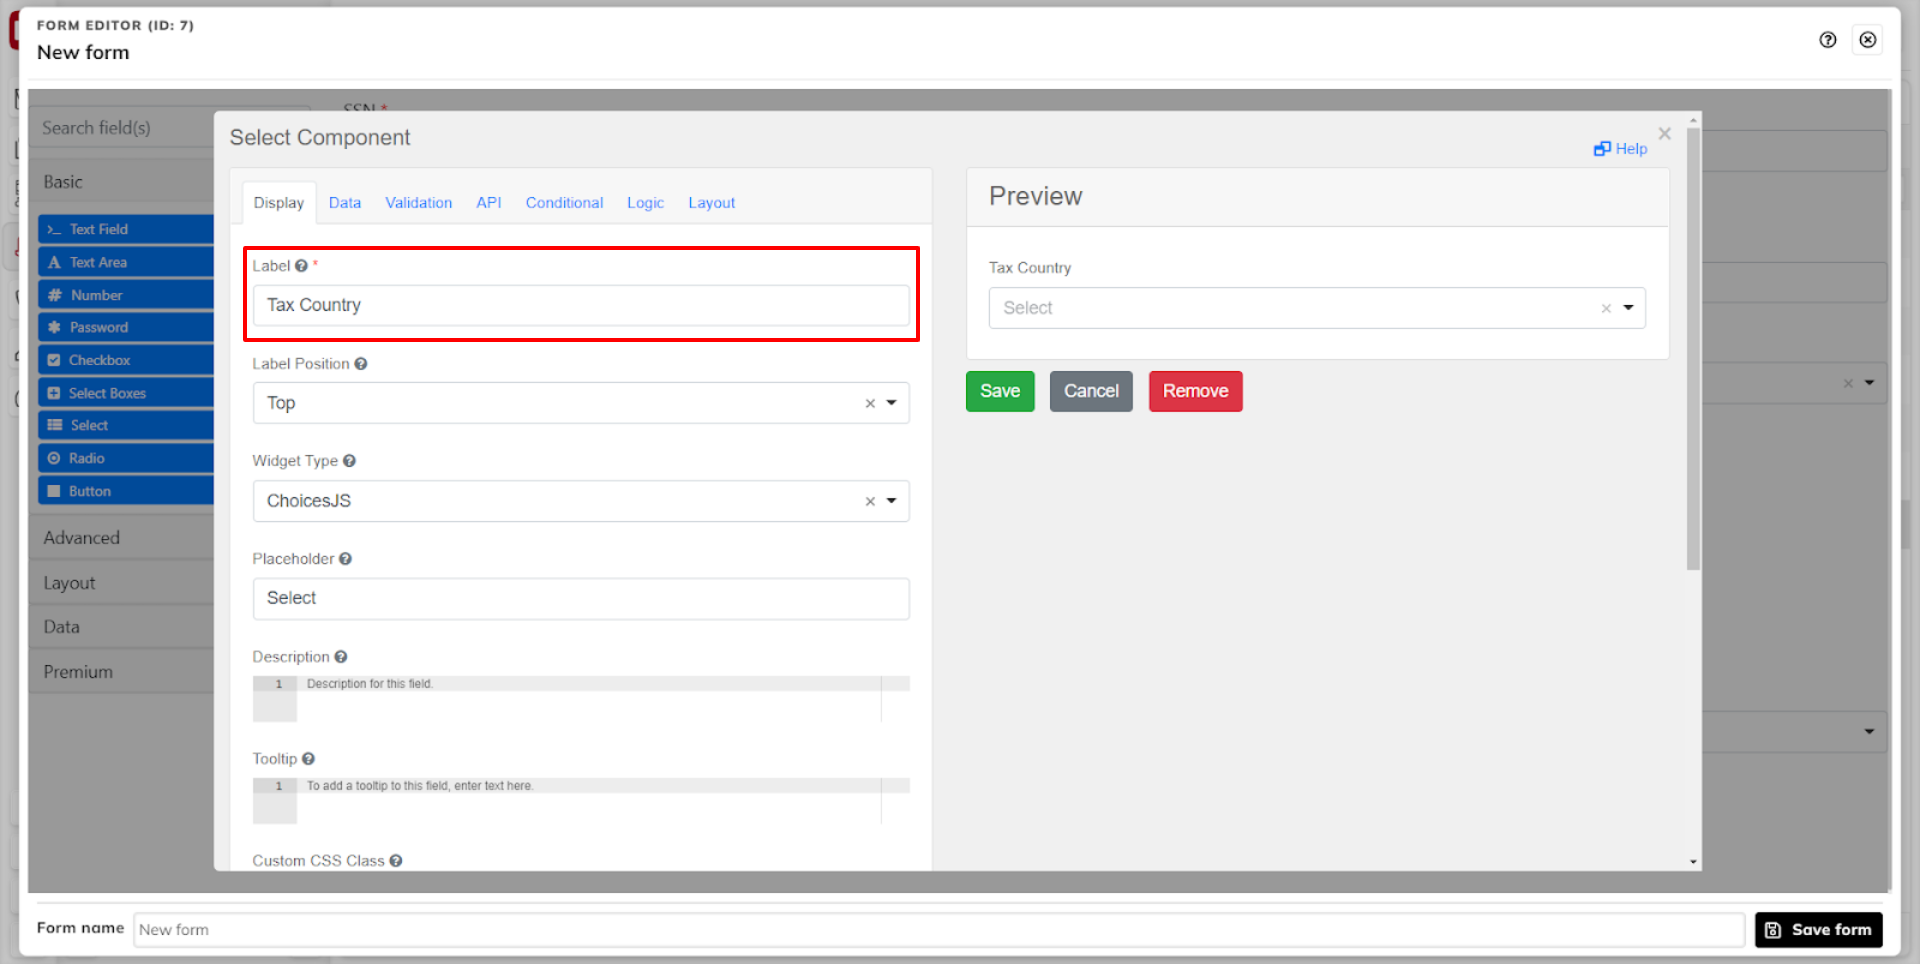
Step 1.7 - Create the Tax Country select component.
Drag a new radio component to the form area. Add a label to it.
 |
Go to the Data tab and add values by clicking +Add Another. This example adds some of the FA standard Tax Country definitions for a contact.
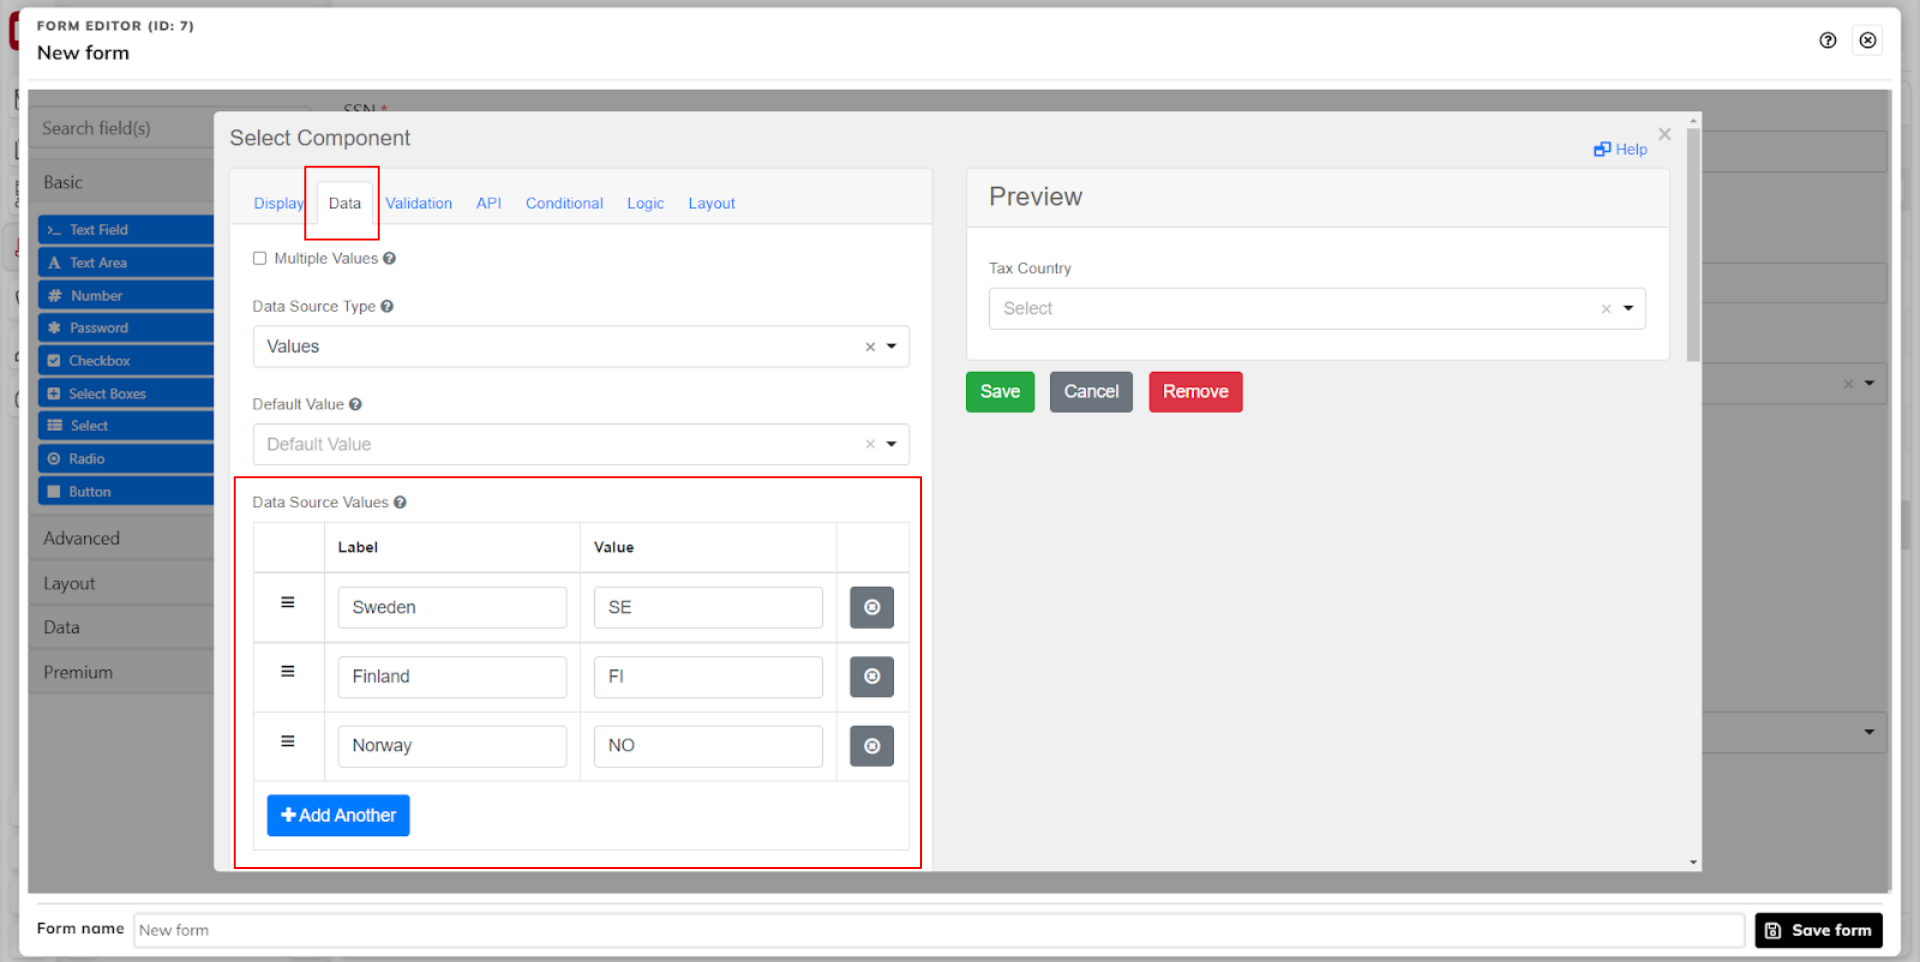 |
Make it a required field by checking the Required checkbox.
 |
Add the import key for the contact's tax country. Save the component.
import.c_taxCountry
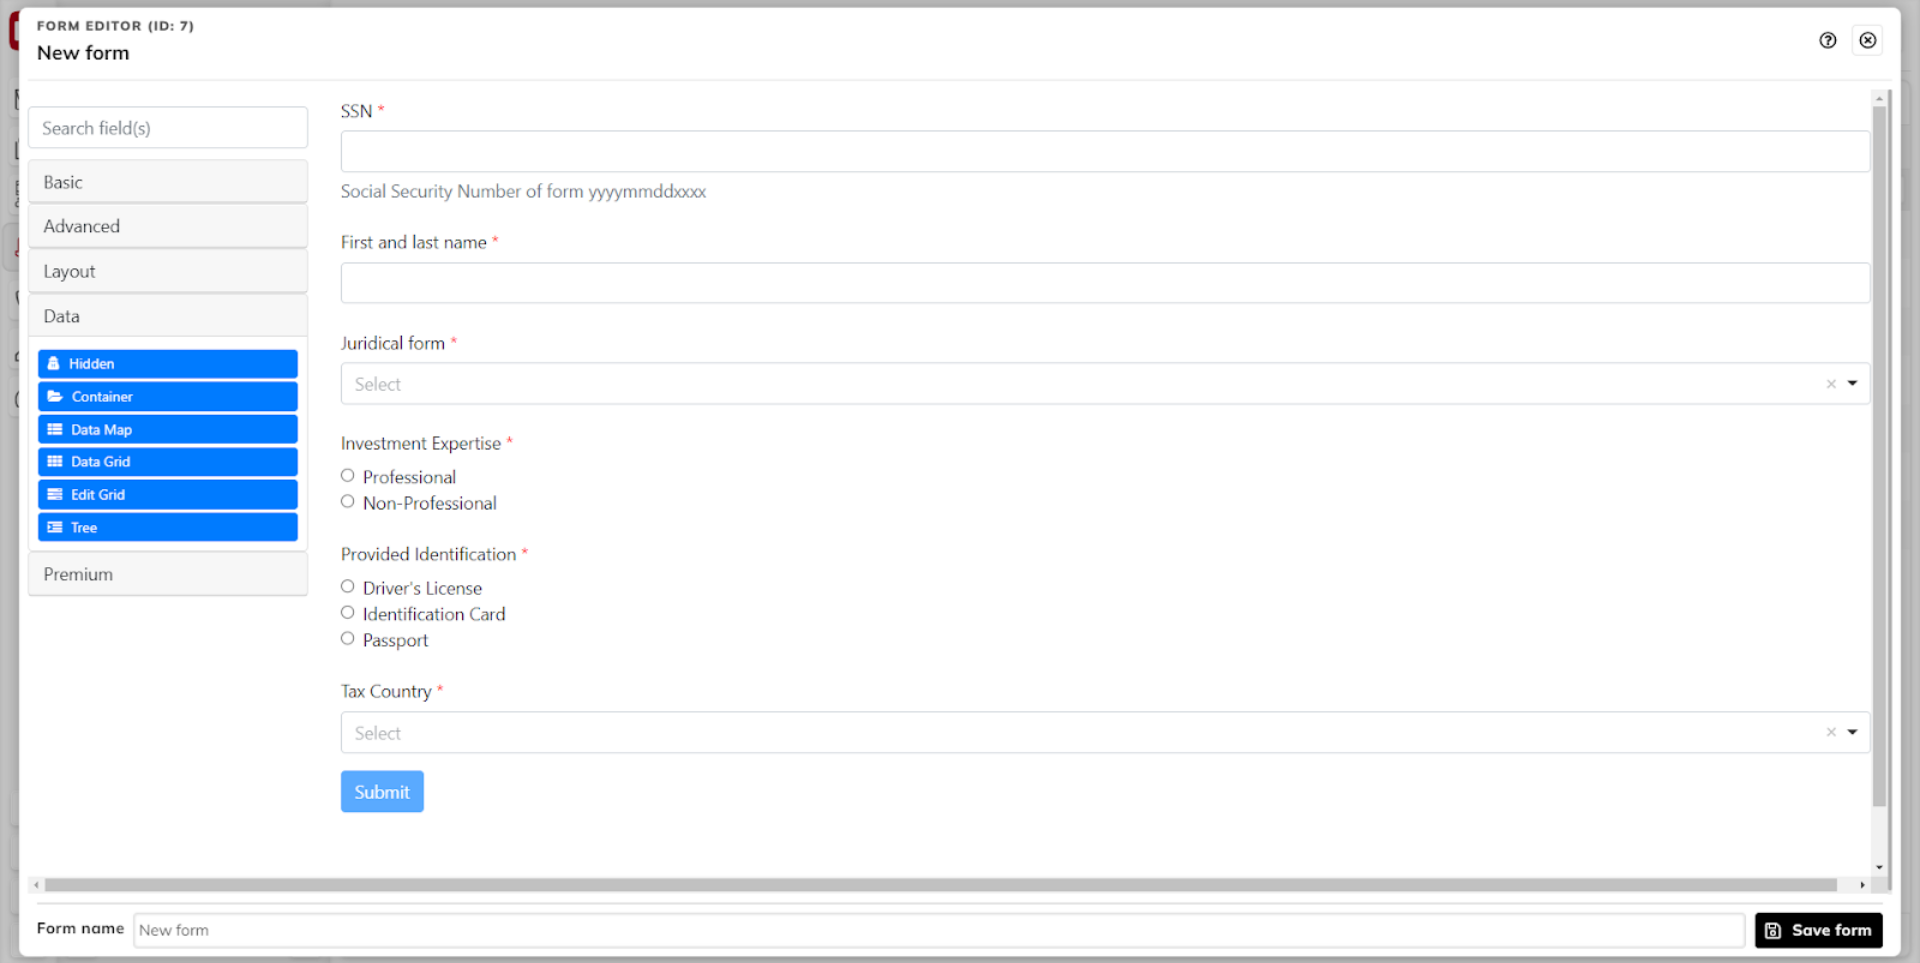
This is what your form should like after completing this step.
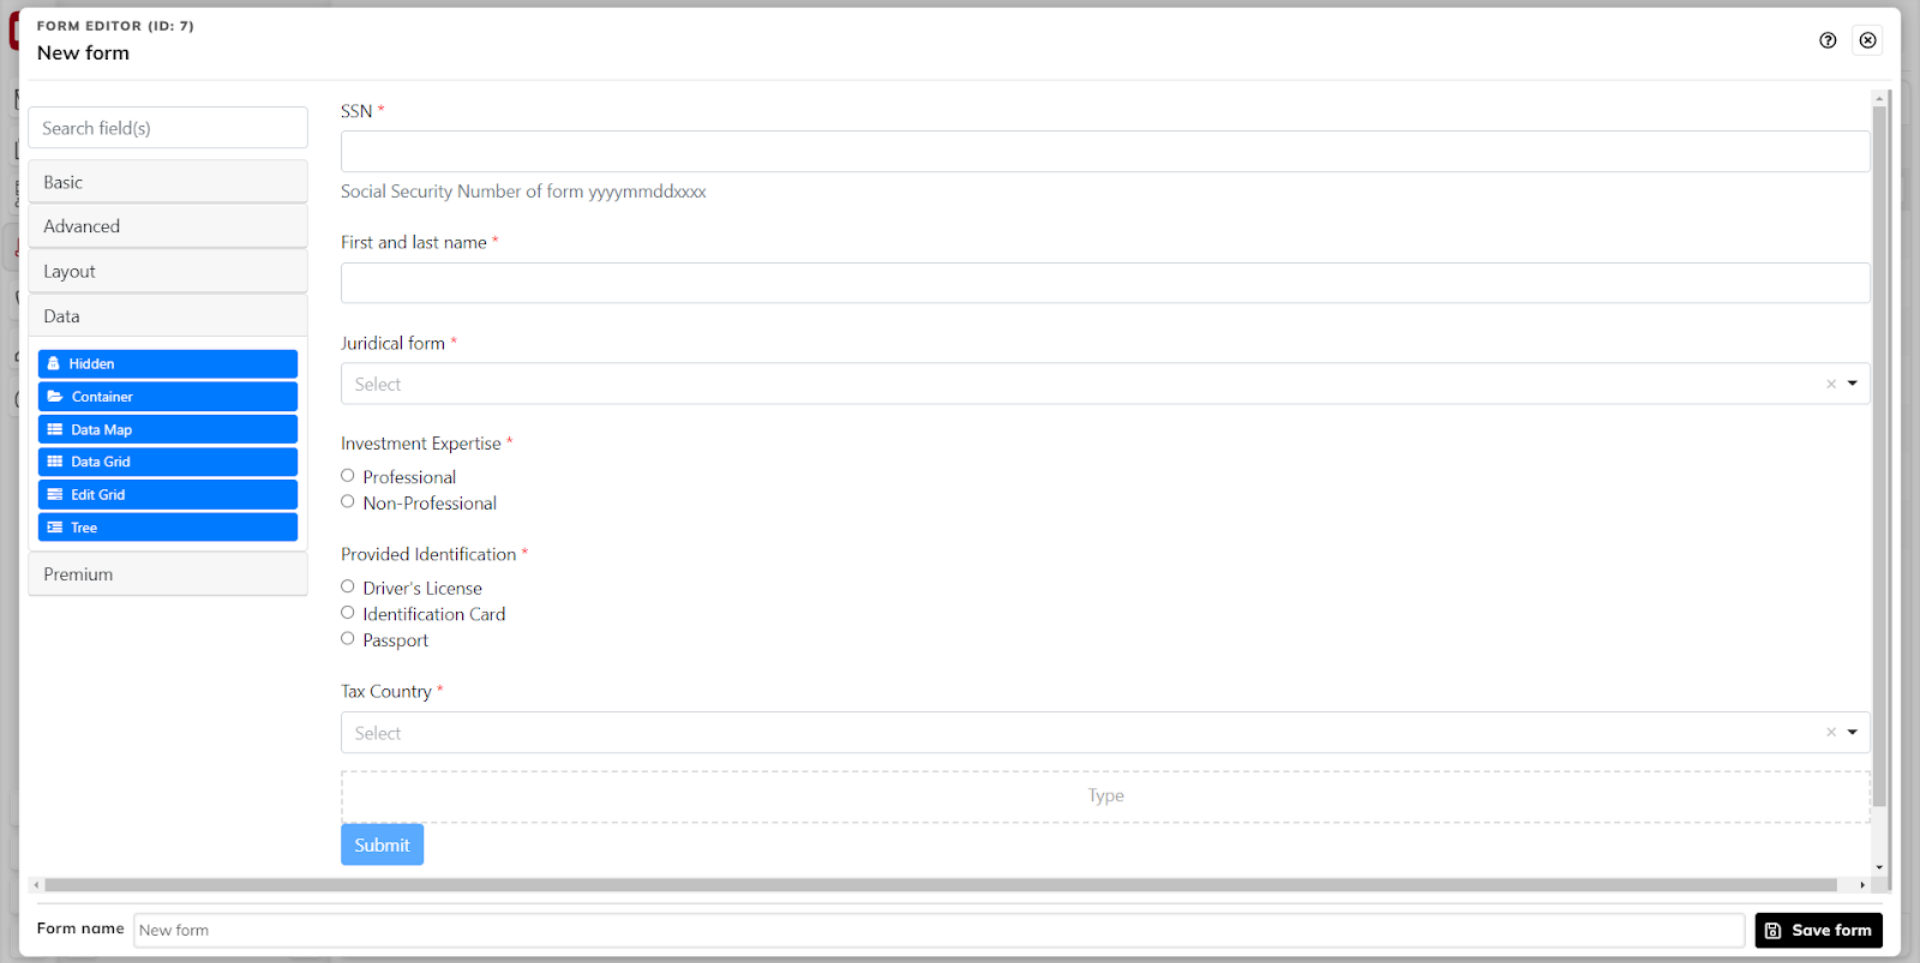 |
Step 1.8 - Create the Type hidden component
Drag in a new hidden component into the form. Hidden components are not shown to the user. We use it to set the contact Type field to a default value, which the user cannot see nor modify. The hidden component may be located under the Data dropdown.
Add a label to the component.
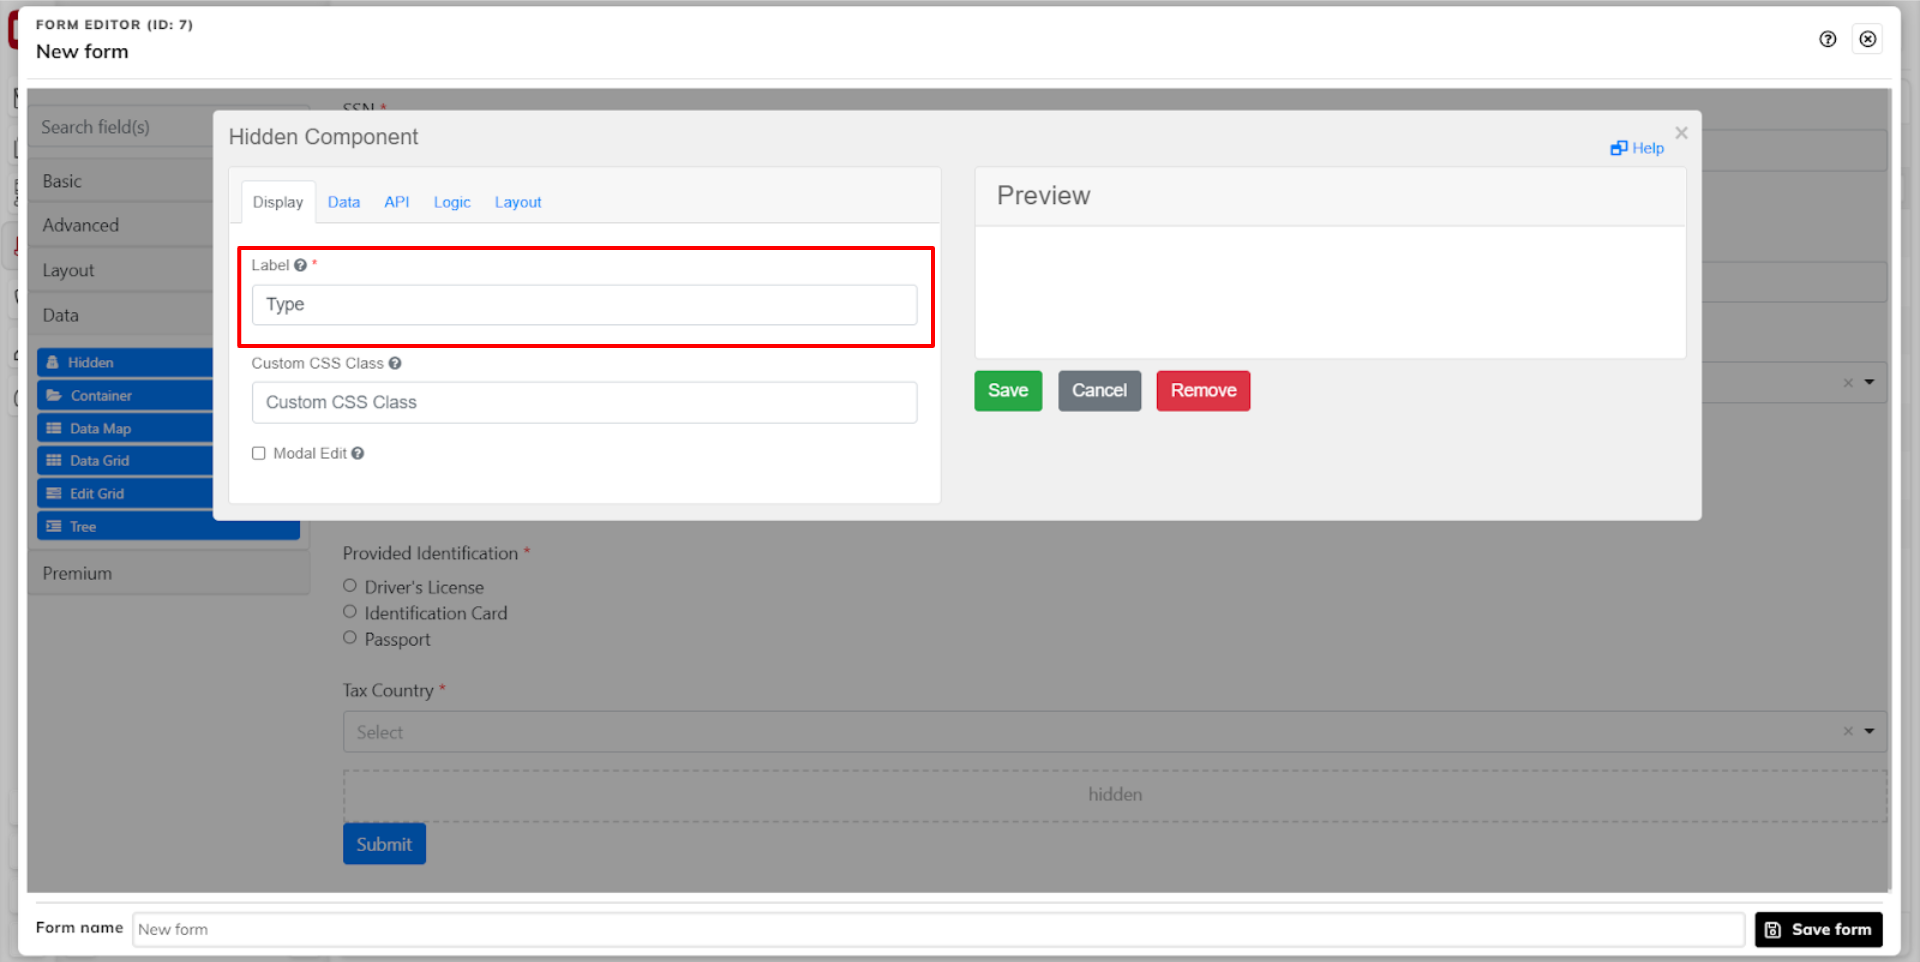 |
Add the default value for the Type. In FA standard, "1" corresponds to Type: Customer.
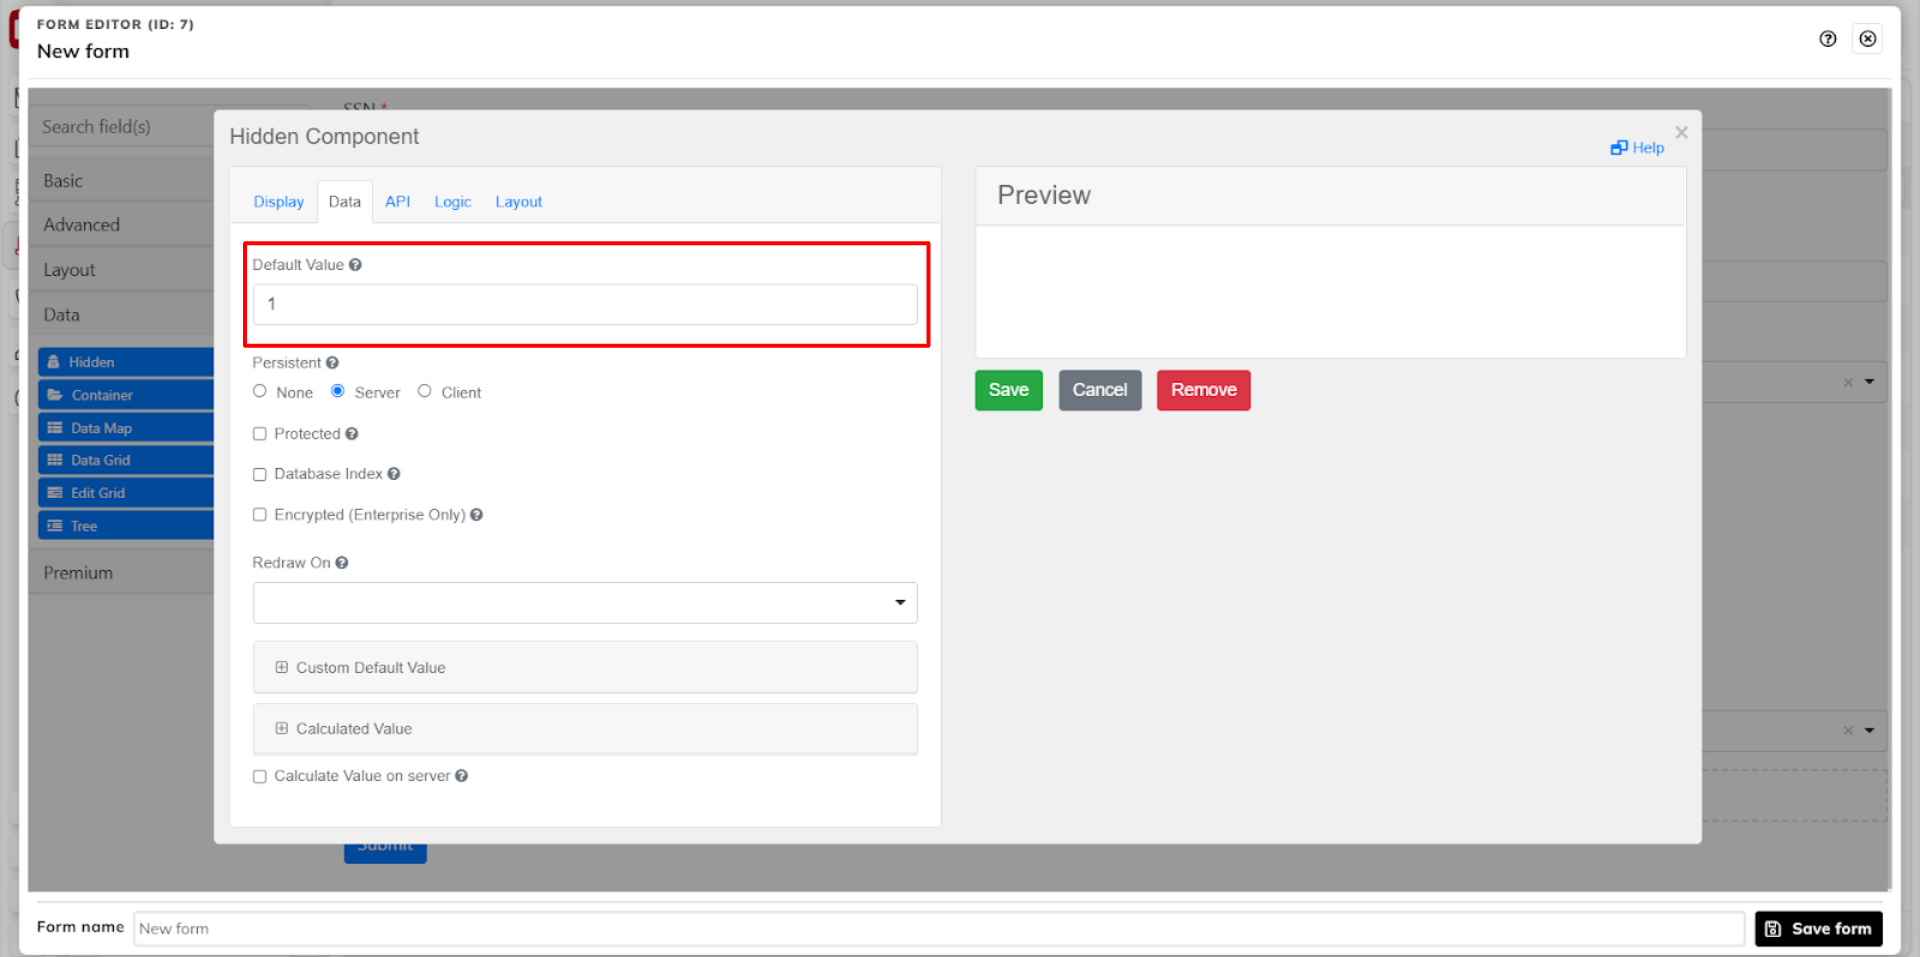 |
Add the import key for the contact Type. Save the component.
import.c_type
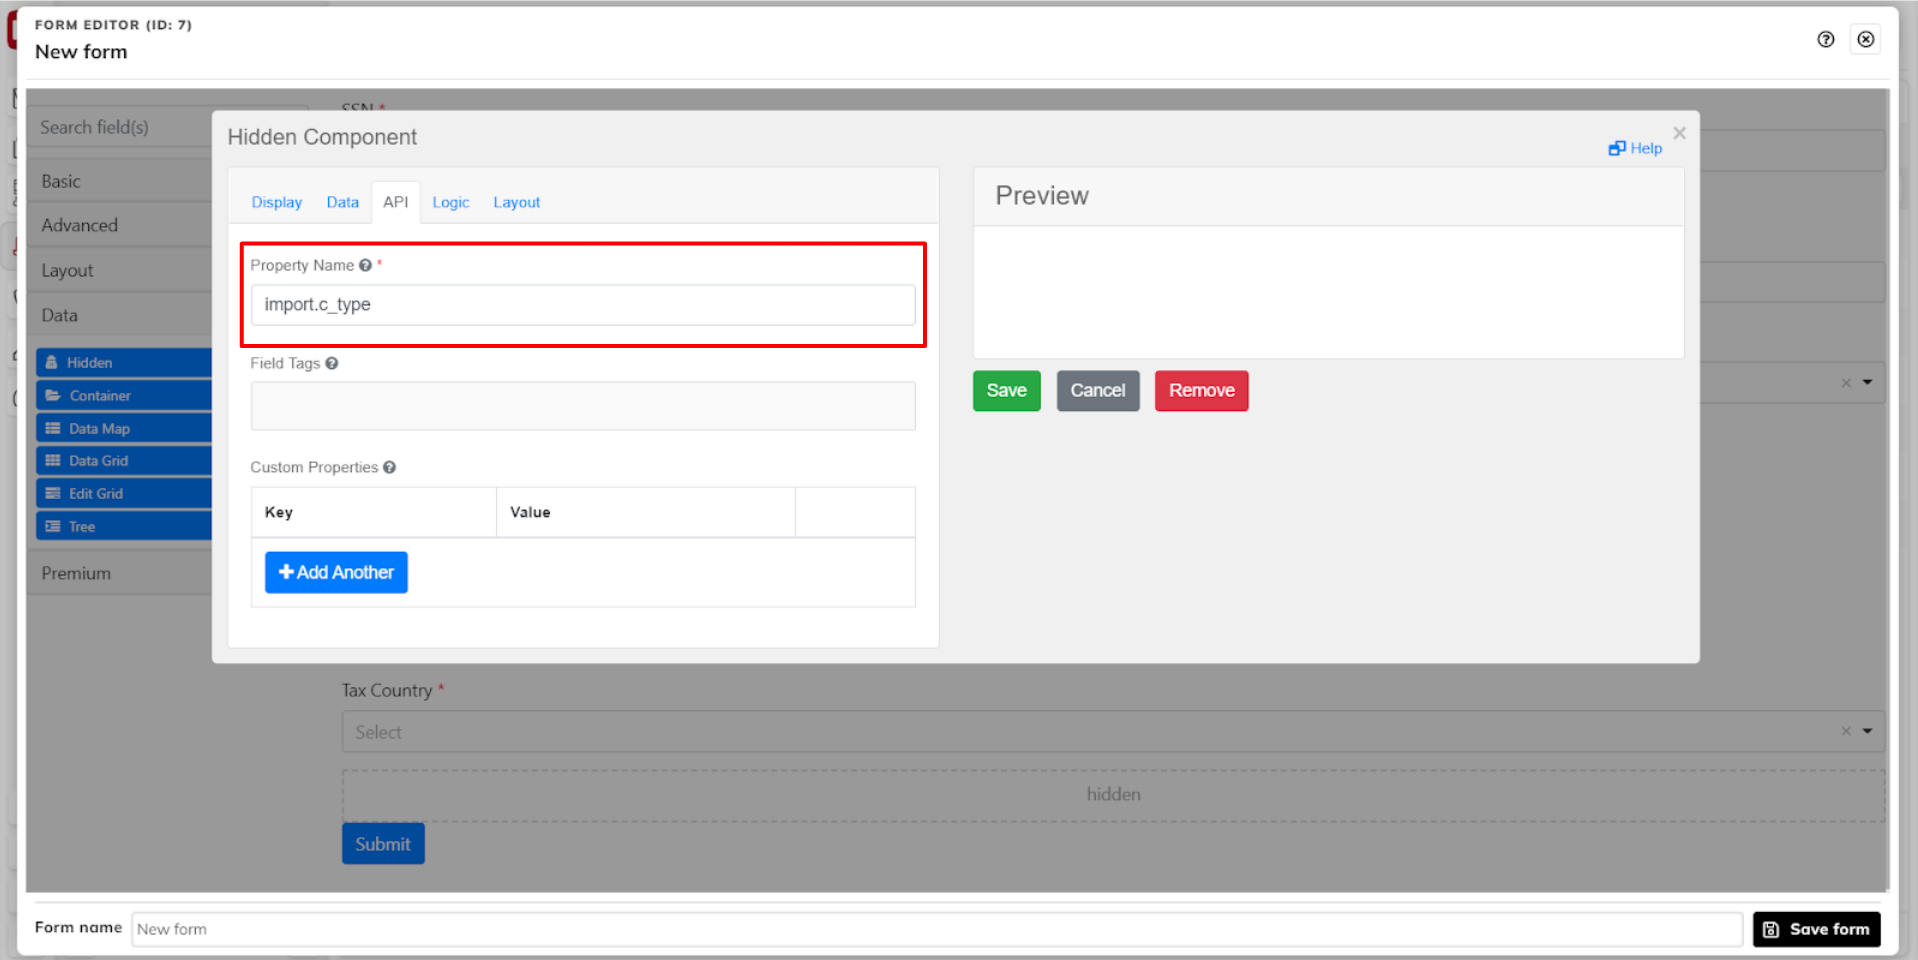 |
This is what your form should look like after completing this step.
 |
Step 1.9 - Create the Status hidden component
Drag a new Hidden component to the form area. Add a label to it.
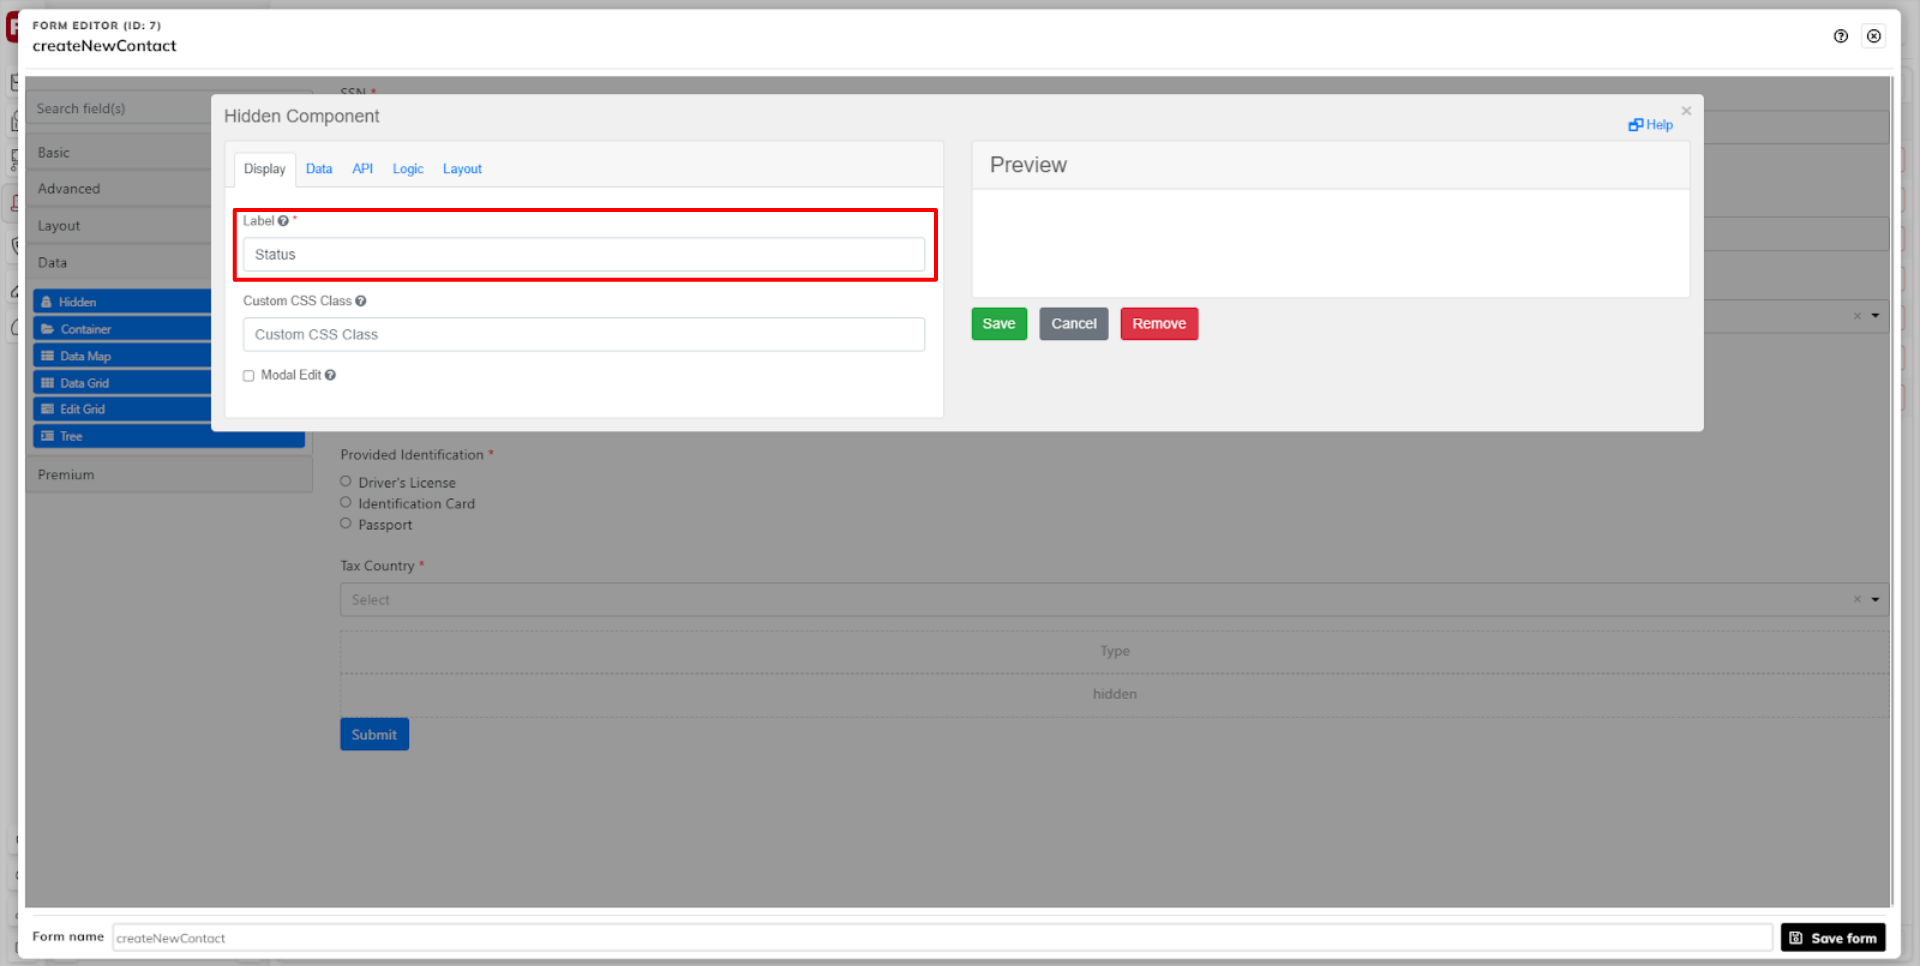 |
Add the default value for Status. In FA standard, "A" corresponds to Status: Active.
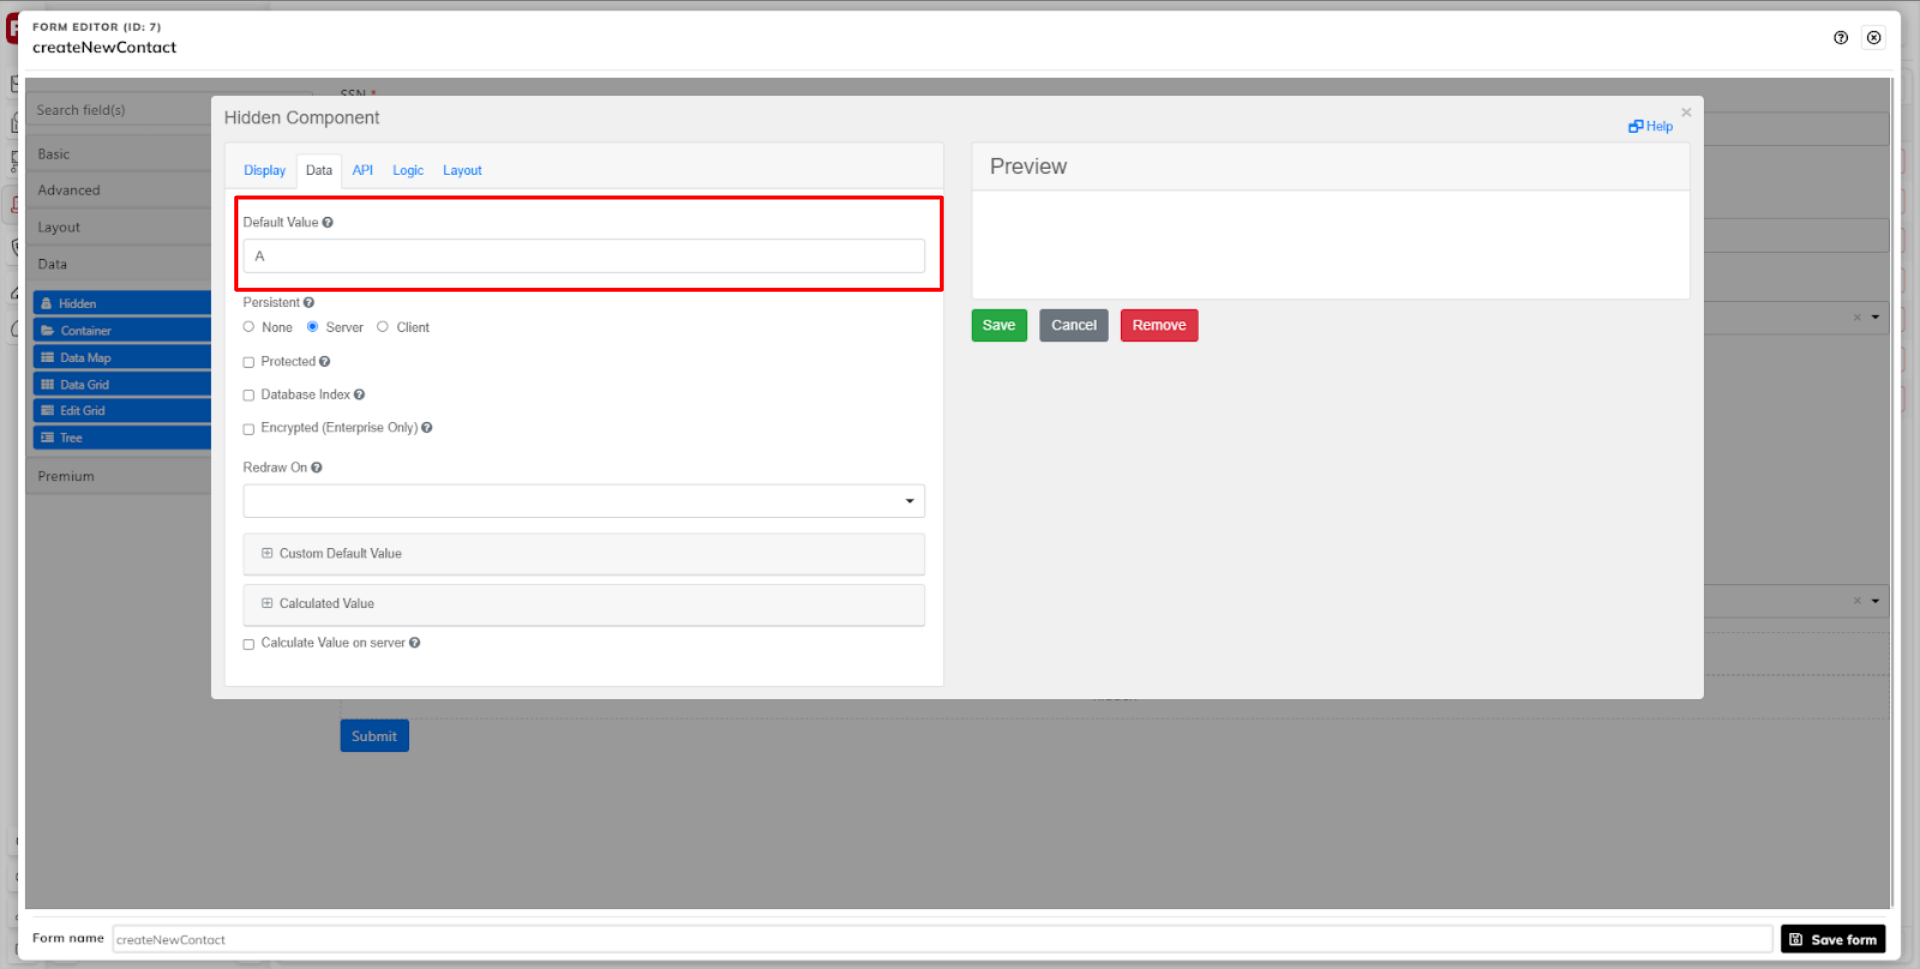 |
Add the import key for the contact Status. Save the component.
import.c_status
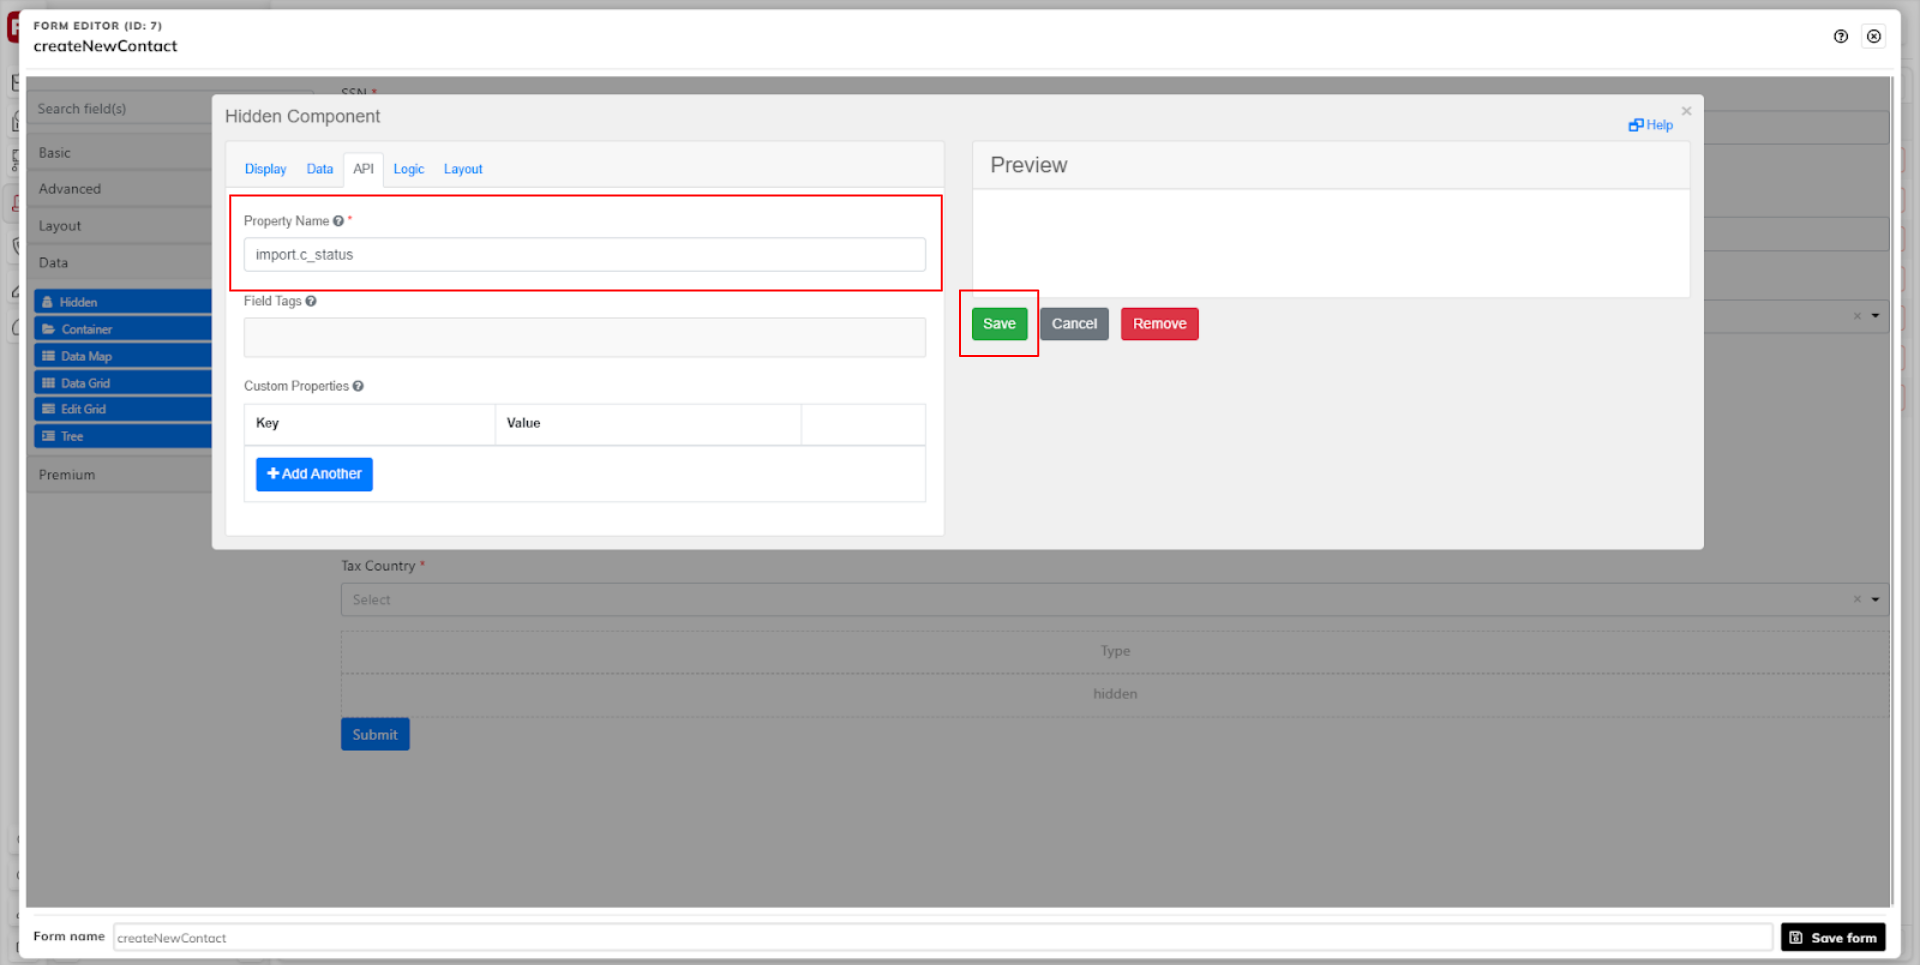 |
Note or memorize the ID of your form. You are going to use it to identify the form later on.
Save the form.
 |
The form is ready. Proceed to the next steps of creating the processes.
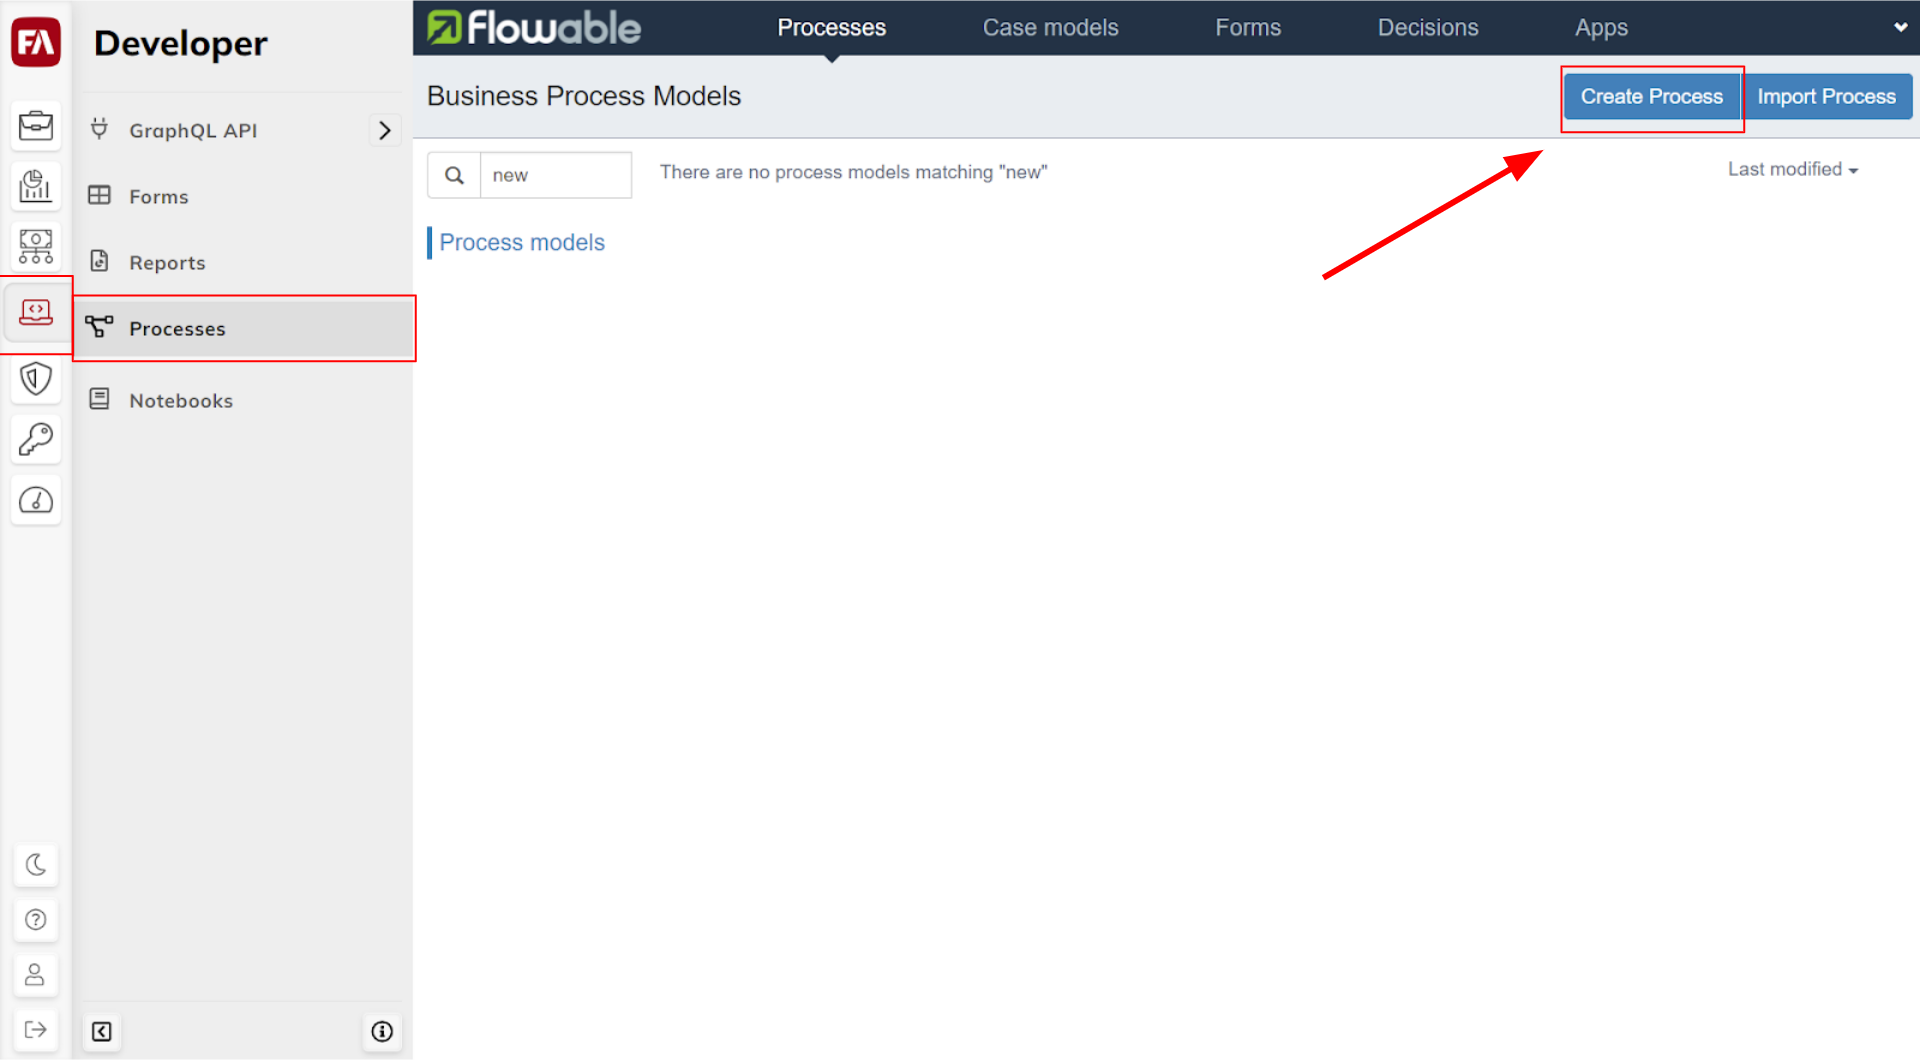
Step 2.1 - Create the process model
Navigate to the FA Developer app and then to Processes. Click Create Process.
 |
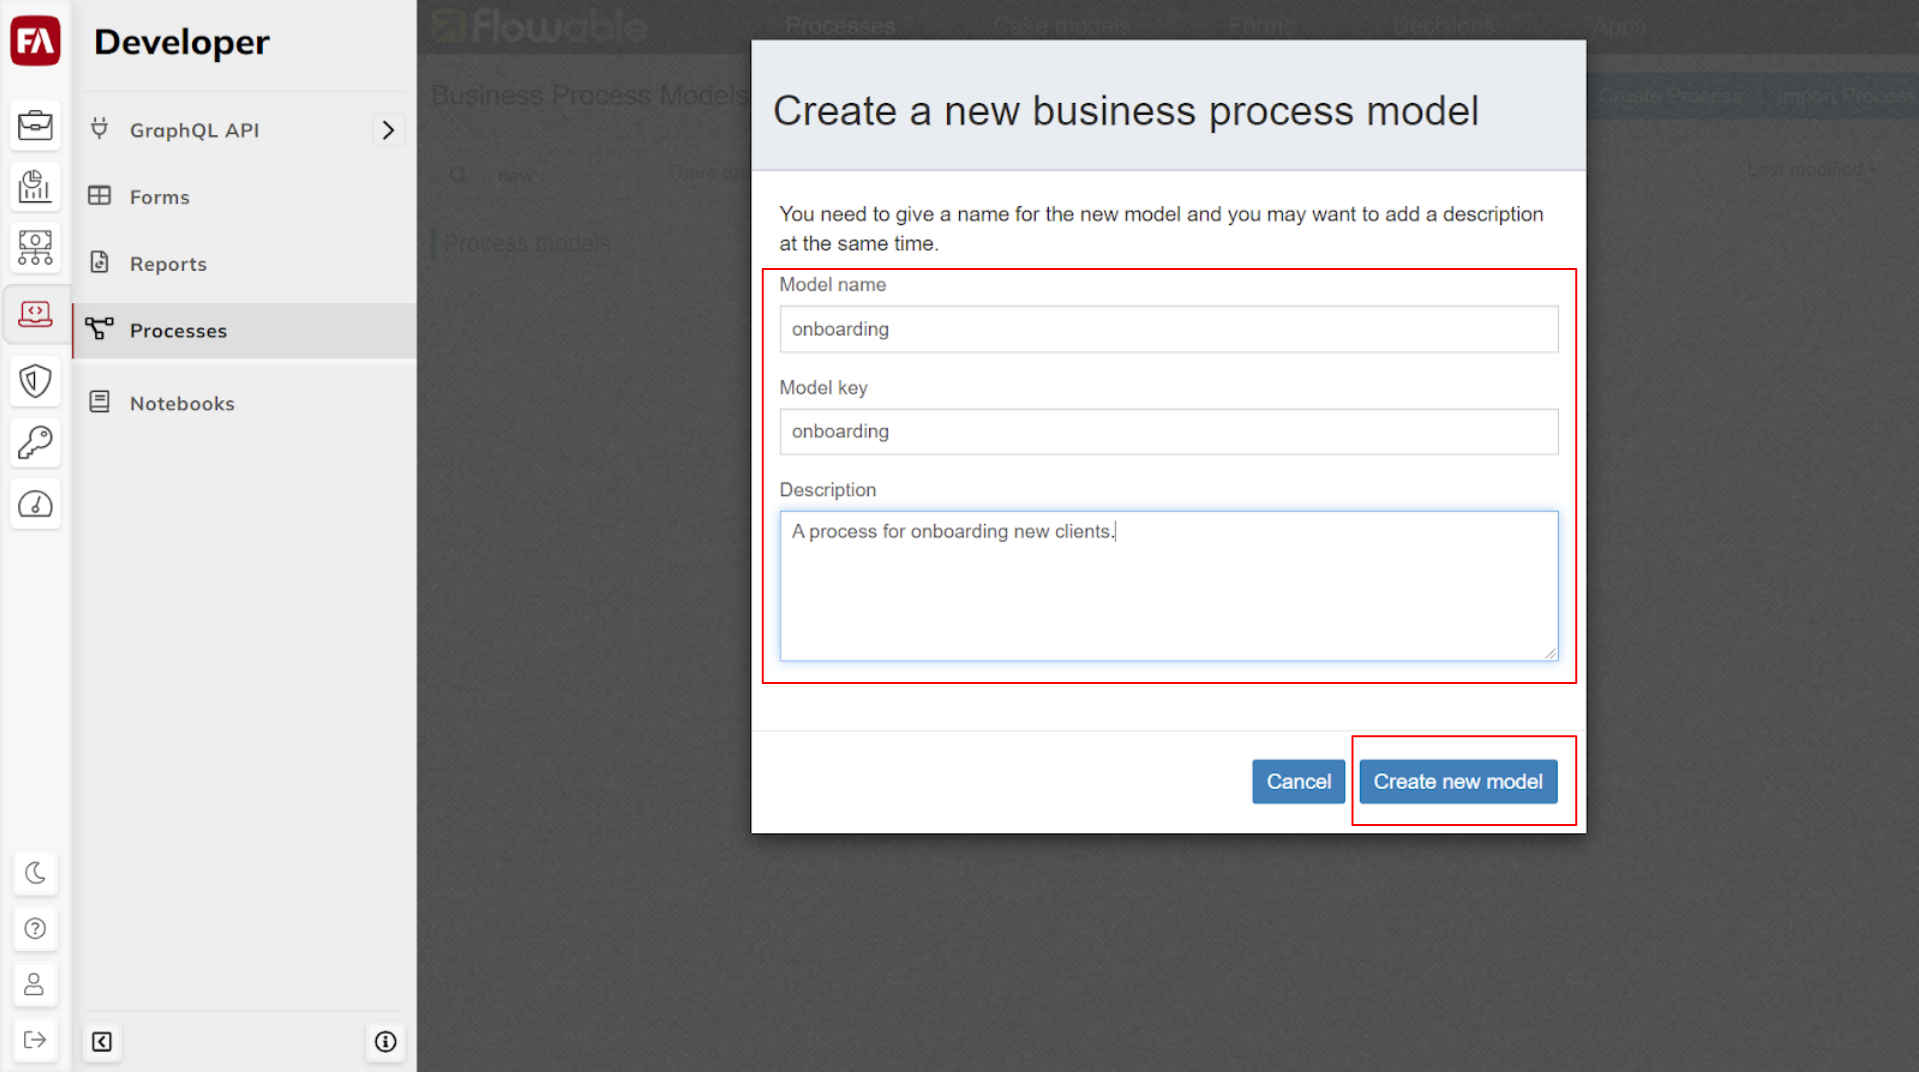
Enter a name, a key and optionally a description for the new process model. Note or memorize the process model key, you will need it later.
 |
You should end up at a screen looking like this.
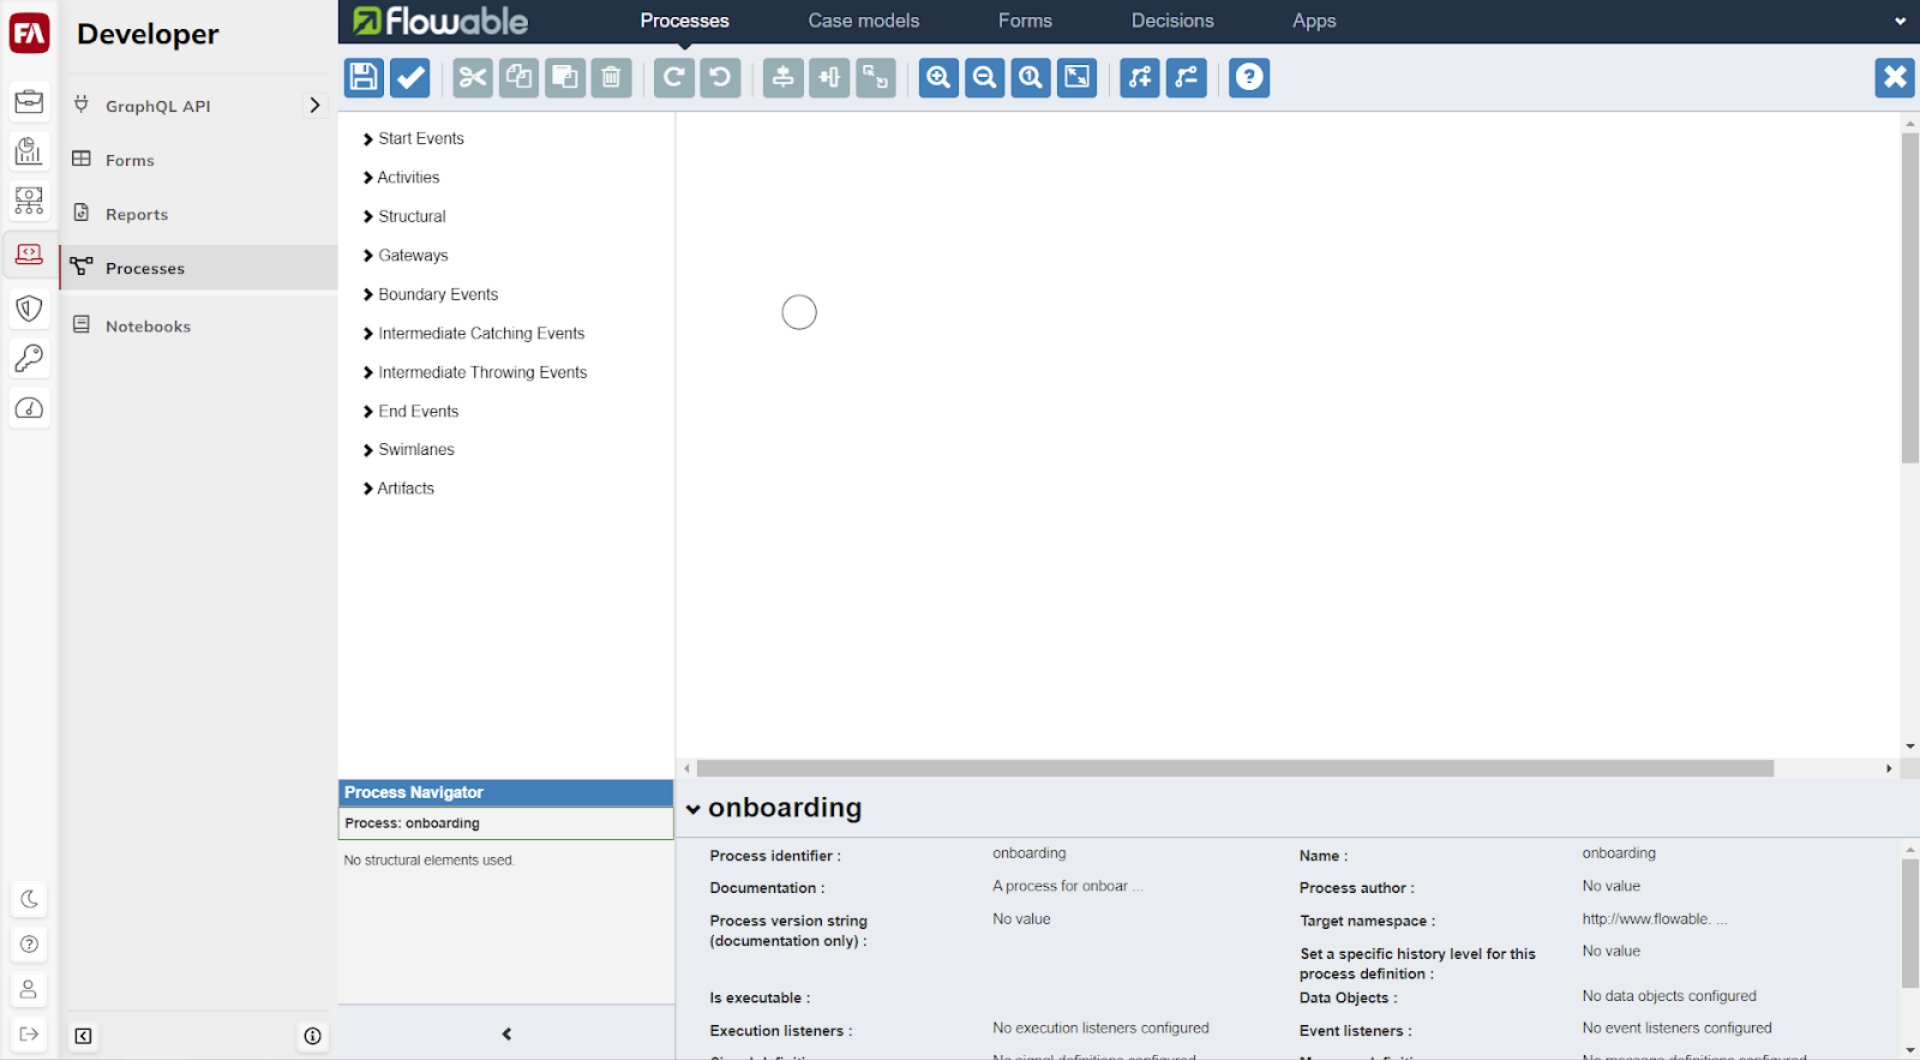 |
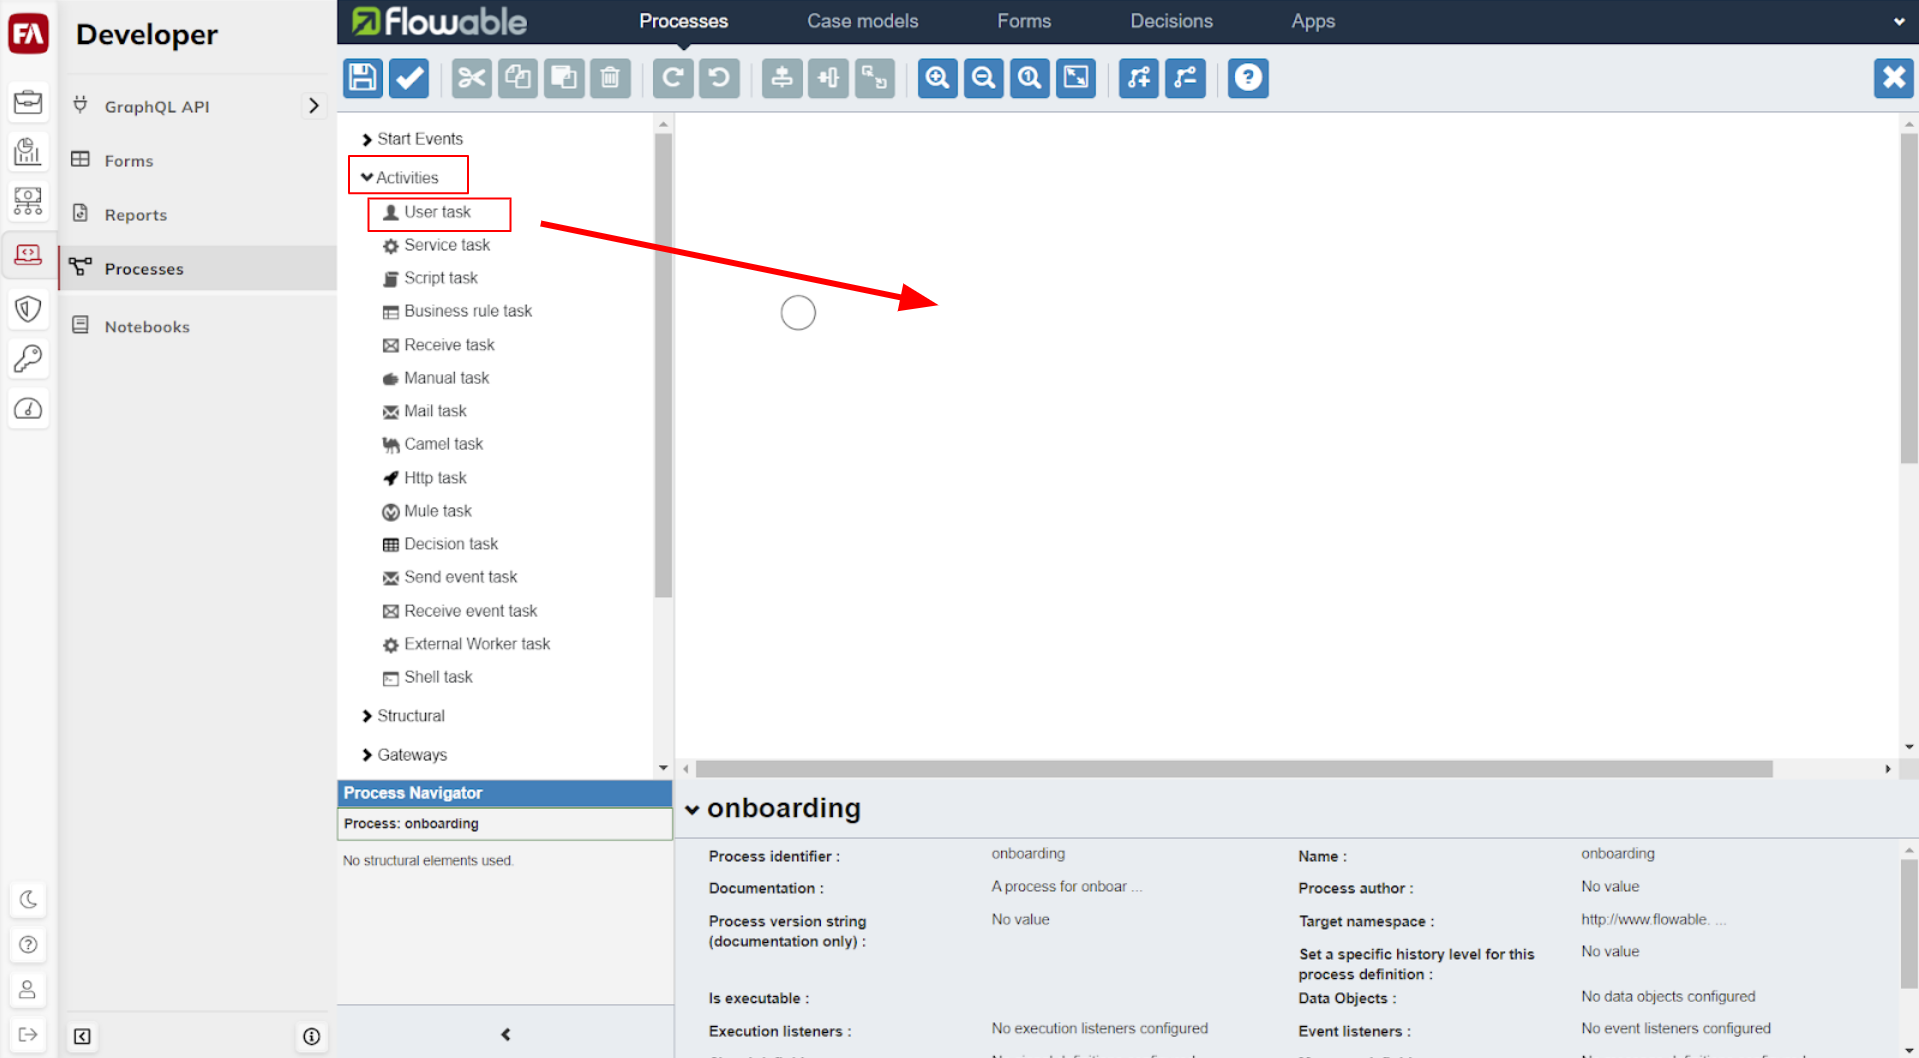
Step 2.2 - Add the User Task process to show the form
Now that you have a process model, you can add processes to it. Start by adding a process to display the form you just created.
Drag a user task component to the process model.
 |
Click the circle that marks the start of the process and drag an arrow from it to the user task. This essentially translates to "Start and then immediately run the user task process".
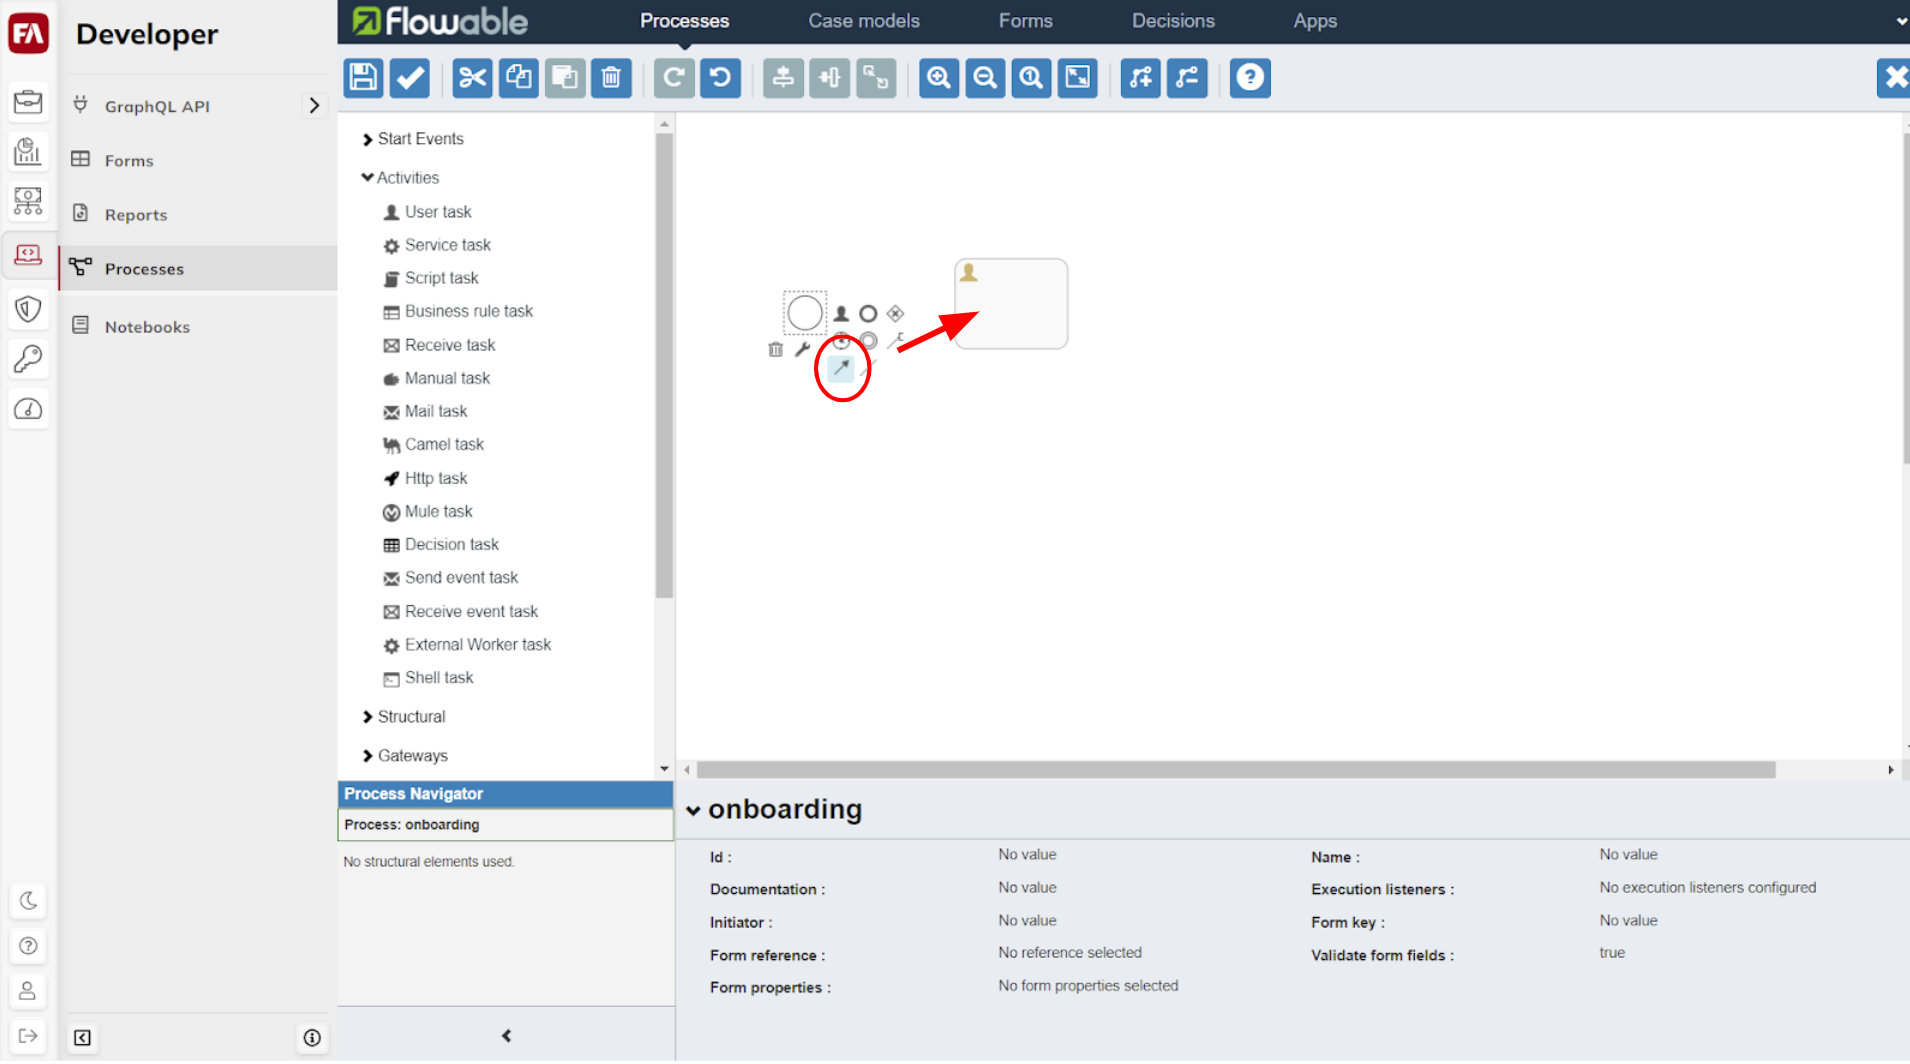 |
Click the user task component. Add a name and a key to it. The key should be set equal to the form ID you memorized or noted at the end of step 1.9.
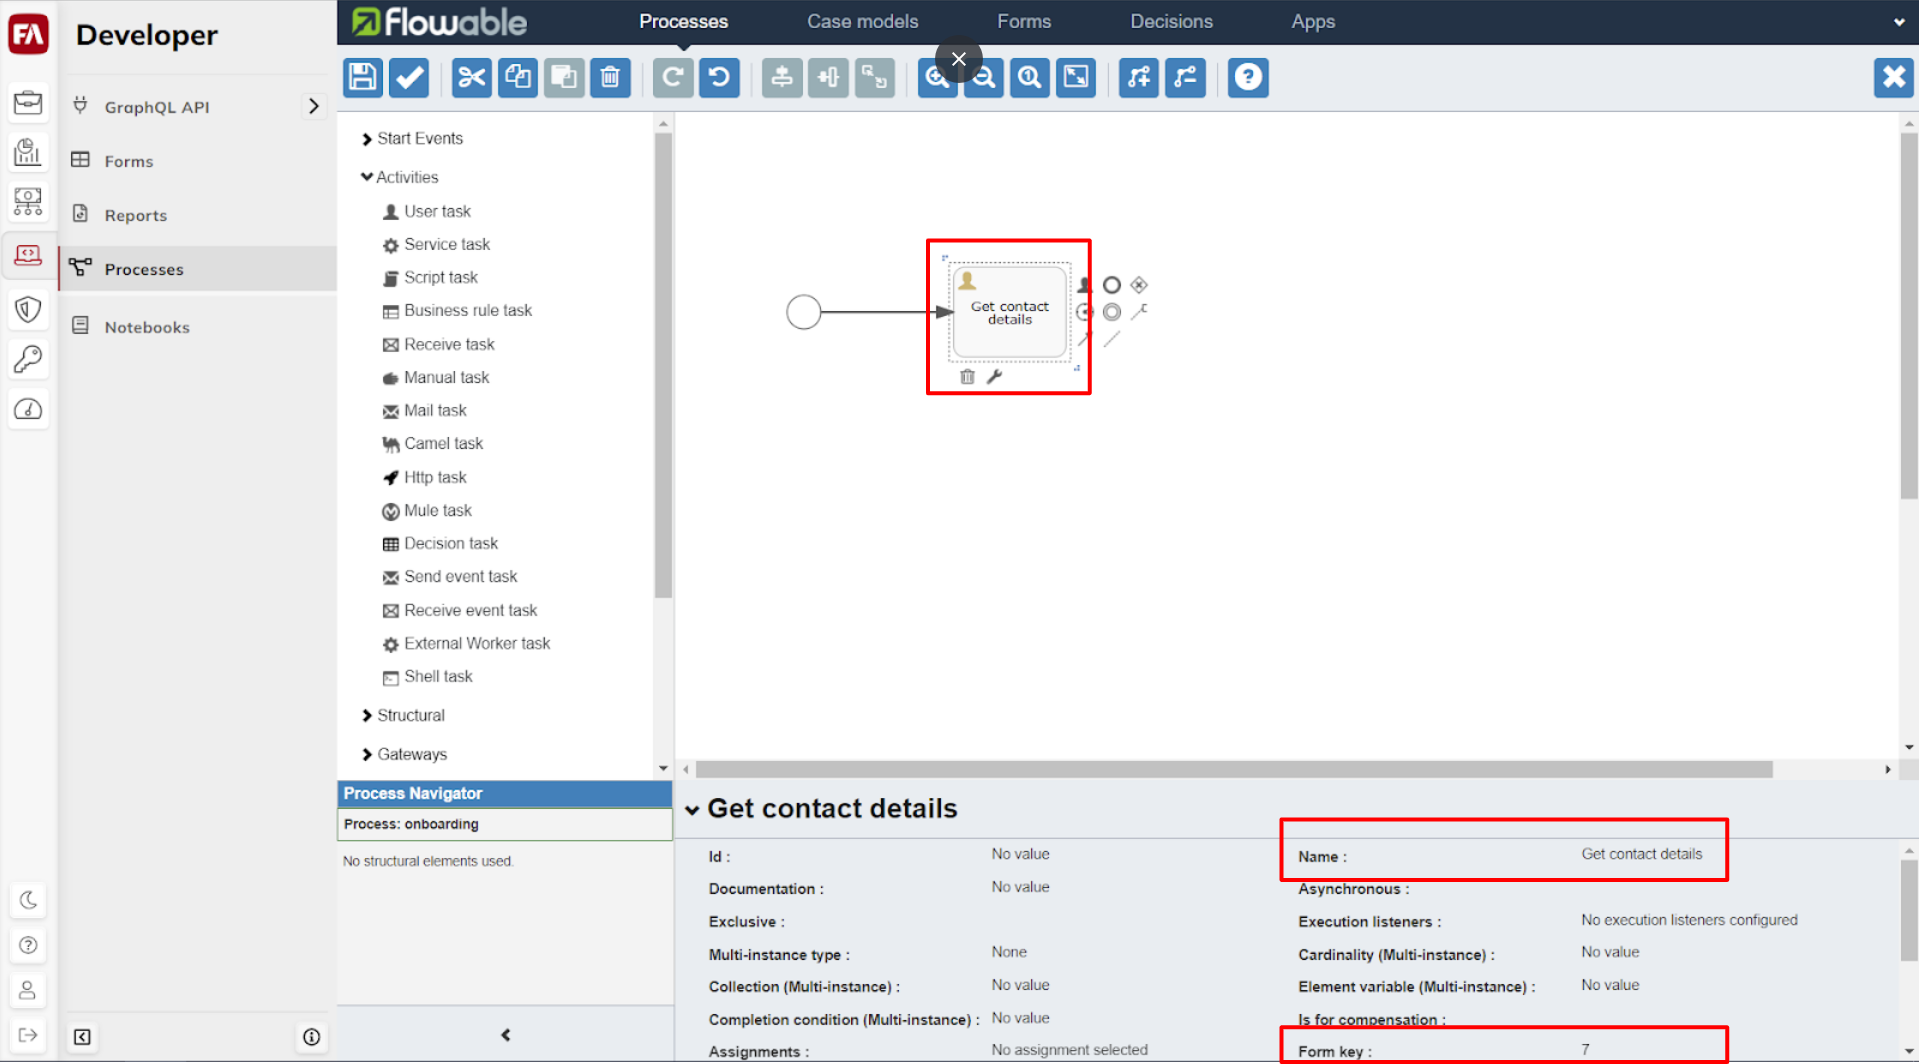 |
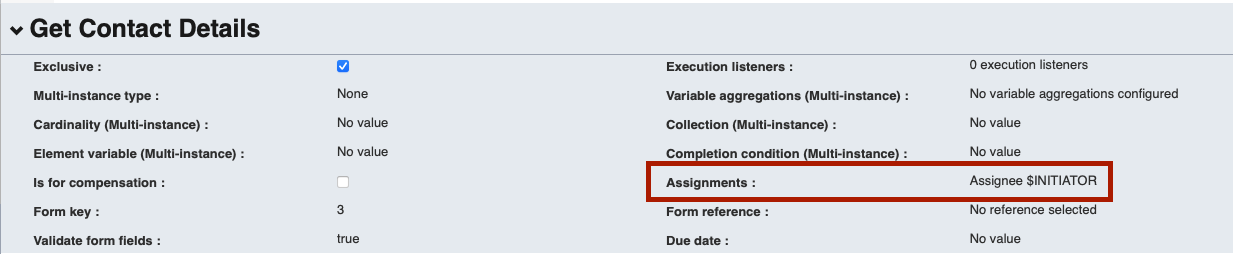
Add $INITIATOR value to the Assignee field in the Assignment option of the user task component.
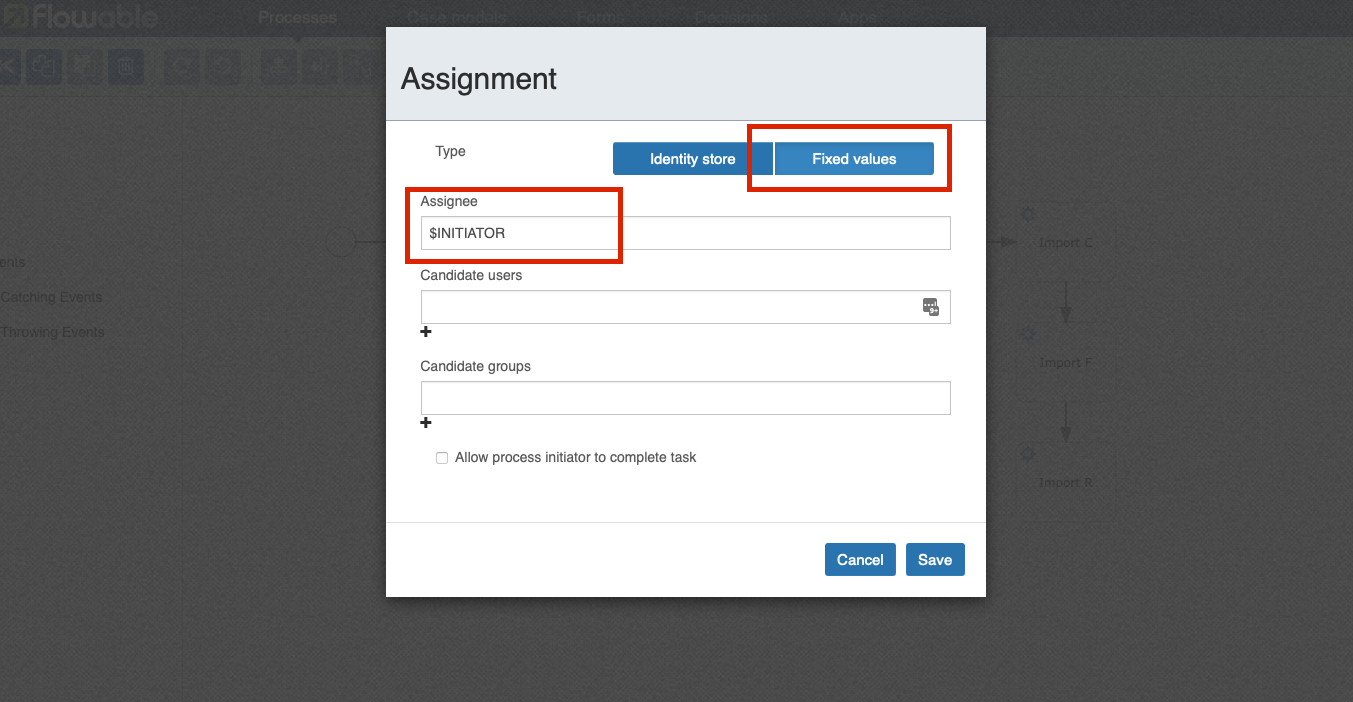
The process model now knows that it should start and then immediately show the form you created in step 1.
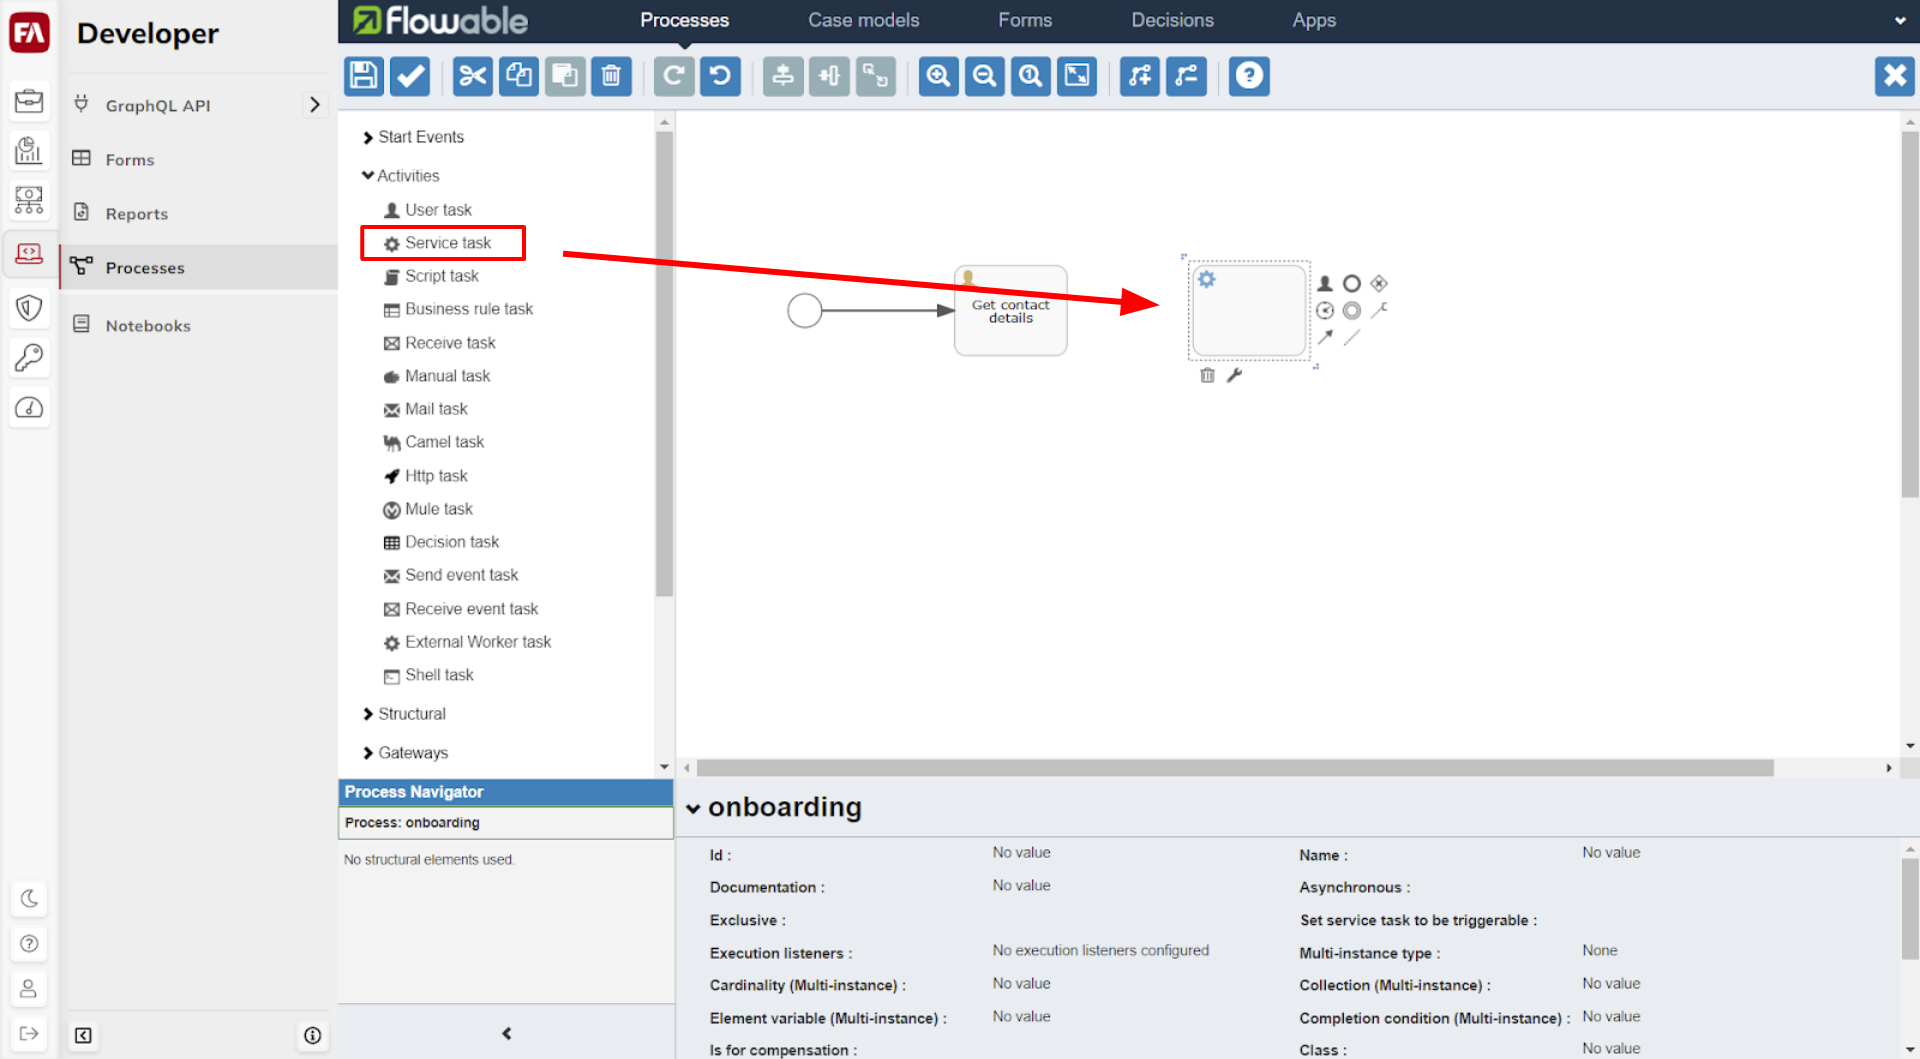
Step 2.3 - Add the Service Task process to import the form data
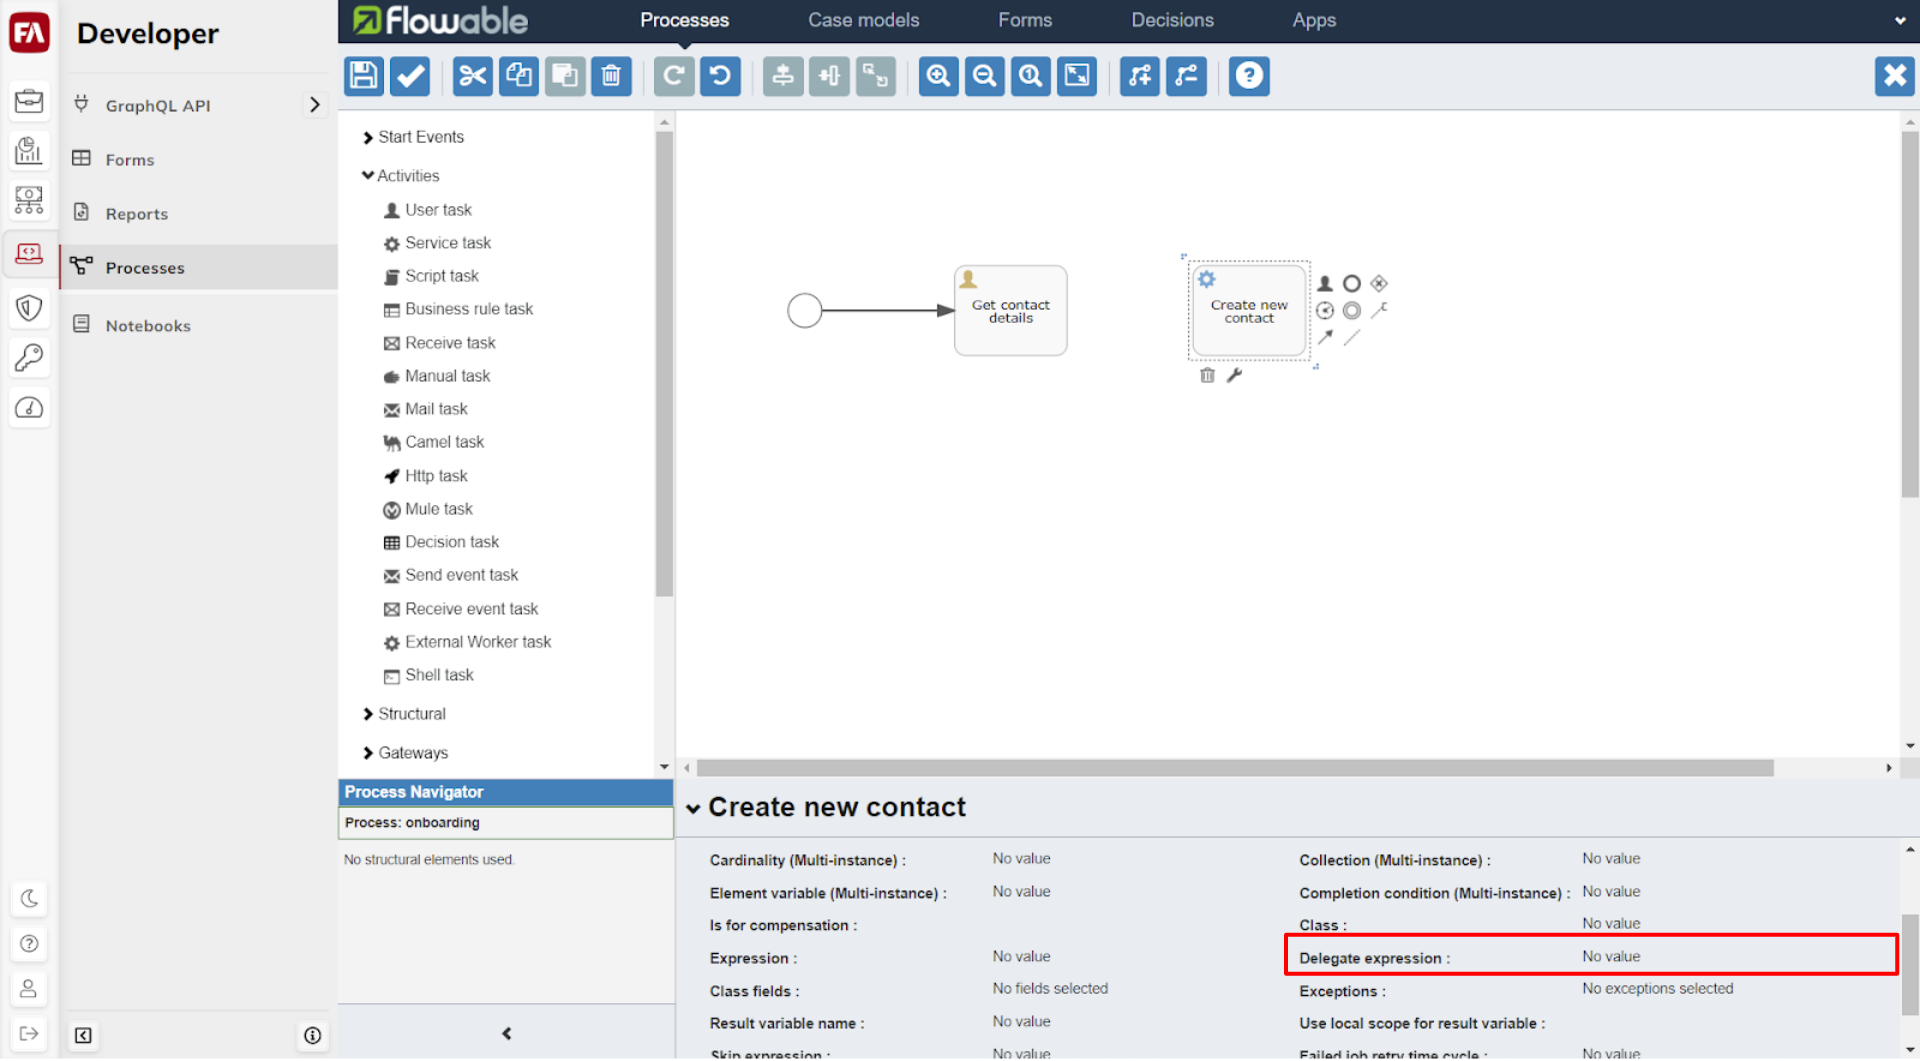
Drag a service task component to the Process Model. Add a name to it, for example, "Create new contact".
 |
Add a delegate expression by clickcing Delegate expression. This opens a new window.
 |
Enter the following:
${importer}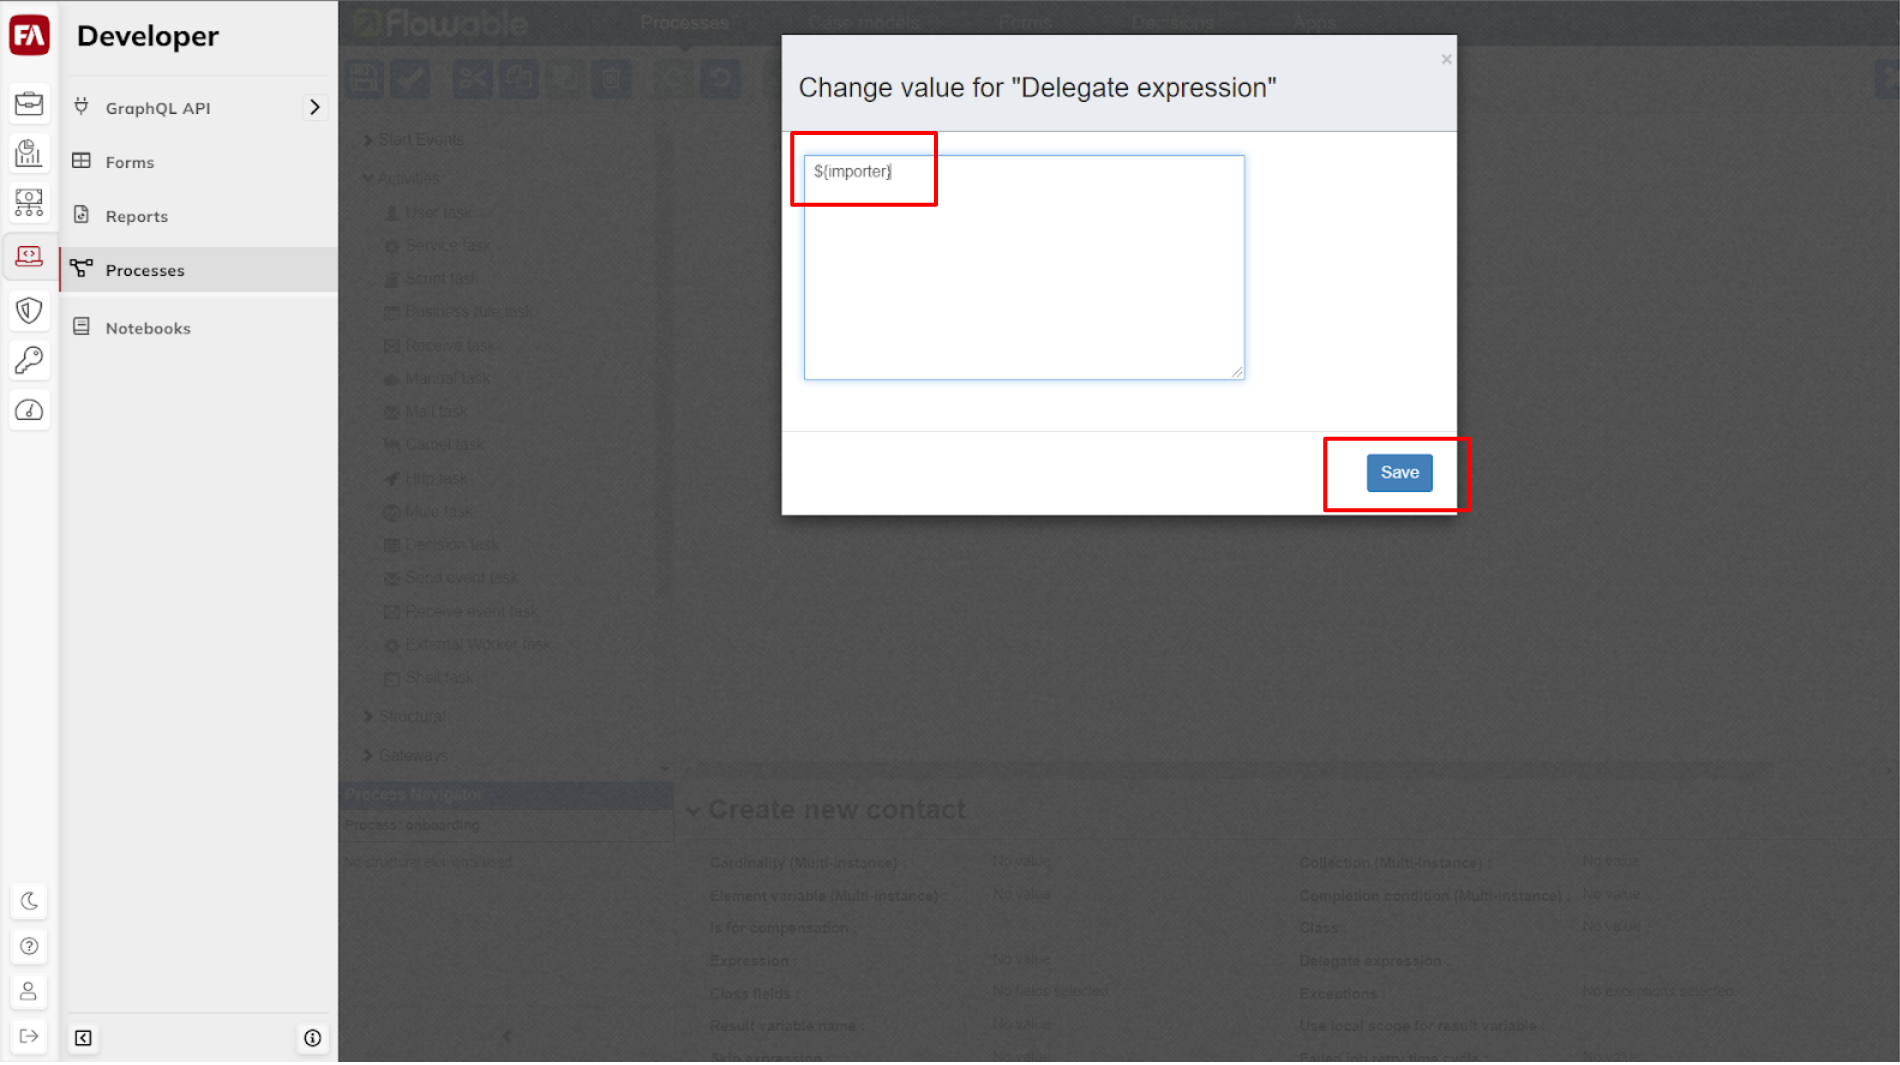 |
Drag an arrow from the user task to the service task. This instructs the Process Model to run the service task after the user task. In other words, the Process Model now understands that when the form is submitted by the user, it should run import.
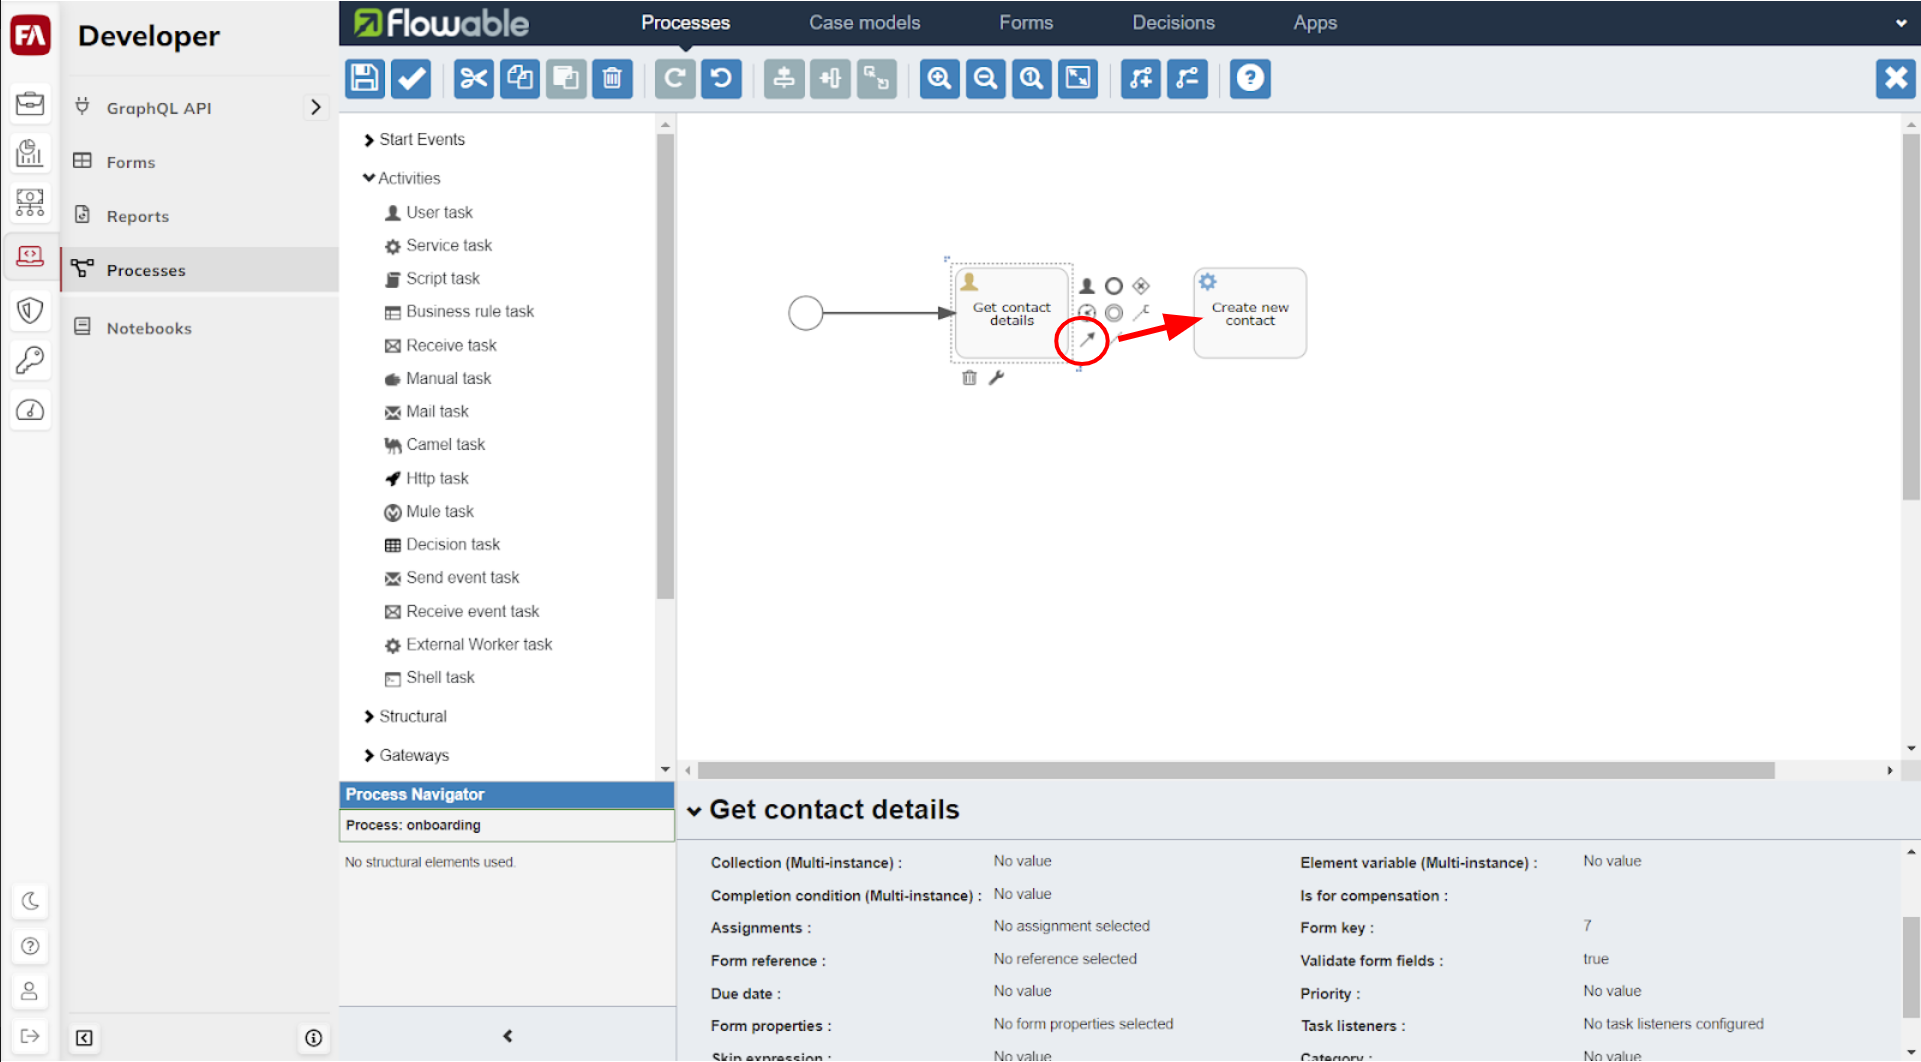 |
The Process Model is ready. Save the Process Model and then exit it.
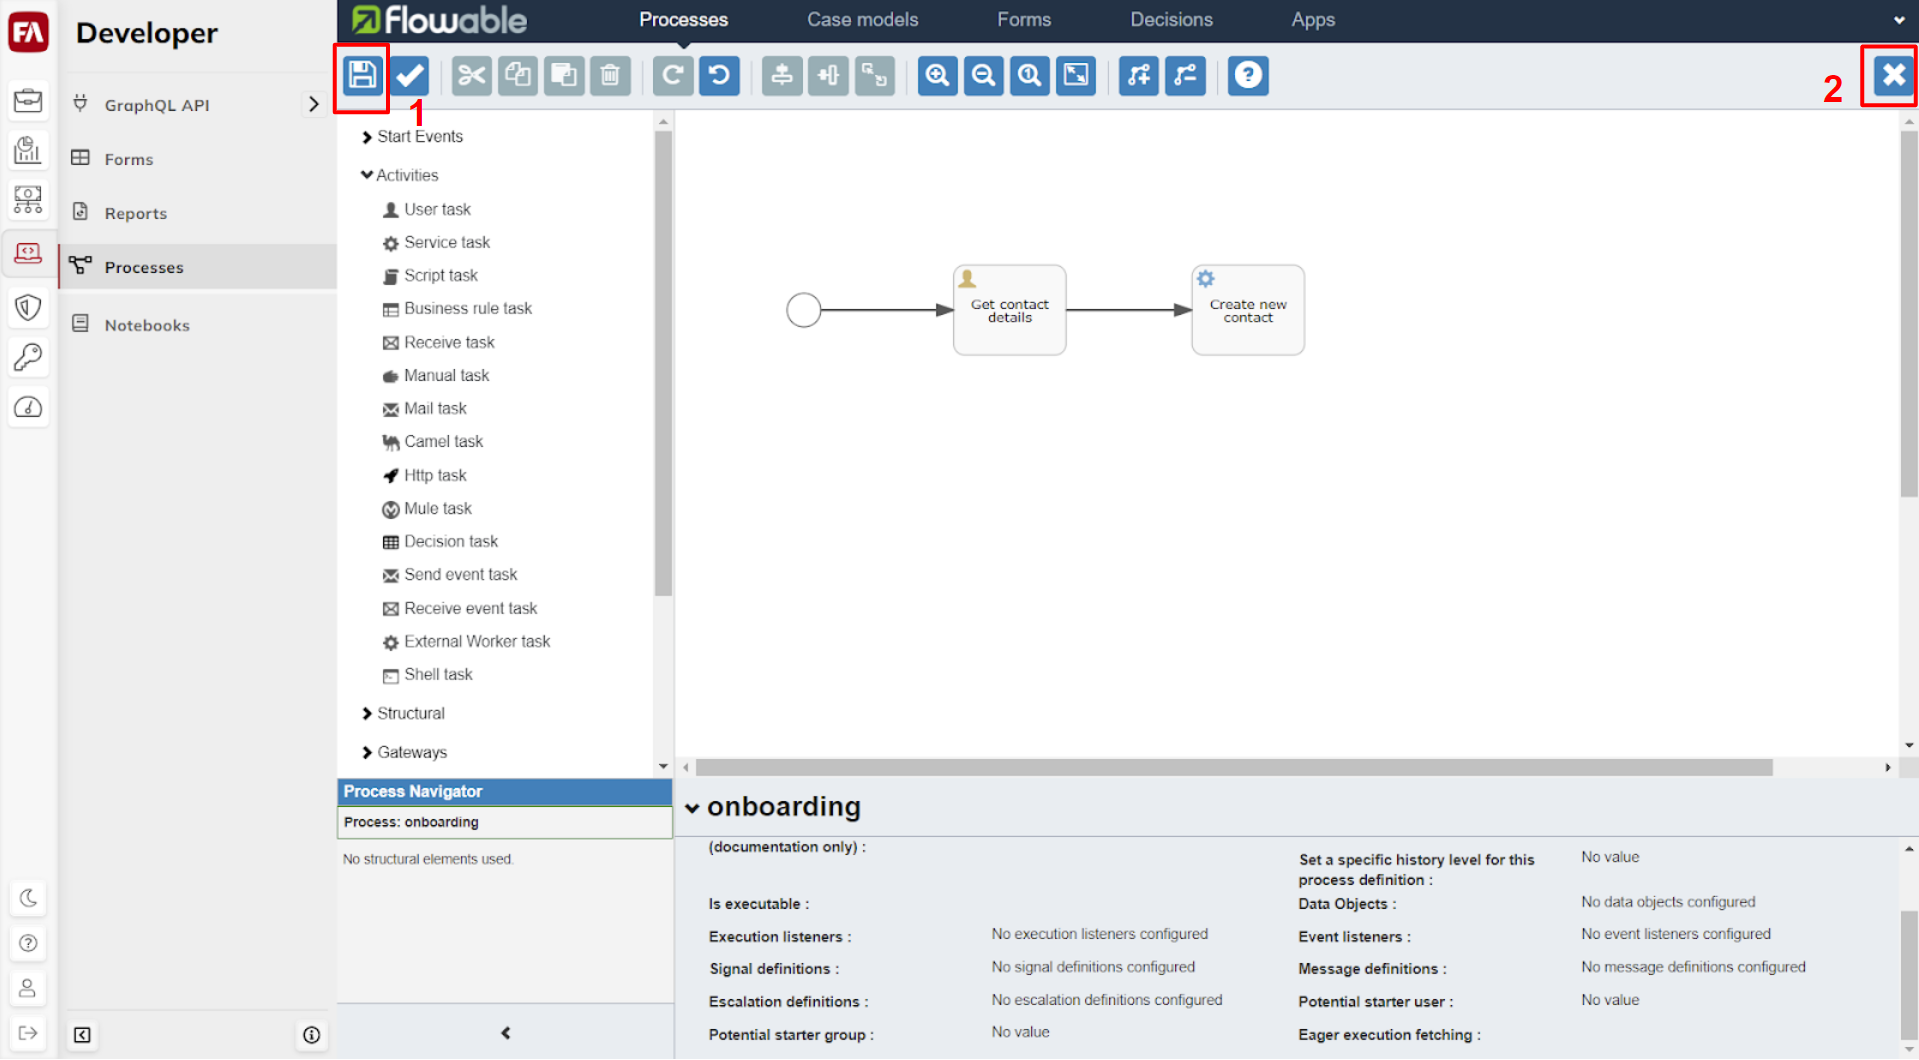 |
Step 2.4 - Create an app to publish the process model
Go to the Apps tab and click Create App.
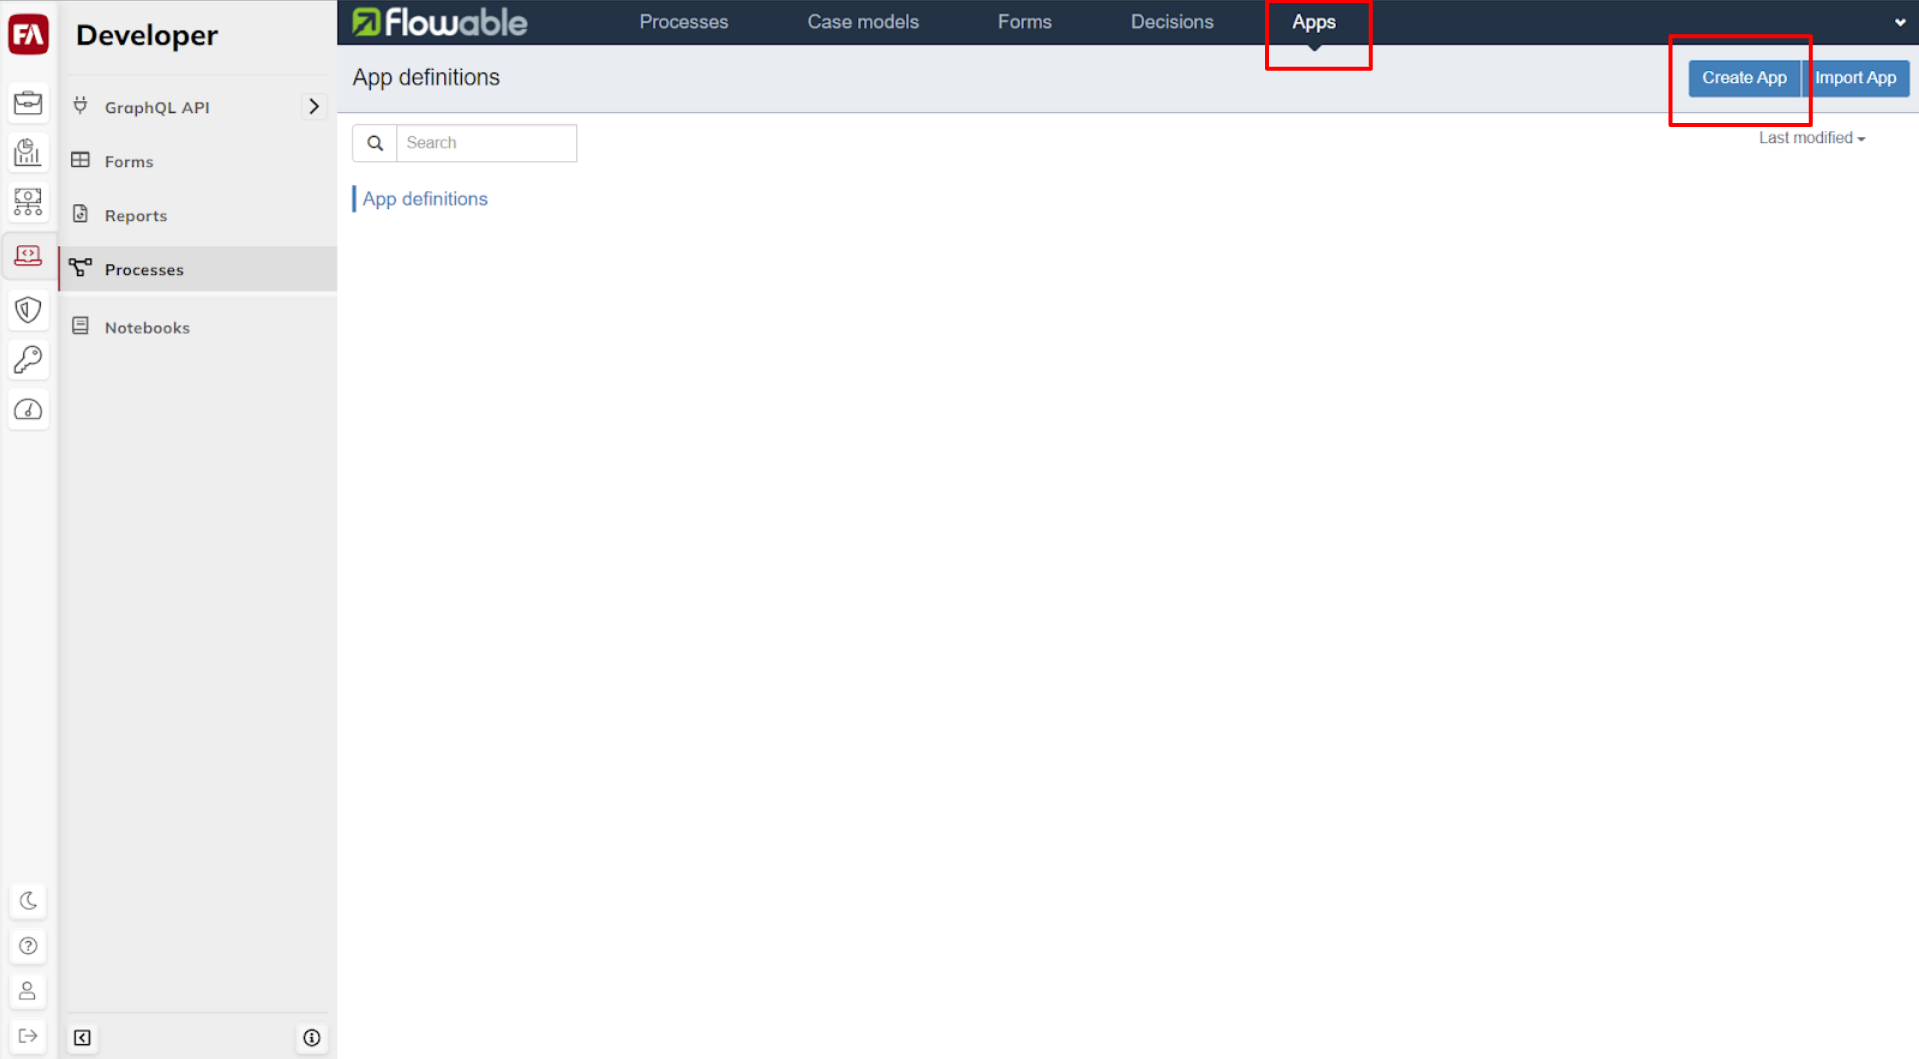 |
Fill in the app details, such as name and key. Click Create new app definition.
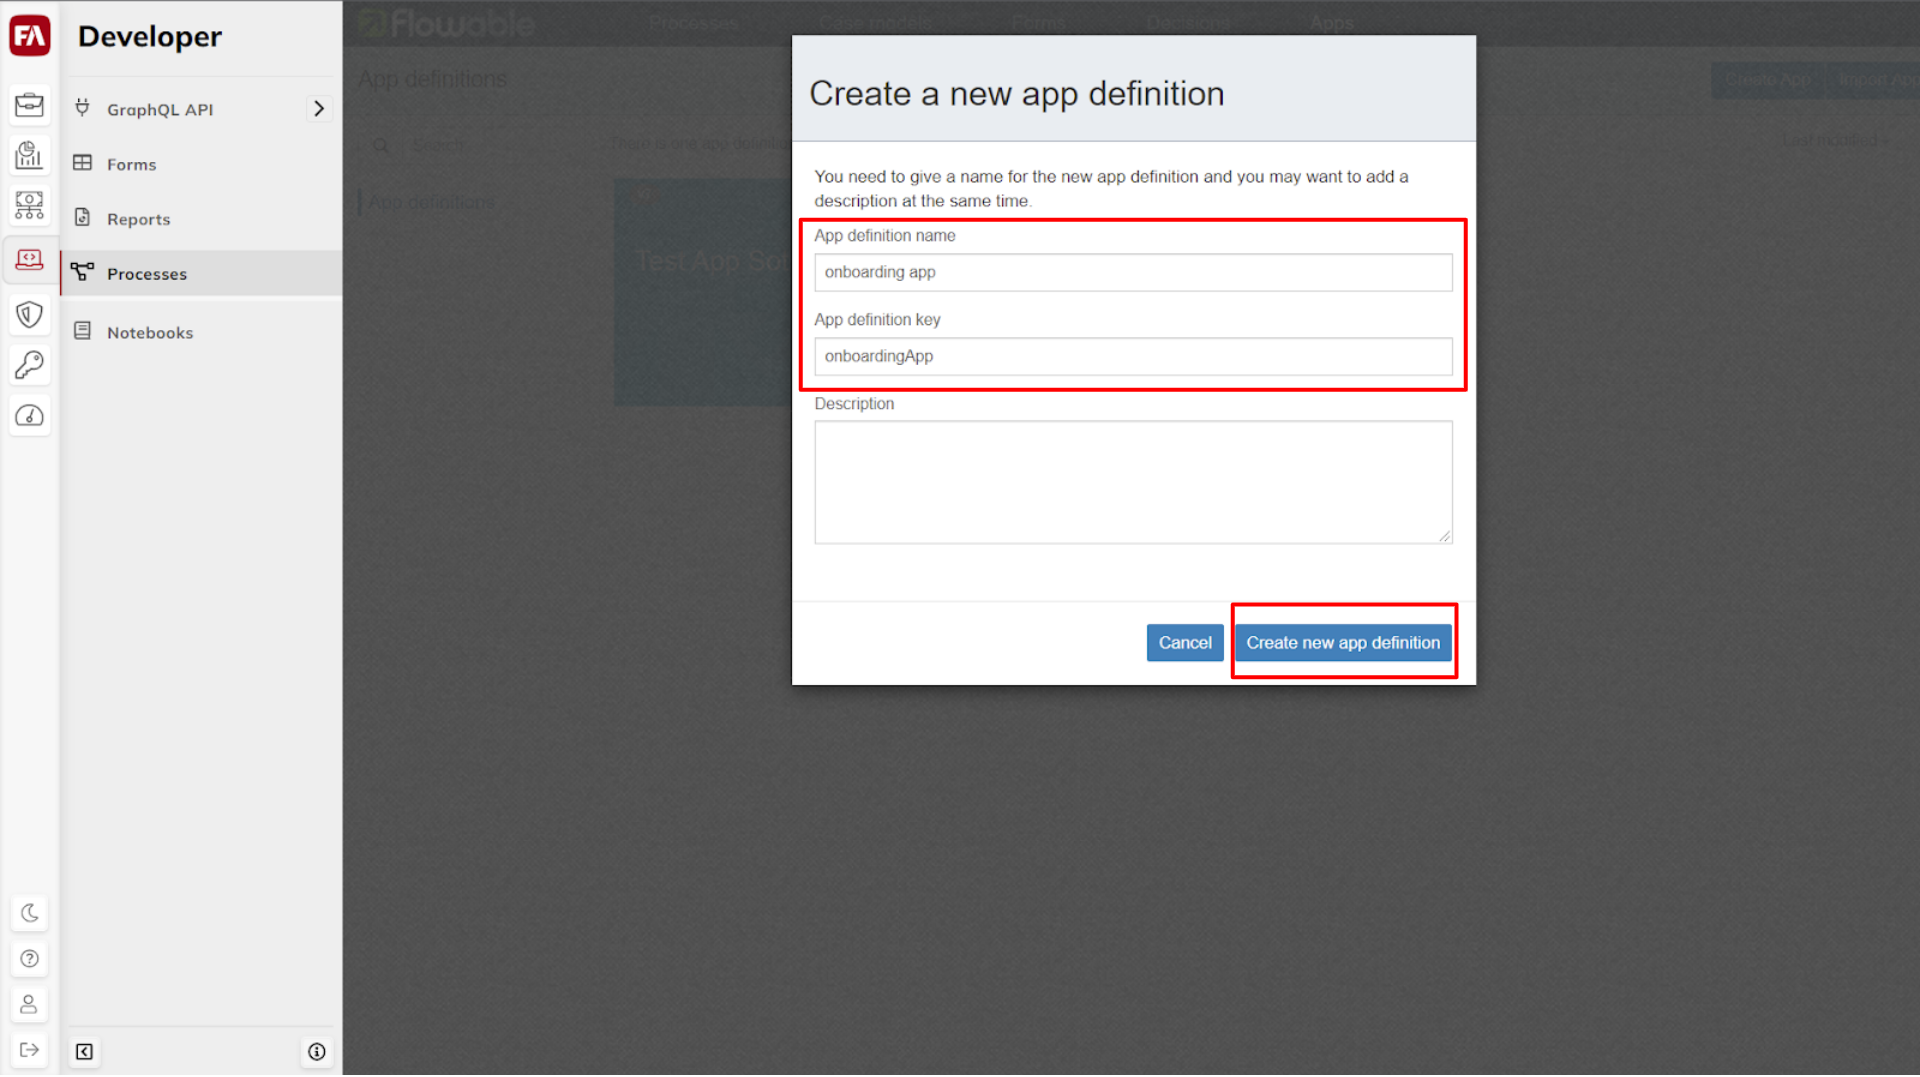 |
In the App overview screen, click Edit included models to add the Process Model.
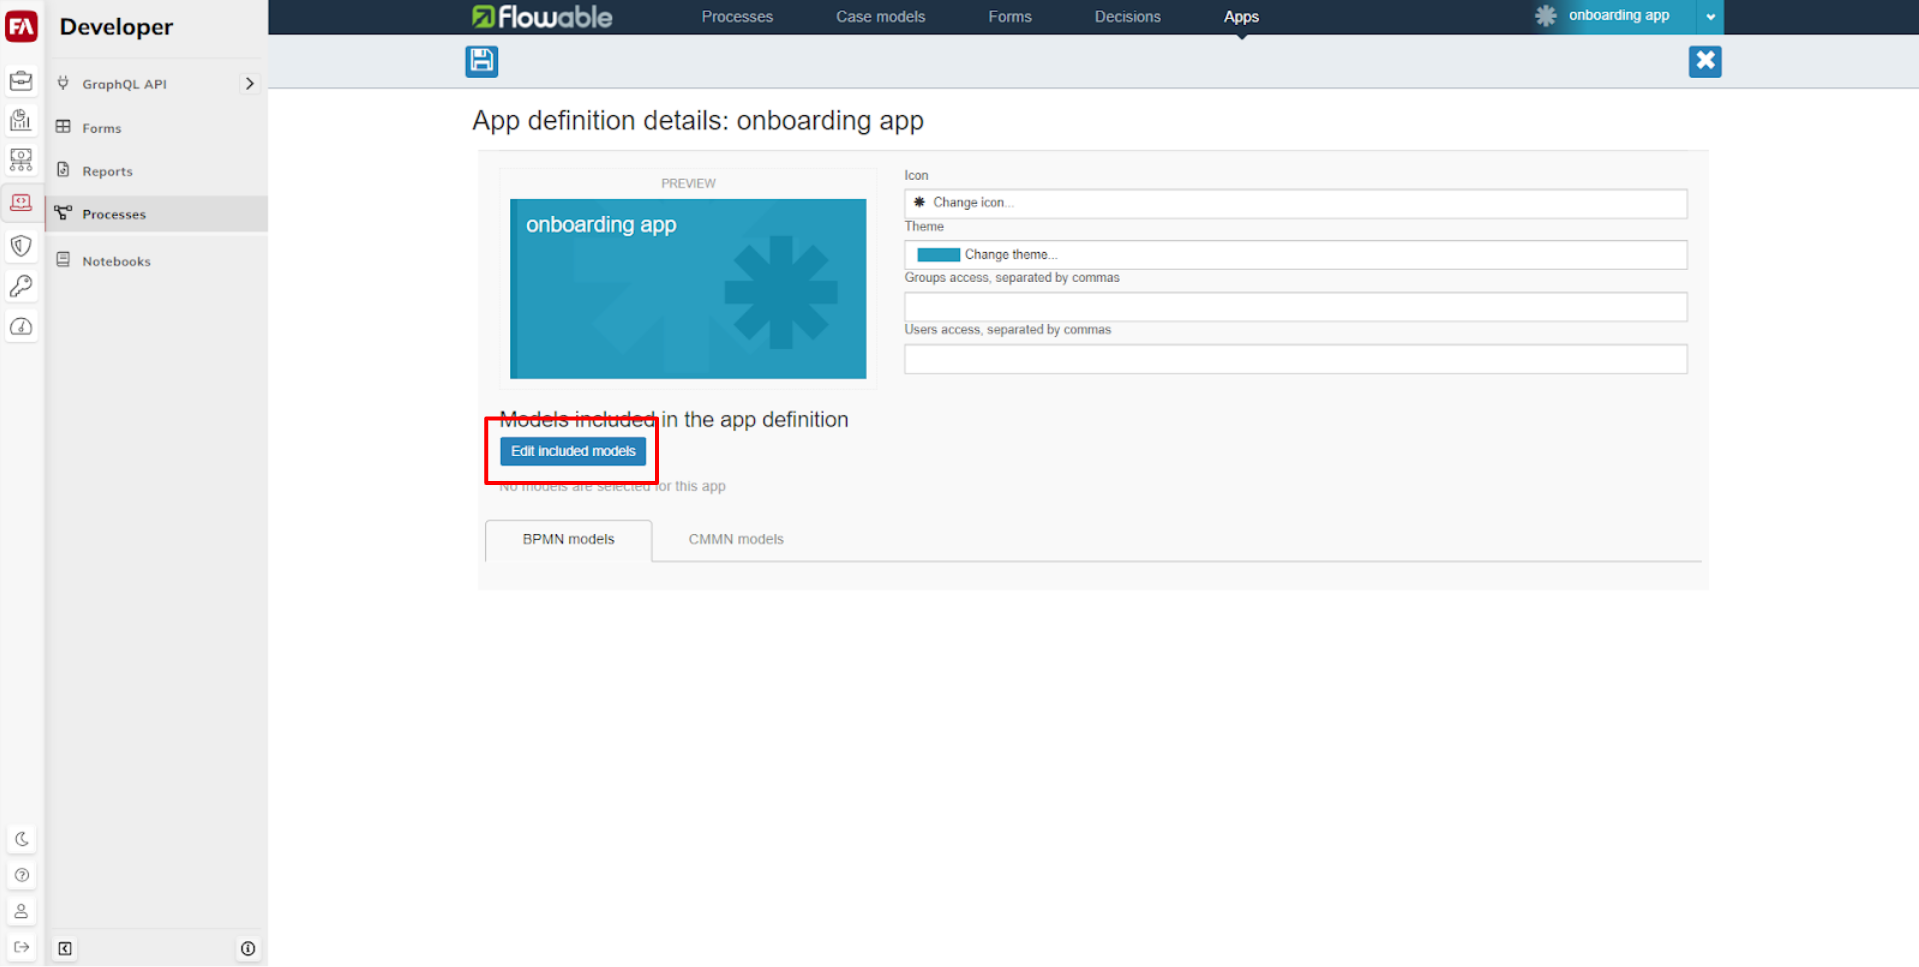 |
Add your Process Model by clikcing it once. There is a small blue plus-sign appearing on top of it, if it is added.
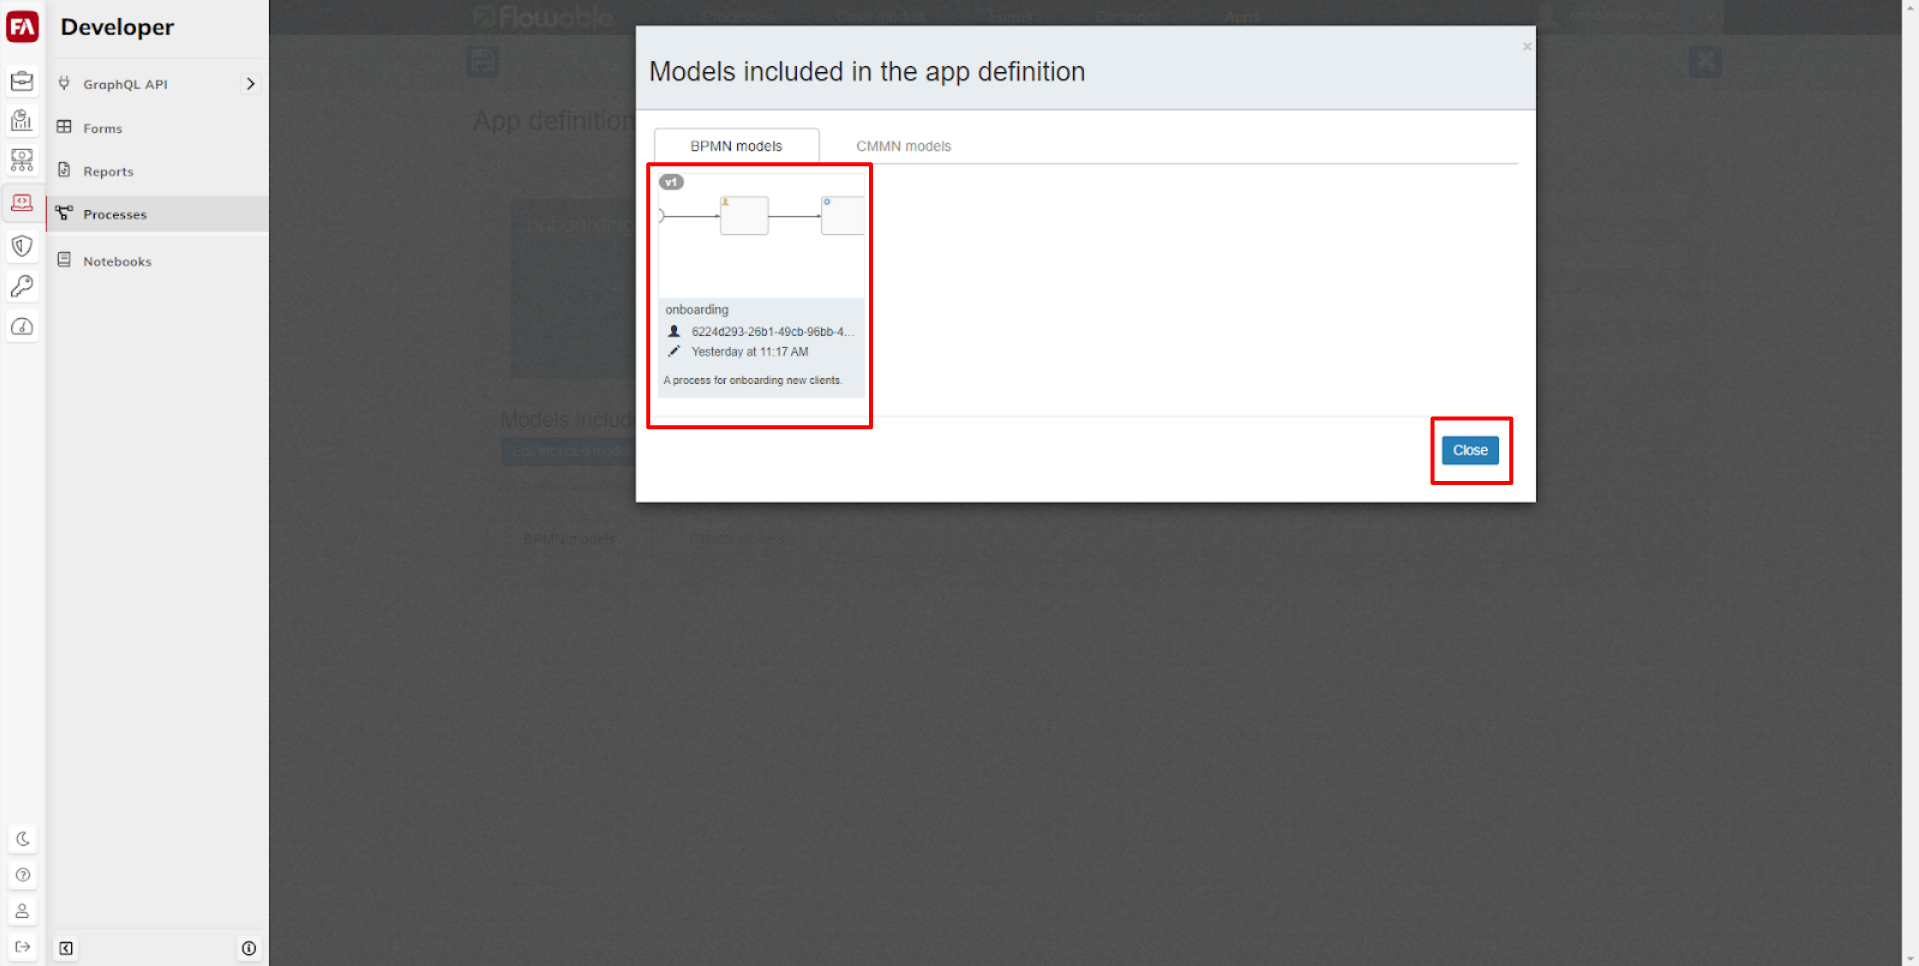 |
Make sure your Process Model is showing in under BPMN models, then save and close your app.
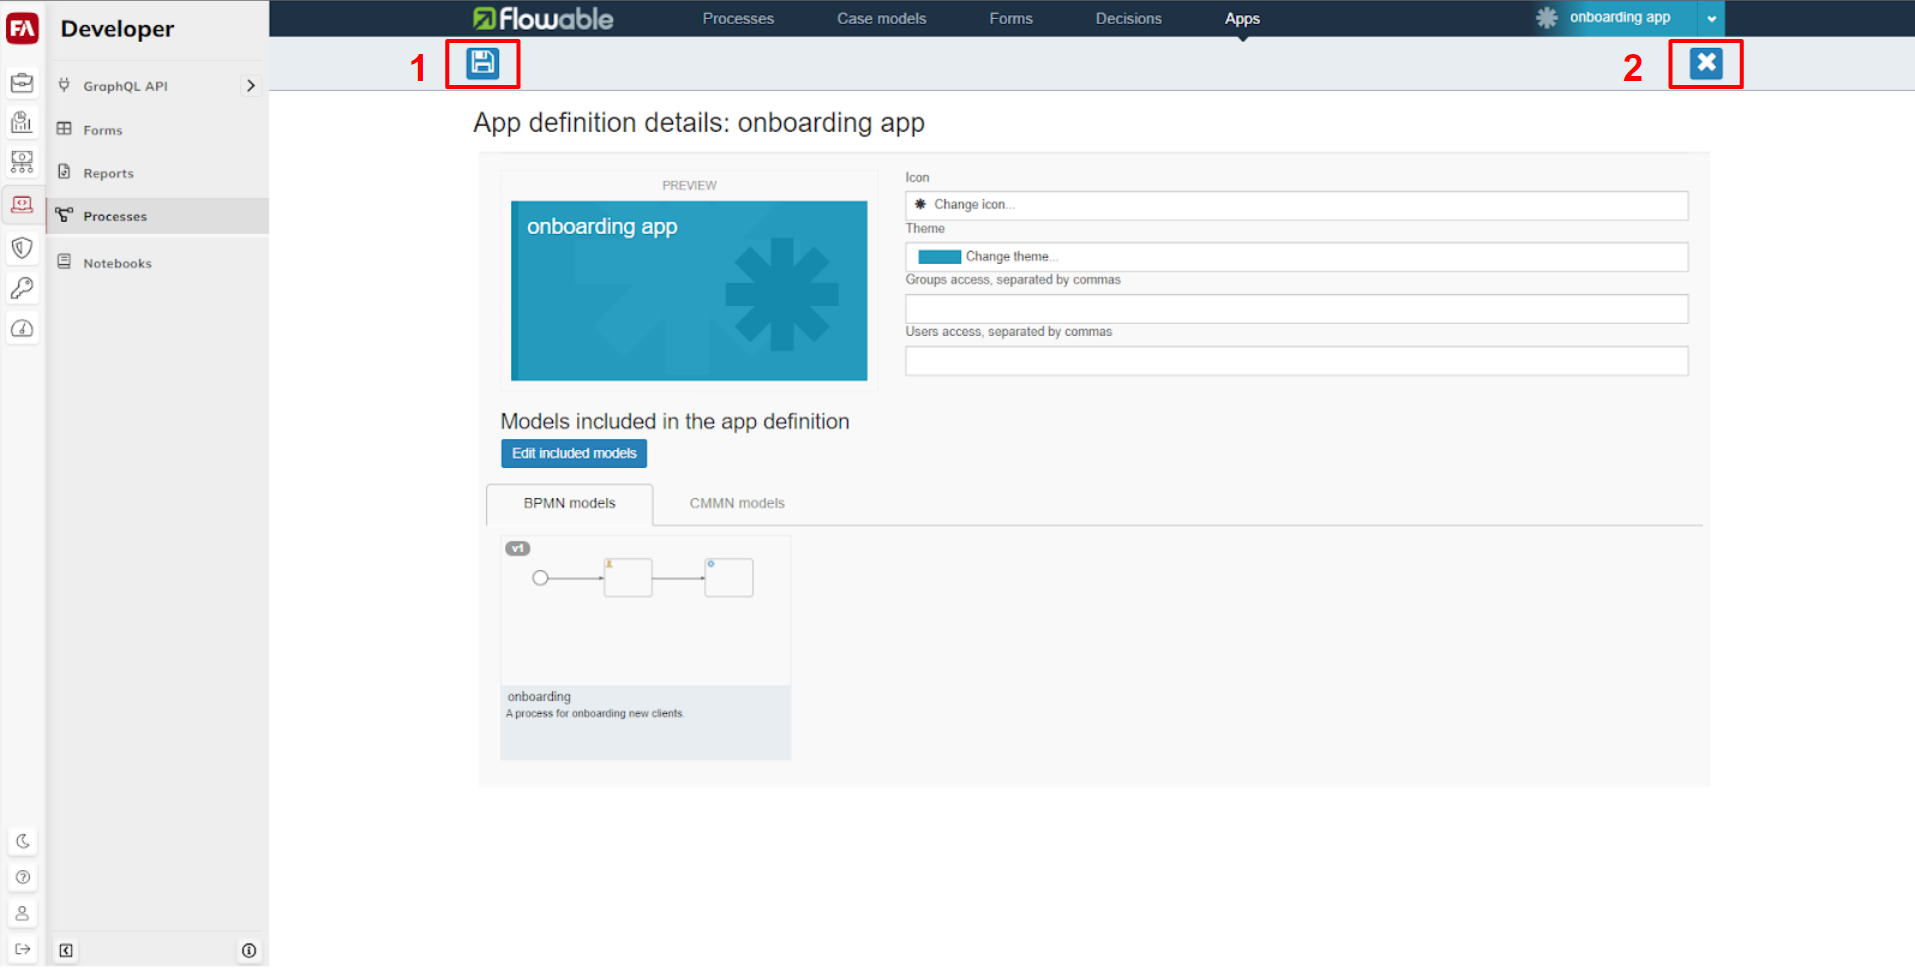 |
Open the app overview again.
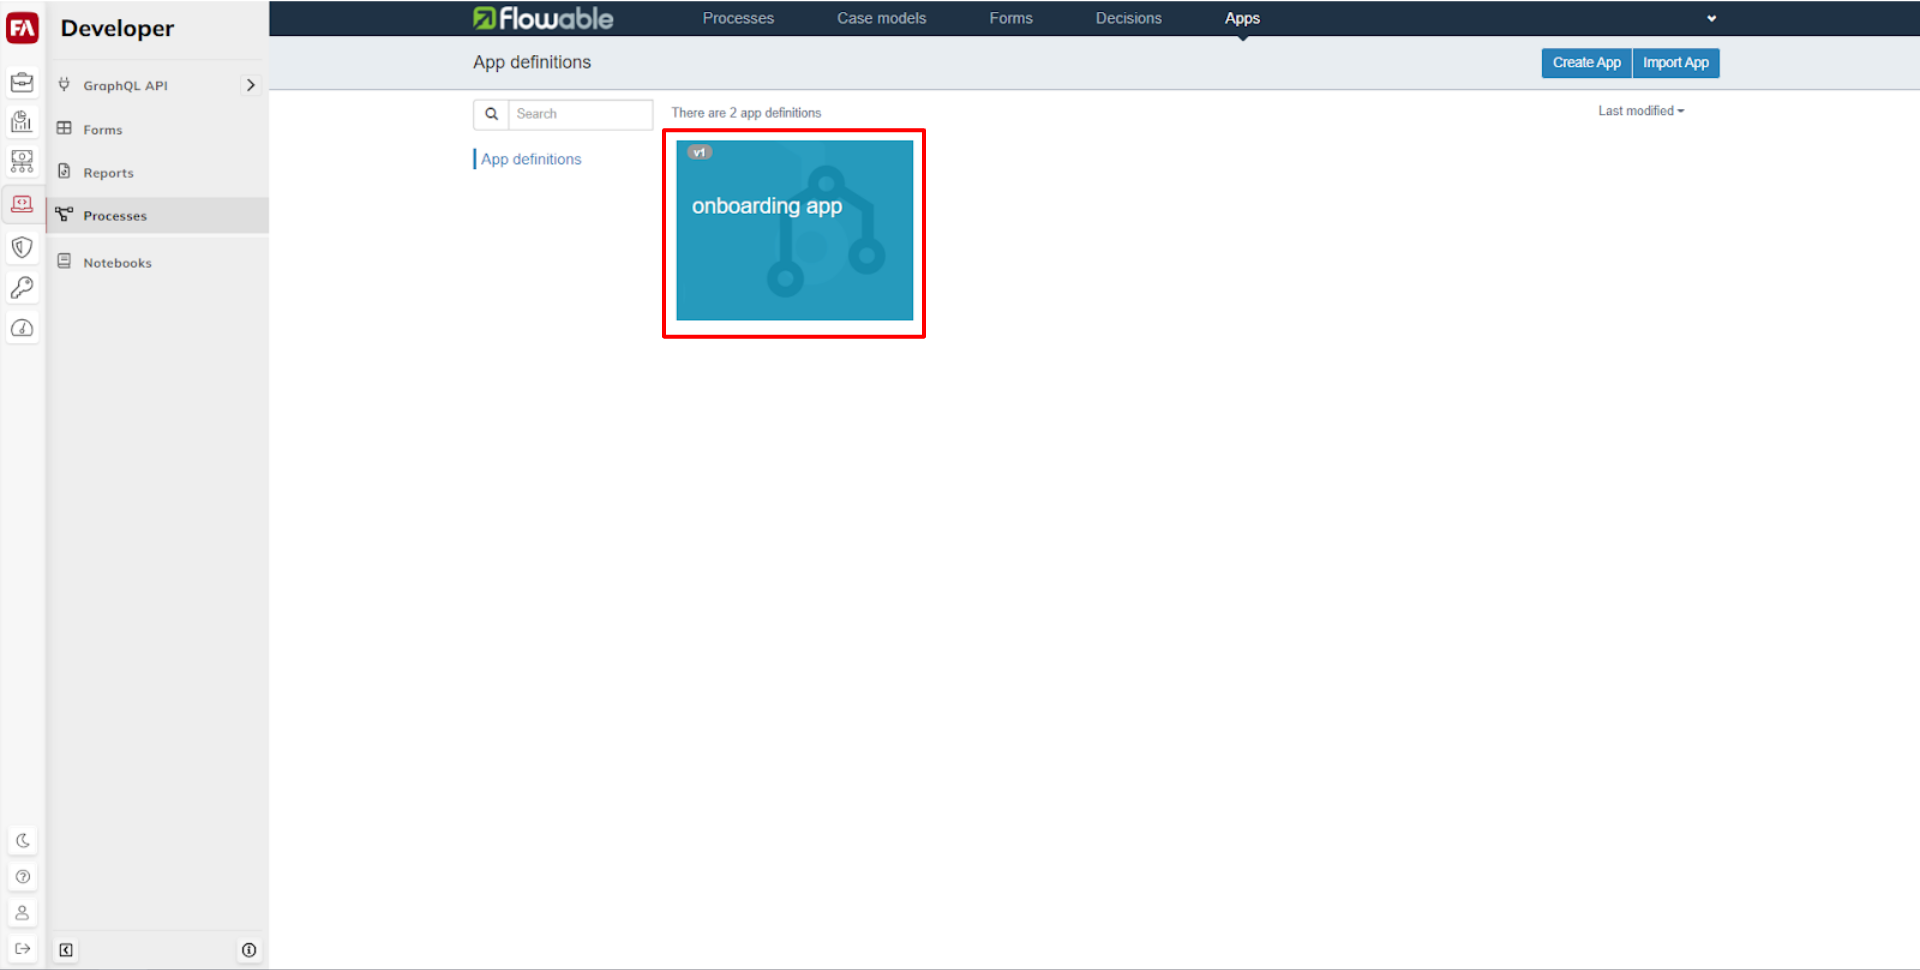 |
Click Publish to publish the app containing your Process Model.
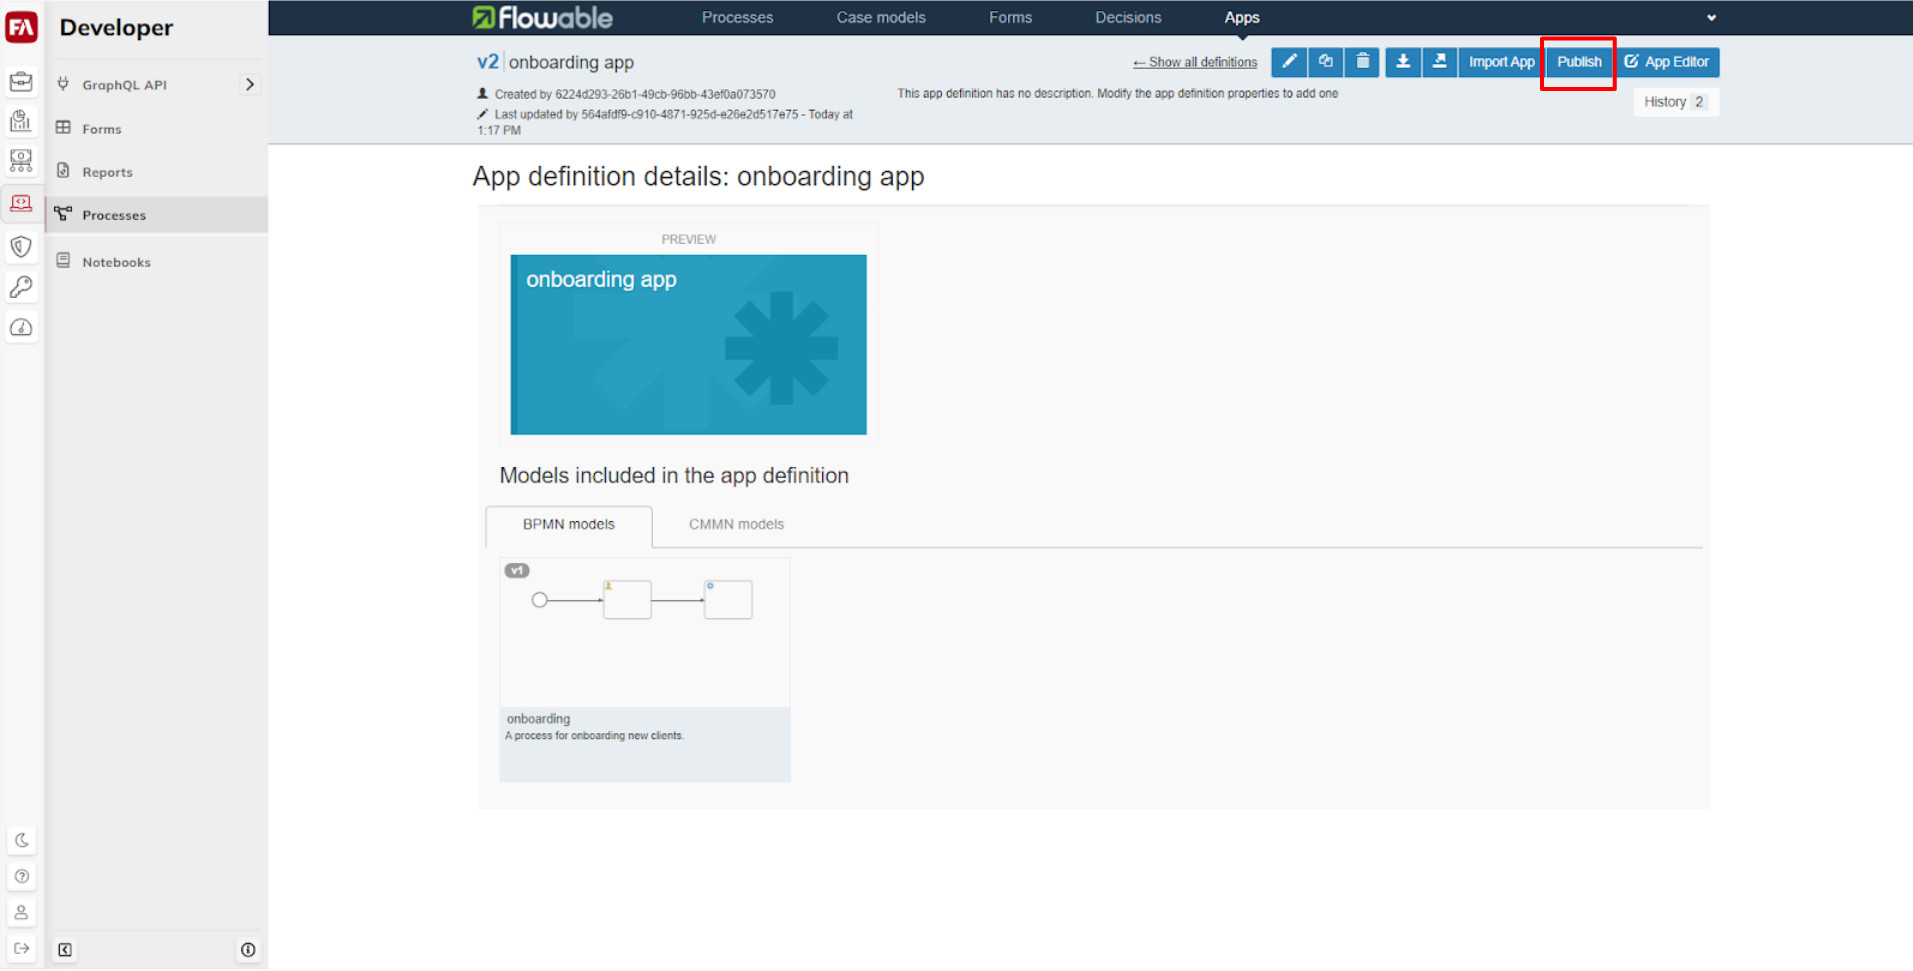 |
Confirm the app publishing by clicking Publish app definition.
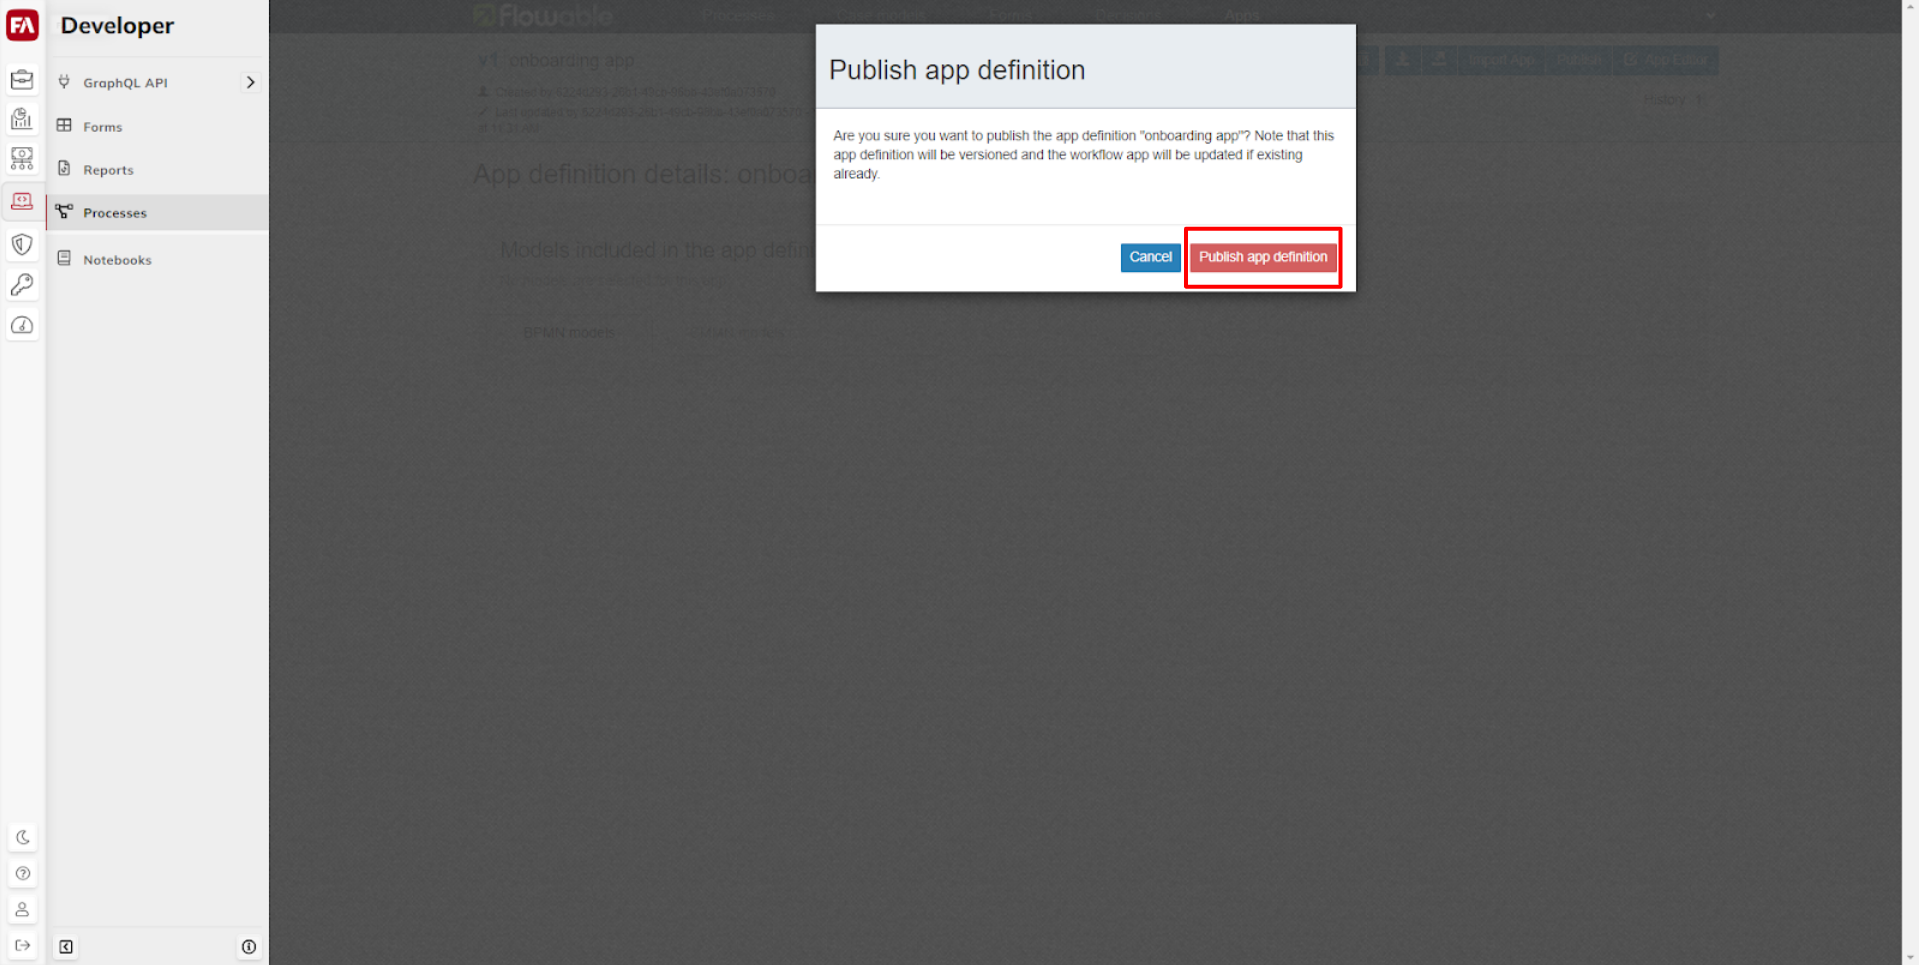 |
The app containing your Process Model is ready and published.
Step 3.1 - Download and modify the user interface (HTML document)
Download the below HTML document and open it in an editor.
In this file, the processKey variable should use the key you have defined in your Process Model:
var processKey = "onboarding"
If you chose another key for your Process Model than the one used in this tutorial – "onboarding" – then replace the string "onboarding" with whatever your Process Model key is (as entered in step 2.1) and save the document. Otherwise, leave the HTML document unchanged.
Step 3.2 - Upload the interface (HTML document) to FA
Navigate to File management in FA Admin console. Within File management, navigate to folder public in the Root/public directory.
In the public folder, click Upload files and upload the the onboardingUI.html file. It should end up in the public folder.
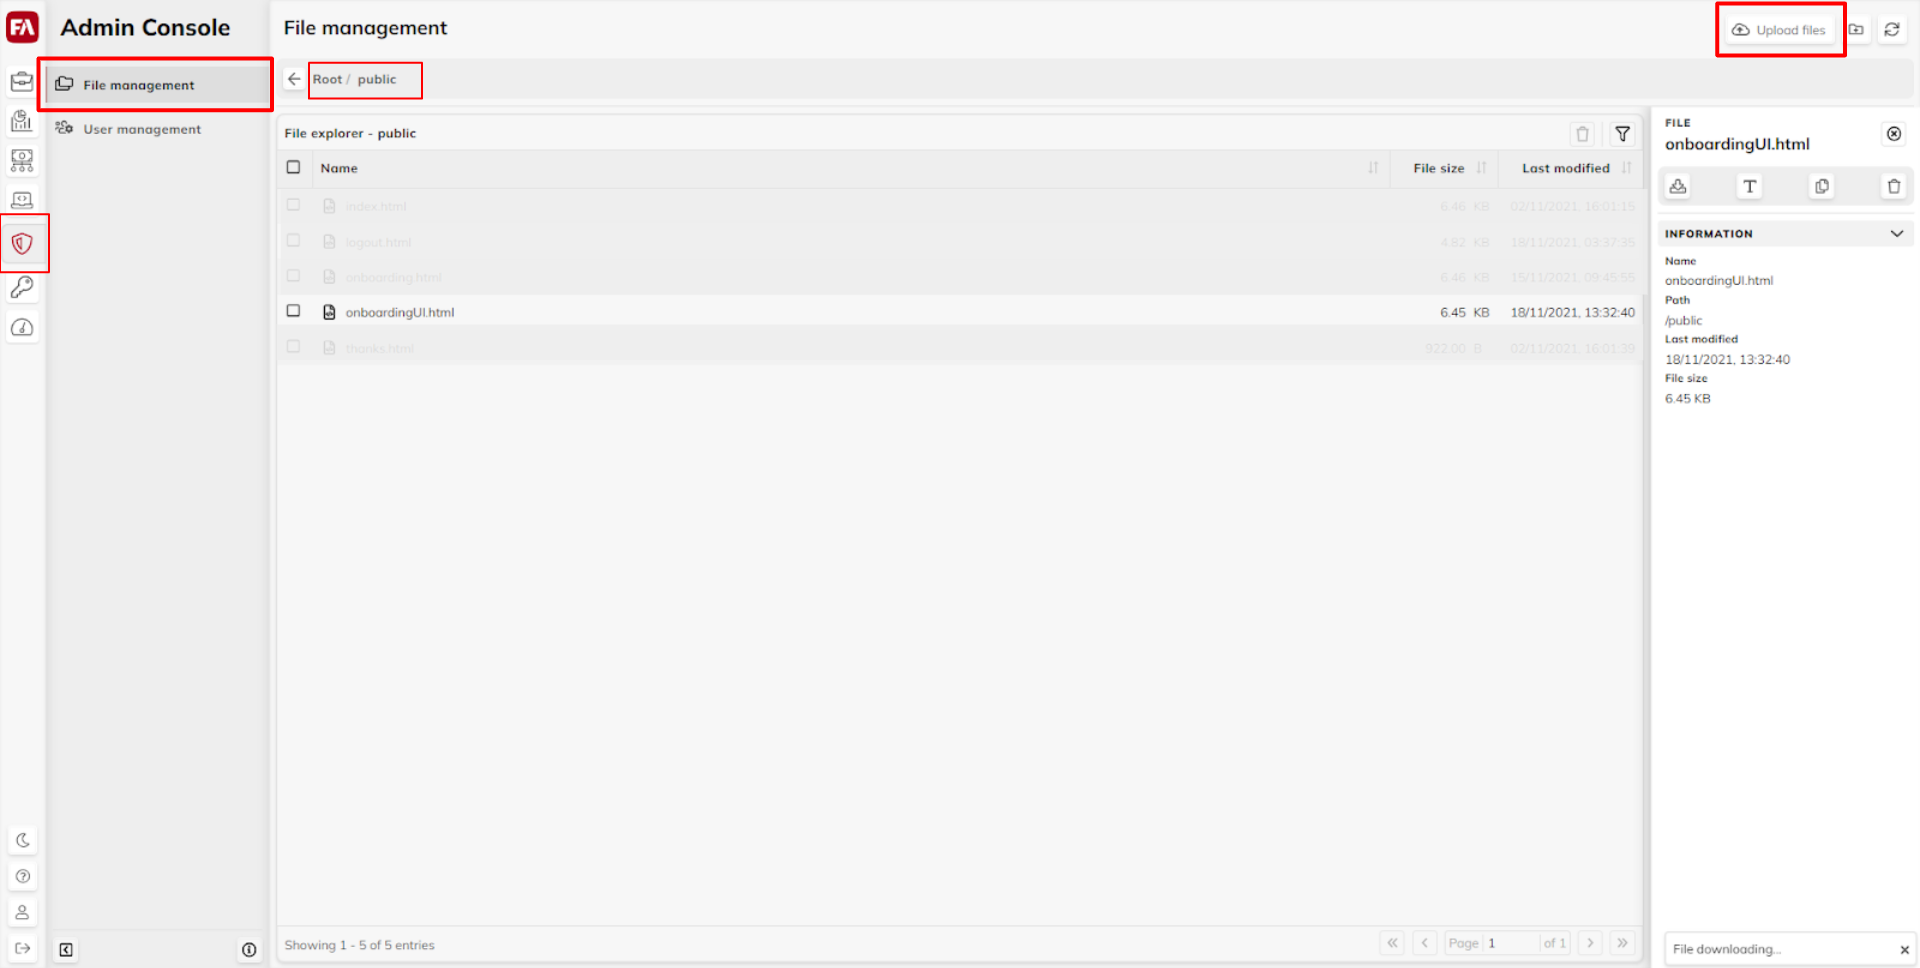 |
Step 3.3 - Upload another HTML document to FA
If you want to redirect the user to a specific page after the process finished running, you can use the redirectPath variable where you can define the destination page. You need to upload that destination page to the FA public folder.
In this example, the form redirects the user to the page thanks.html:
var redirectPath = "thanks.html"
Download the below thanks.html document and upload it to the public folder the same way you did in step 3.2.
The URL to access the process is the below. Replace <instance> with your environment name.
Note that you need to be logged in to FA, in order to access this URL.
https://<instance>.fasolutions.com/public/onboardingUI.html
You should end up at a page looking like this.
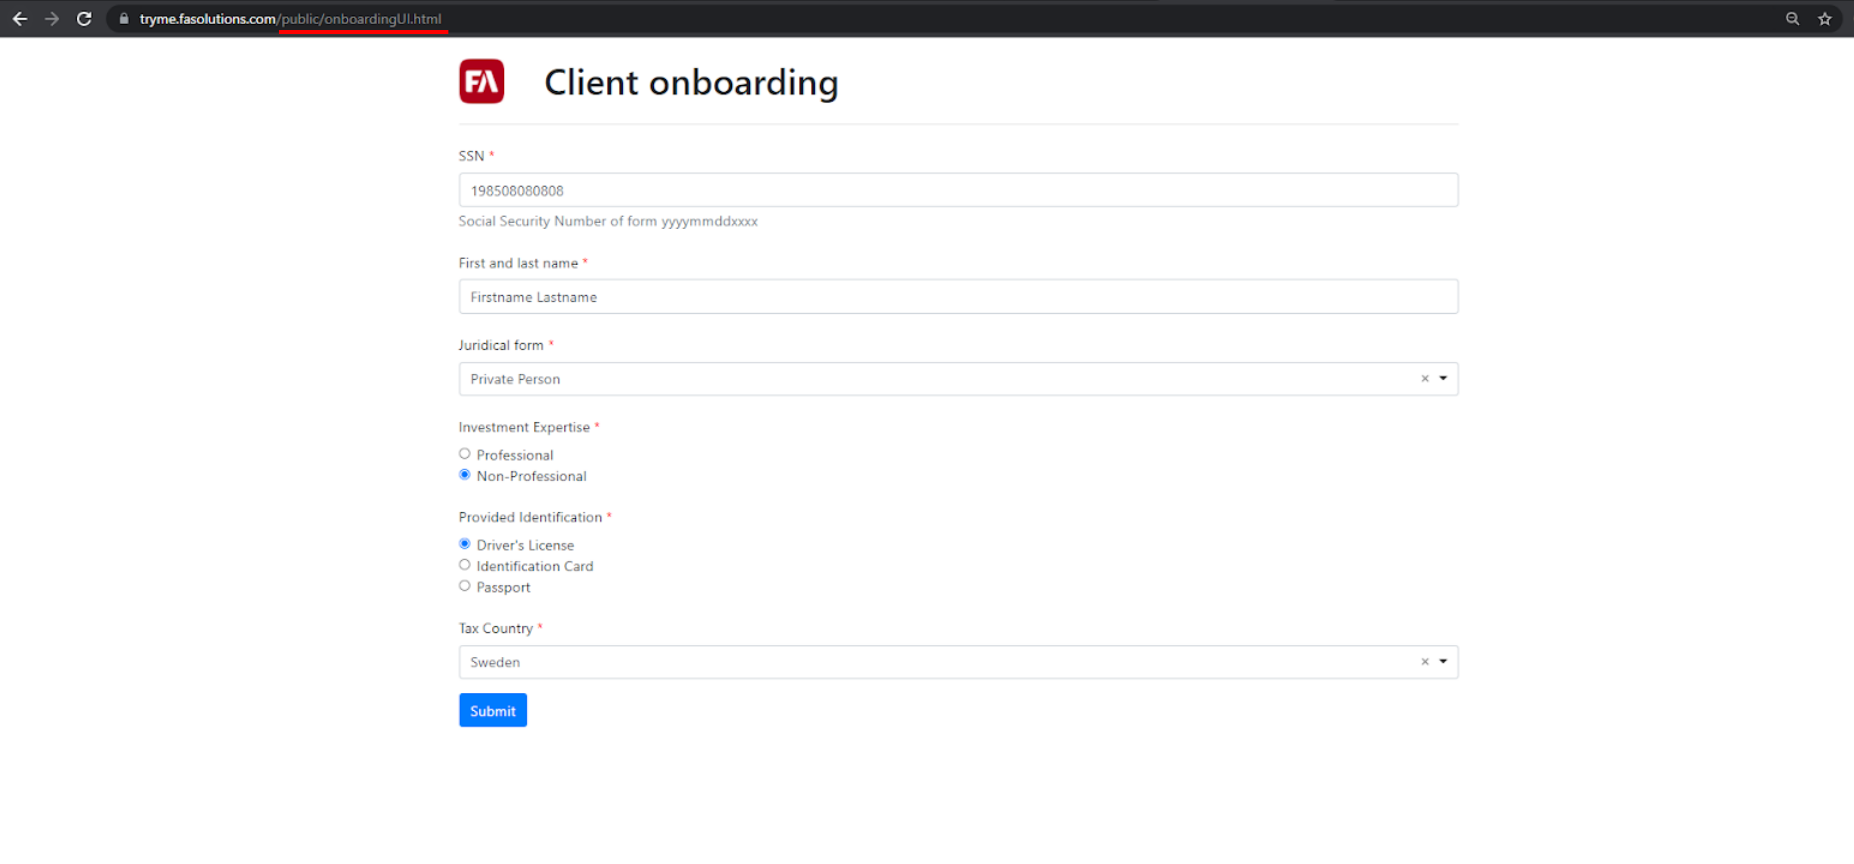 |
If you submit the form, a new contact is created through importing in FA, with the details entered into the form.
Finally, you are redirected to the thanks.html page, that contains a link to take you back to FA.
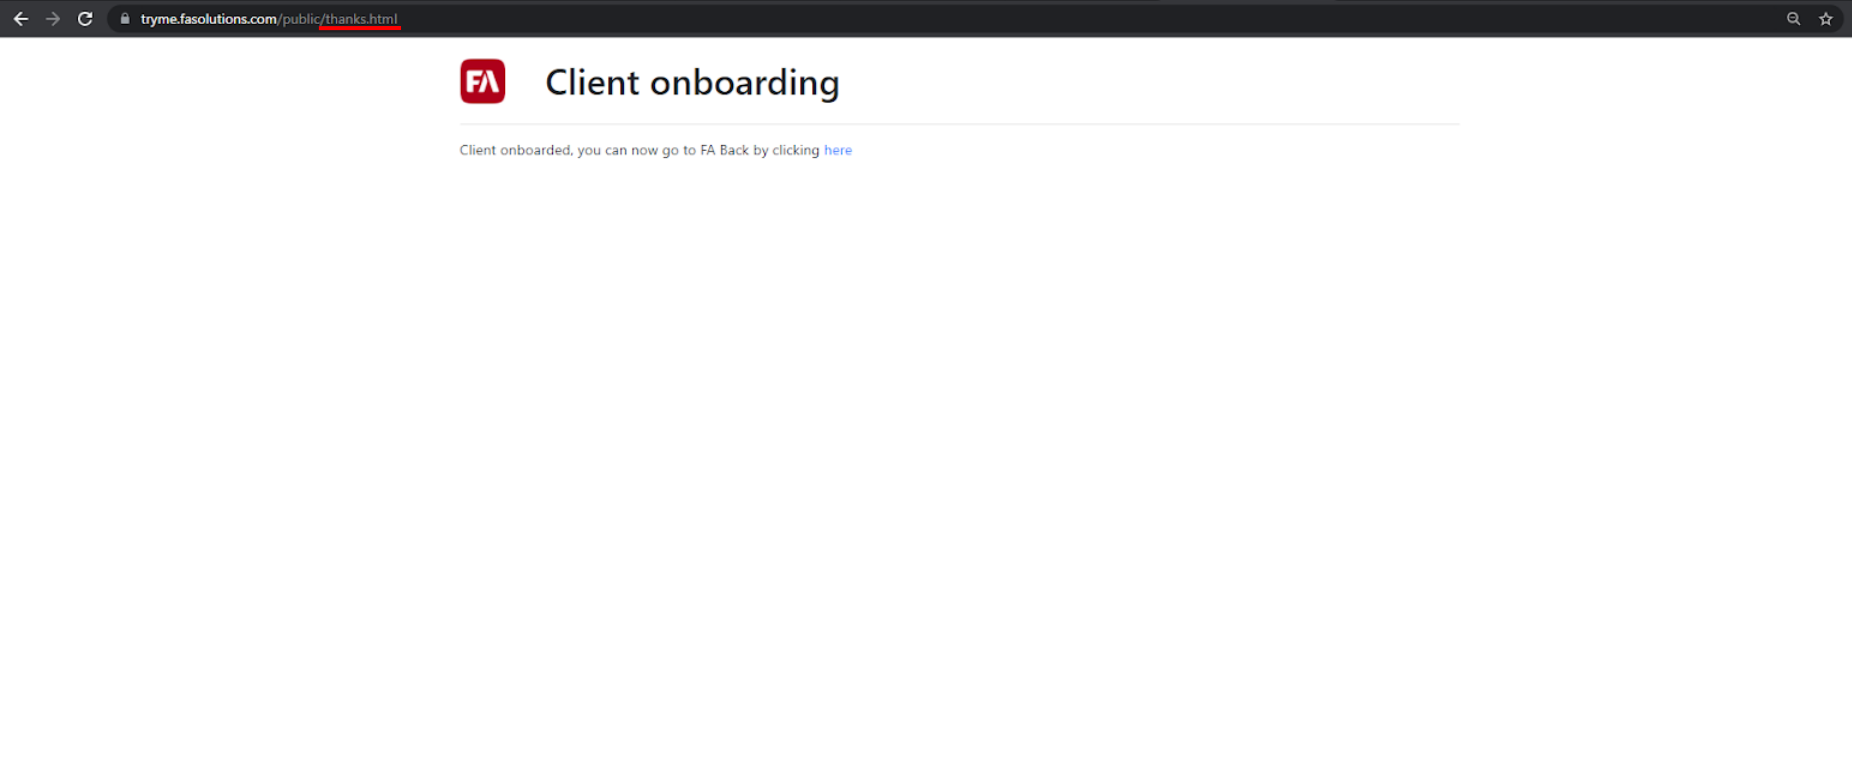 |
Use the same URL to access the process again, if you wish to start it over.