Configure and create transaction and holding reports for Futur Pension
You can create XML files with transaction and holding information from FA and configure them to be sent automatically via SFTP to Futur Pension.
The reports are generated based on the selected reporting date, and the reported transactions are marked with the Futur-Sent tag to prevent them from being sent again later.
Note
To use this functionality, you should have the role REP_FUTUR assigned.
Configure the sending
To enable the automatic sending, first do the initial setup:
Go to Tools → Administer → External reporting → Futur Pension reporting.
Select Enable automatic transfer to enable the automatic sending.
Fill in the Username and Password with the credentials received from Futur Pension.
Select whether to connect to the test or production system (defaults to Production if nothing is selected).
Use the Skip manual approval and Skip date selection checkboxes to not use FA Back user interface for approval of the files and date selection.
Define which Report date (days before the current date) to use. Select 0 to report current day's values and 1 to report yesterday's values.
Note
If you want to schedule the report sending, both Skip manual approval and Skip date selection need to be selected.
Specify the insurance number
Enter the insurance number as one of the portfolio IDs (you can choose which ID to use):
Portfolio ID in the Portfolio window, Basic info tab.
External ID in the Portfolio window, IDs tab. Specify “Futur Pension” in the External name field when adding the ID.
Make sure that either the Portfolio ID matches the insurance number, or add the insurance number as an External ID with External NameFutur Pension under the IDs tab of the Portfolio window.
Create the reports
To generate reports:
Right-click the portfolio in the Overview , Portfolio hierarchy pane and choose External reporting → Send data to Futur Pension. The reports can similarly be created from the Portfolios view.
Choose the reporting date and click Done. The holdings and transactions files are generated.
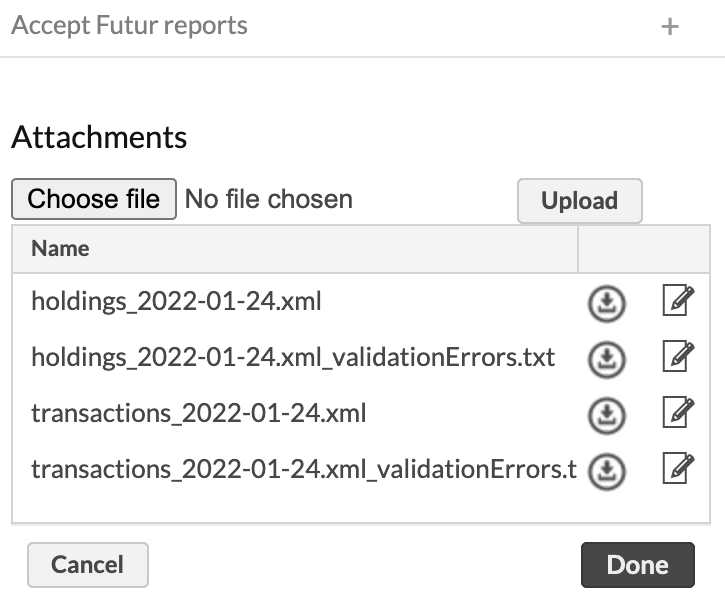
If there are errors, you can view them in the
_validationErrorsfiles. Check the file contents and make adjustments to fix the issues.After you get no validation errors, you can send the files to Futur Pension by clicking Done. This only applies if you configures the automatic sending to Futur Pension as described above.
The reported transactions are marked with the Futur-Sent tag after you click Done.