Set up DNB bank and custody connection
This article guides you through setting up the connection parameters so that you can use DNB bank and custody connection.
Prerequisites
To send and receive files from DNB, you need to do the following:
Get a private key for the SFTP connection and upload it with the name private.pem in FA Back through Tools → Administer → Bank and custody connections → Upload keys.
Send the corresponding public key to DNB.
Tell DNB to whitelist the IP. For production systems, the IP to whitelist is usually 51.124.71.179.
Ask that DNB direct all files into the Inbox folder. The FA system only fetches files from the Inbox folder on the DNB server.
To enable signing for files going to DNB, set up a PGP key pair and upload the relevant keys. Follow the instructions in Install a PGP key pair for PGP-encrypted connections.
Configuring parameters
In FA Back, go to Tools → Administer → Bank and custody connections → Manage.
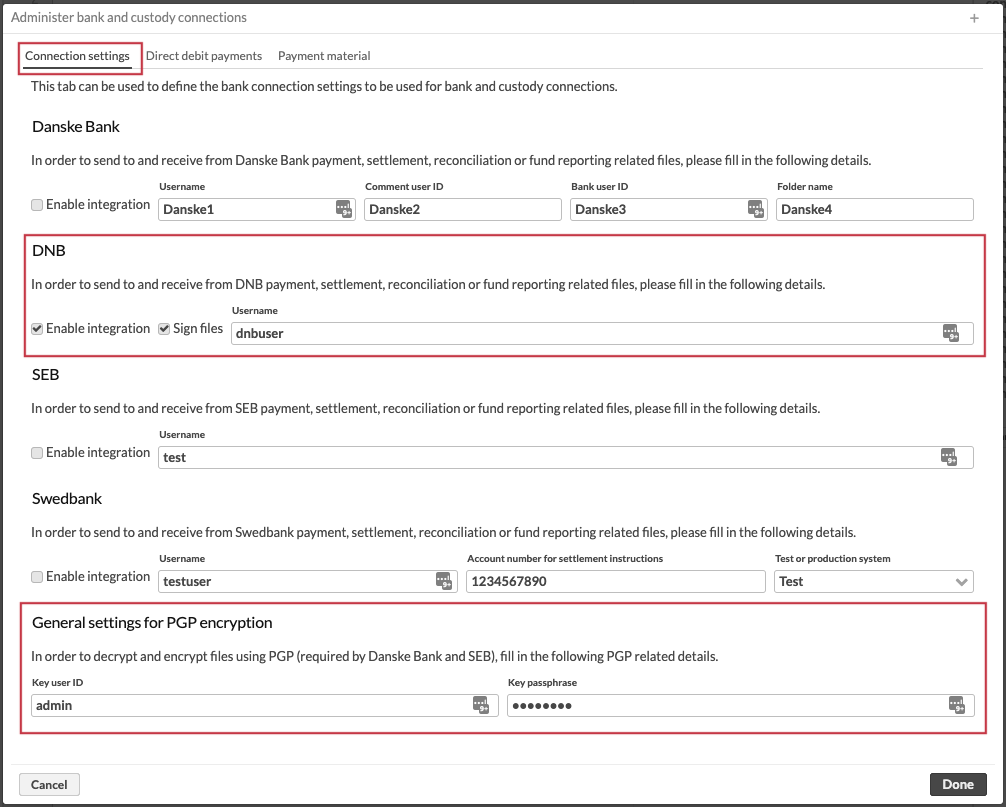
Provide the following settings specific to the DNB connection under the DNB heading on the tab titled Connection settings:
Enable integration: checking this box enables the integration
Sign files: checking this box enables PGP signing of files to be sent to DNB (optional). Make sure you follow the steps in Install a PGP key pair for PGP-encrypted connections to set up the signature key and provide the PGP details further down.
Username: enter the username that you received from DNB
If signing is enabled, provide the PGP settings that you took note of when going through Install a PGP key pair for PGP-encrypted connections under General settings for PGP encryption:
Key user id: the user ID given when generating the key
Key passphrase: the passphrase given when generating the key
Once you click Done, the DNB integration is complete.