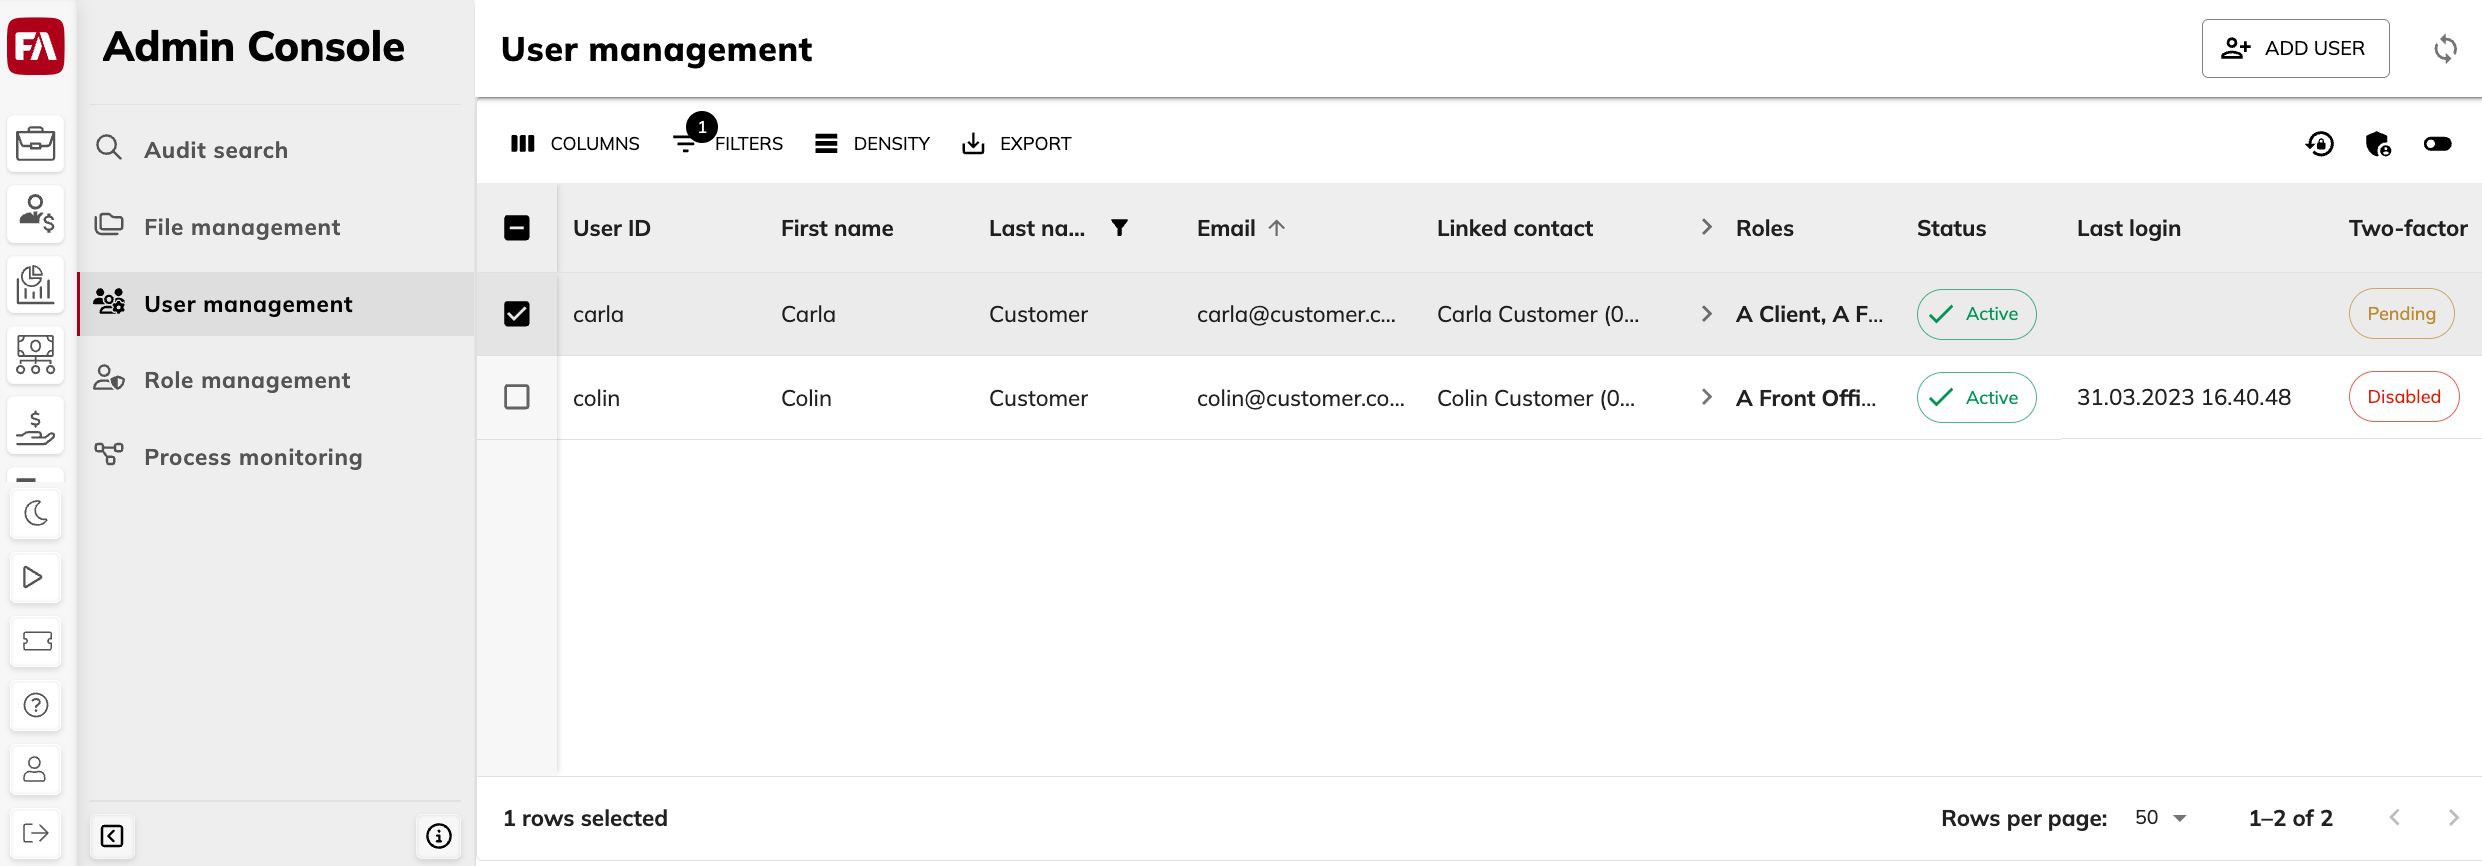
User management view
The User management view allows you to manage FA Platform users and their access rights to applications. The following sections describe what viewing options you have, how to manage users, how to assign user roles, how to manage user authentication, and how to manage user and account information.
 |
Viewing options
You can:
Search for users by their user ID, first name, last name, and email (fields at the top).
Refresh the table content by clicking
 at the top right.
Export the user information as an XLSX file.
For the whole table, click Export → Download as XLSX.
For specific rows, select users and click Export → Download as XLSX.
Adjust the table (see Adjust the view).
Adjust the view
You can adjust the table layout and specify the search criteria and then save these modifications for later:
Make your adjustments. You can:
Adjust columns.
Show or hide columns (
 ).
).Reorder by dragging and dropping.
Change the width by dragging the boundary.
Sort by clicking the column name.
Adjust table row density (
 ).
).Filter the table based on column content (
 ).
).Search the table with the search fields at the top of the view.
Click
 and enter a name for the view.
Click Save.
The adjustments are saved as a view, including the search fields at the top. You can now:
Set a saved view as the default. To do this, click the Saved views field or
 , and then click the star icon
  next to the saved view.
Open a saved view, work with it and make changes to it, and then use
 to restore the view to its previously saved settings.
Clear the saved view and return to the initial system view (click
 in the Saved views field).
Rename or delete saved views (click
to open the saved views sidepane).
Manage users and roles
You can add new users in the system and deactivate or delete existing users.
Add a user
To create a user account:
Click Add user at the top-right corner and fill in the user information:
The User ID used as a username at login and Email (required fields).
Linked contact to set up access to client data or access to FA Front access with the external identity provider.
Other fields if needed. See User details and account information for details.
Click Edit user roles in the User details pane and choose which apps your user can access and with what roles.
To access an app, a user needs a role for it – a user without any roles can't access any application.
Let the user know about their credentials and how to get a password.
Send them the user ID – FA platform doesn't send this information automatically.
Instruct the user to request a password reset link by clicking Forgot password on the login page.
Deactivate a user
If a user doesn't need to access the platform anymore, we recommend deactivating their account rather than deleting it – this maintains the user's history while preventing them from accessing FA.
To change the status for multiple users, choose the users in the table and click  . To change the status for one user, click in the User details pane. You can see the user's status in the table:
Active – The user can log in to the FA platform.
Inactive – The user can't log in to the FA platform.
Delete a user
Deleting a user removes all user information from the system. A deleted user can’t log in. If you just want to disable a user and prevent them from logging in, consider deactivating the user instead of deleting the account. To delete a user, click  in the User details pane.
Assign user roles
The Roles block in the User details pane shows the roles assigned to the user. Roles determine:
The app the user can access. To access an app, the user needs at least one role within that app. For example, if a user has a right in FA Back, the user is allowed to access FA Back.
The access rights within the app. For example, FA Back roles determine access rights through permission and FA Front roles determine access rights through the views defined for the role.
To add or remove the user’s roles, click Edit user roles  at the top of the User details pane.
Manage authentication
You can manage user authentication using the following options:
Password reset
You can force the user to reset their password on next login. To force a password reset for multiple users, choose the users in the table and click  . To force password reset for a selected user, click
  in the User details pane, choose Force password reset on next login and save the changes.
Two-factor authentication
Two-factor authentication is a login option that requires entering a verification code in addition to the basic credentials (user ID and password). You can check two-factor authentication status in the User details pane:
Disabled – Two-factor authentication is turned off.
Enabled – Two-factor authentication is turned on. The user has logged in and completed the mobile authenticator setup.
Pending – Two-factor authentication is turned on. You chose “Enable two-factor authentication on next login”, but the user didn’t yet log in to complete the setup.
To manage two-factor authentication, use the buttons (available depending on the two-factor authentication status):
- Enable two-factor authentication
Enable two-factor authentication on the next login for the user.
- Cancel two-factor authentication
Cancel two-factor authentication request that is pending.
- Disable two-factor authentication
Disable two-factor authentication for the user.
Brute force detection
FA Platform uses brute force detection to identify attempts to guess a user’s password. Brute force detection temporarily disables the user's account after a certain number and frequency of login failures. The user account is disabled for one minute if:
The user enters incorrect credentials twice within a second. This means that someone tries to guess the password programmatically.
The user fails to enter correct credentials 5 times. After the account is disabled, every unsuccessful attempt increases the lock by one minute, up to one hour.
To check if a user account is disabled by the brute force detection, open the User details pane and go to the Brute force detection section. It includes the following information:
- Status
Brute force detection status of the user account: Blocked (deactivated by brute force detection), or Unblocked (active). A user blocked by brute force detection has to wait for up to 1 hour (depending on the number of unsuccessful login attempts) for the account to be unblocked.
- Total login attempts
The number of failed login attempts.
- Last attempt
The date and time of the last login attempt.
- IP address
The IP address from which the last login attempt was made.
To activate a blocked user account, choose Unblock and activate. Once unblocked, your user can log in again without waiting for the system to unblock the user after a certain time.
User details and account information
You can view or edit a user's information by clicking on them in the table (the User details sidepane opens). The following user information is available:
User account information
- User ID (required)
A unique user ID for logging in to FA and log the user's activities.
- Email (required)
The user’s email to send a password reset link to the user, if the user clicks Forgot password on the login page.
- First name, Last name
The user’s first and last name.
- Linked contact
The corresponding contact in FA Back. Linked contact is needed to:
Grant access only to certain customers and portfolios (see the Set up limited visibility for one user and Set up limited visibility for many users sections in the FA Admin guide).
Allow online end users to view their own investments in FA Front. A user that has a linked contact has access to the investment information associated with this contact.
- Linked contact external ID
The user’s external ID received from the external identity provider when the user logs in to FA Front. External ID is used to find a matching contact for the user. If you see this field, this means that FA failed to link a contact to the user. For example, there is no contact with such an ID or there are several contacts with this ID stored in FA. In this case, you can add a contact manually in the Linked contact field.
- Status
The user account status: active (the user can log in to FA) or inactive (the user can't log in to the system). See Assign user roles for details.
Sessions
The Sessions block shows a list of currently active sessions for the user. For example, the same user might have logged in with different browsers, having multiple sessions open at the same time. The list shows:
- Application
The apps where the user is logged in within the session. For example, the user might have FA Back and FA Front open in different tabs in the same browser, accessing both applications with a single login and a single session.
- Last access
The date and time the user accessed an app within the session. If the user accesses only one app, this shows the time they logged in, or if your user accesses multiple apps, this shows the time the user last opened a new app.
- IP address
Shows the IP address the user is logged in from.
You can log the user out of all sessions by clicking Log out user from all sessions. The user will be able to use FA for a short time until their authentication expires, then they will get a "communication problem" and will be taken to the login page.
Last logins
The Last logins block shows date and time of the five last user logins.