User details pane
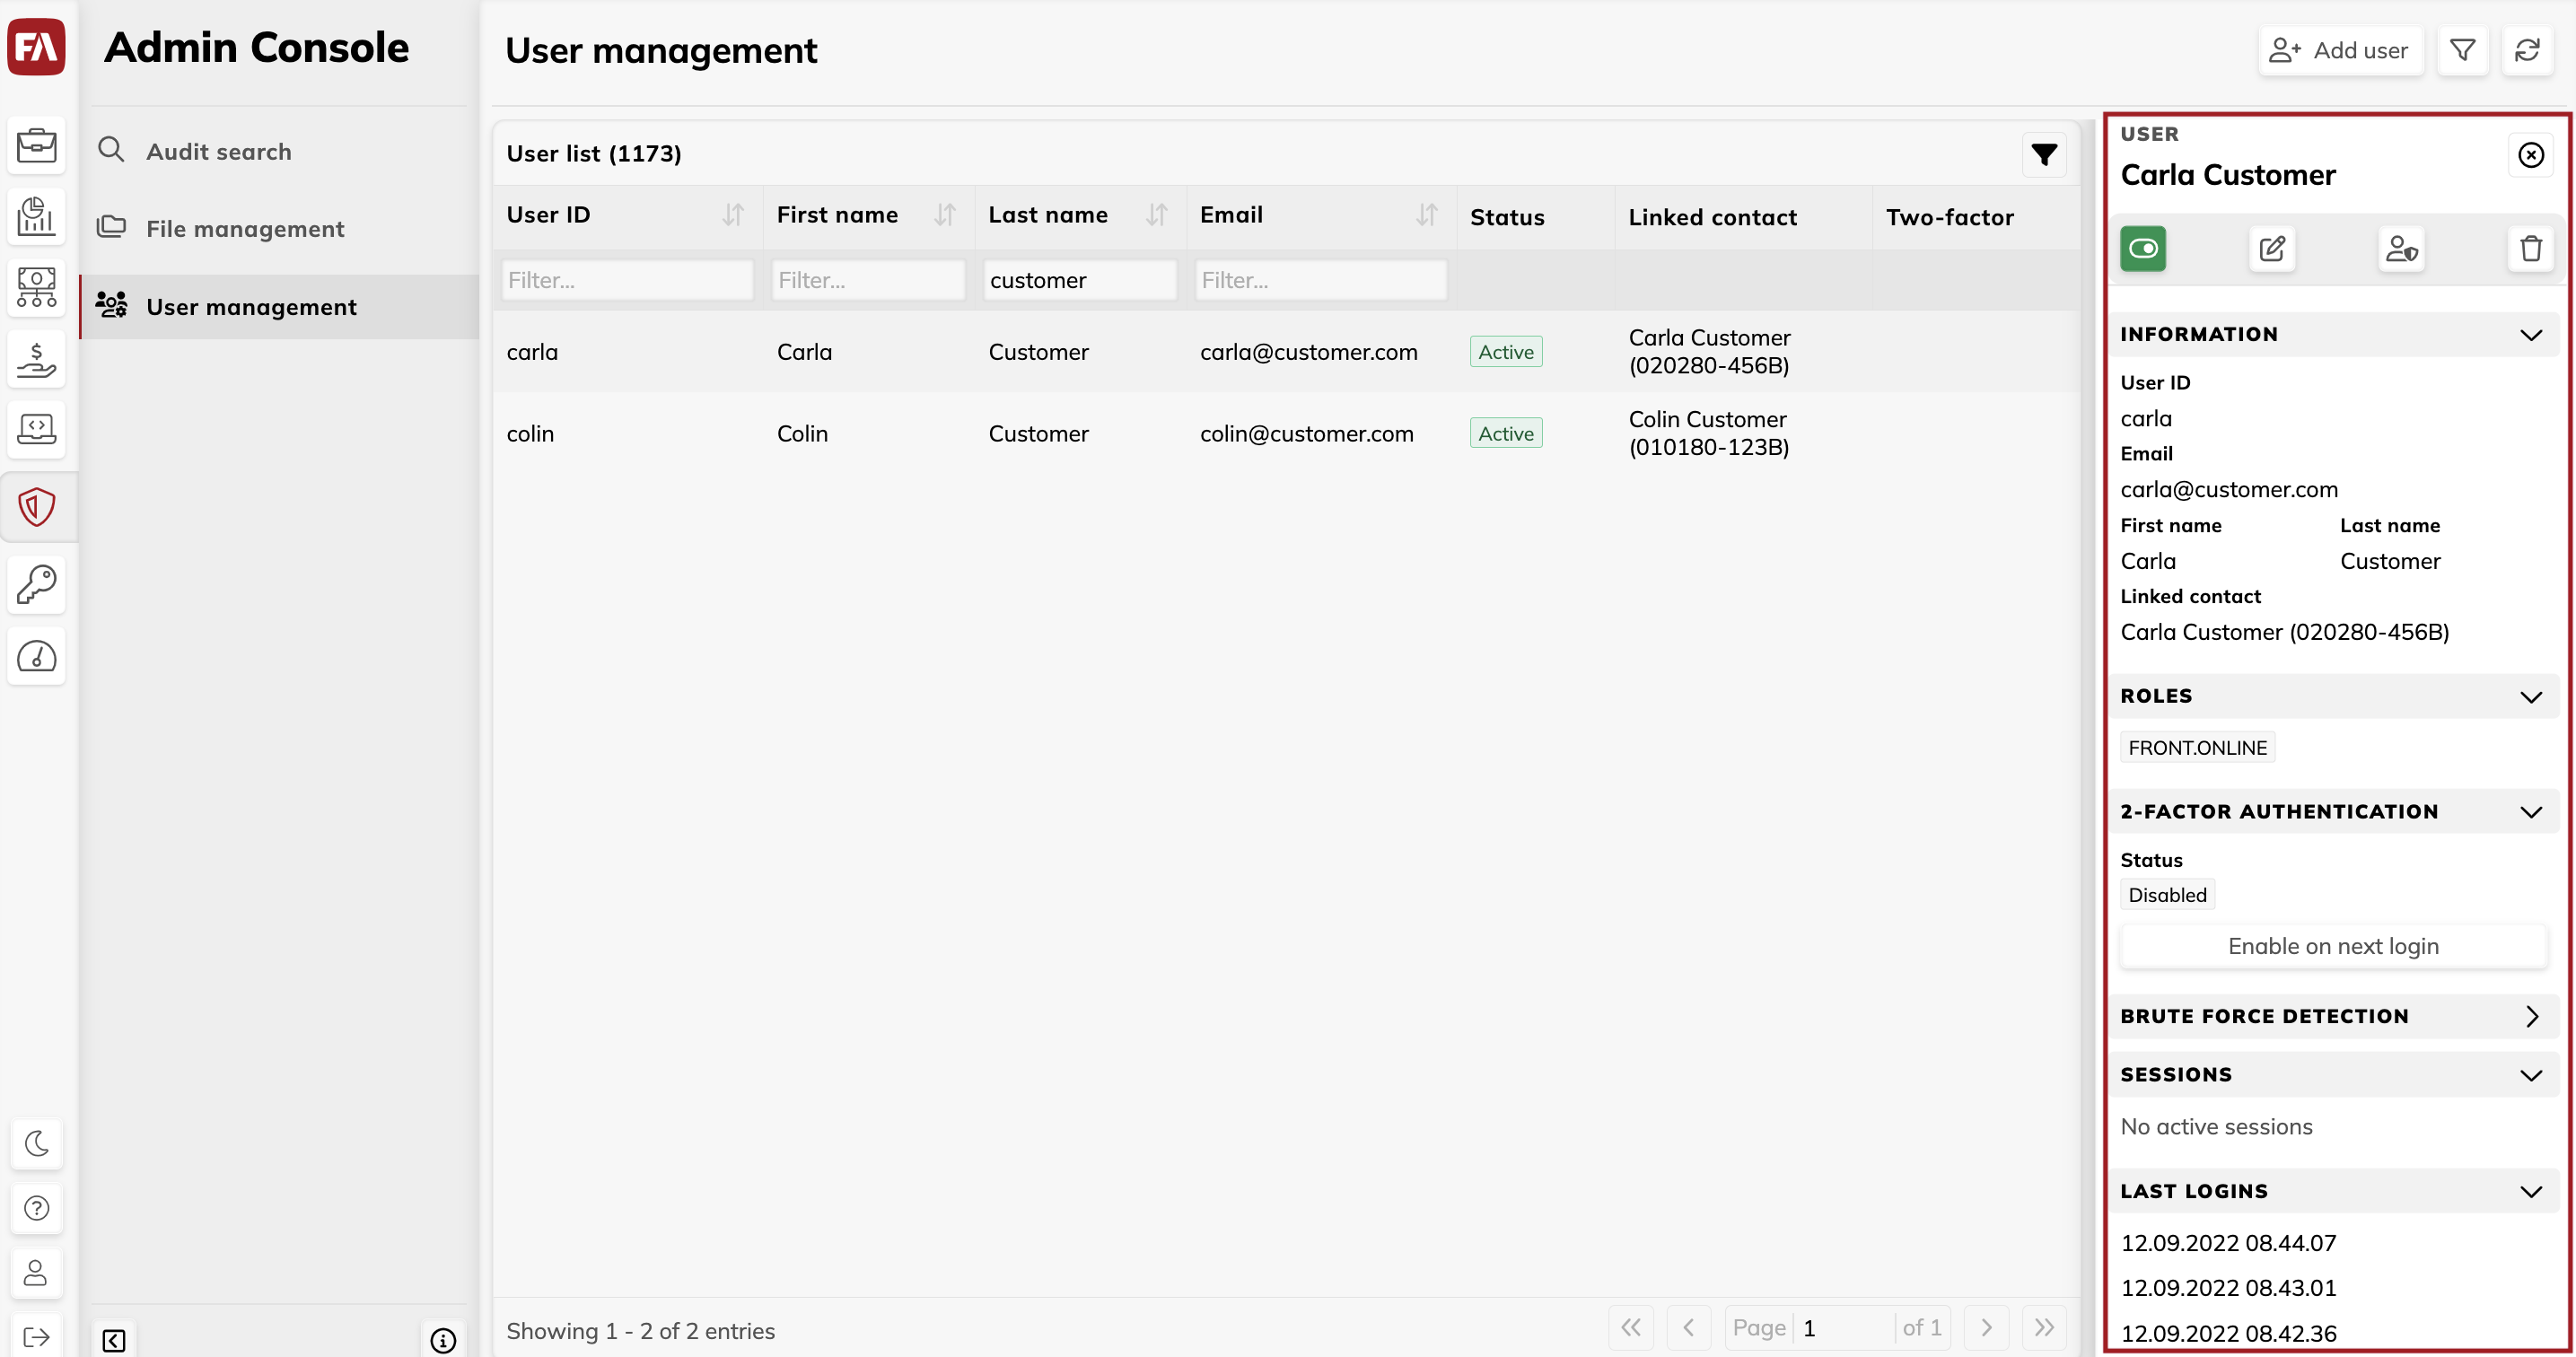
Buttons
- Activate/ Deactivate user
Switch the user’s status. Deactivated user can’t log in to FA. We recommend using this option instead of deleting the user – this maintains the user's history while preventing them from accessing FA.
- Edit user info
For more information about the user details, see the Information block section below.
- Edit user roles
For more information about the user roles, see the Roles block section below.
- Delete user
Delete a user and all user information from the system. A deleted user can’t log in, and user information is no longer available. If you just want to disable a user and prevent them from logging in, consider deactivating the user instead of deleting.
Information block
- User ID (required)
A unique user ID used for logging in to FA and log the user's activities.
- Email (required)
The user’s email used to send a password reset link to the user, if the user clicks Forgot password on the login page.
- First name, Last name
The user’s first and last name.
- Linked contact
The corresponding contact in FA Back. Linked contact is needed to:
Grant access only to certain customers and portfolios (see the How to set up limited visibility for one user and How to set up limited visibility for many users sections in the FA Admin guide).
Allow online end users to view their own investments in FA Front. A user that has a linked contact has access to the investment information associated with this contact.
- Linked contact external ID
The user’s external ID received from the external identity provider when the user logs in to FA Front. External ID is used to find a matching contact for the user. If you see this field, this means that FA failed to link a contact to the user. For example, there is no contact with such an ID or there are several contacts with this ID stored in FA. In this case, you can add a contact manually in the Linked contact field.
The following options are available when you click the Edit button:
- Force password reset on next login
Force the user to reset their password on next login.
- Enable two-factor authentication on next login
Require the user to set up their mobile authenticator app next time they log in. For details, see Two-factor authentication block.
Roles block
The Roles block shows the roles assigned to the user grouped by department. Roles determine:
The app the user can access. To access an app, the user needs at least one role within that app. For example, if a user has a role in FA Back, the user is allowed to access FA Back.
The access rights within the app. For example, FA Back roles determine access rights through permission and FA Front roles determine access rights through the views defined for the role.
To modify the user’s roles, click the Edit user roles button at the top of the User details pane.
Two-factor authentication block
The Two-factor authentication block shows you if two-factor authentication is enabled for the user and allows you to turn it on and off. With two-factor authentication, users are required to enter a verification code in addition to their basic credentials (user ID and password) when logging in to FA.
Two-factor authentication statuses are:
Disabled – Two-factor authentication is turned off.
Enabled – The user has logged in and completed the mobile authenticator setup.
Pending – You chose “Enable two-factor authentication on next login”, but the user didn’t yet log in to complete the setup.
To manage two-factor authentication, use the buttons (available depending on the two-factor authentication status):
- Enable two-factor authentication
Enable two-factor authentication on the next login for the user (available from version 1.4).
- Cancel two-factor authentication
Cancel two-factor authentication request that is pending (available from version 1.4).
- Disable two-factor authentication
Disable two-factor authentication for the user.
You can also enable or disable two-factor authentication in the Information block.
Brute force detection block
Brute force detection identifies an attempt to guess a user’s password. With brute force detection, the user's account is temporarily disabled after a certain number and frequency of login failures. The user account is disabled for one minute if:
The user enters incorrect credentials twice within a second. This means that someone tries to guess the password programmatically.
The user fails to enter correct credentials 5 times. After the account is disabled, every unsuccessful attempt increases the lock by one minute, up to one hour.
The Brute force detection block includes the following information:
- Status
User account status: Blocked (deactivated by brute force detection), or Unblocked (active). A user blocked by brute force detection has to wait for up to 1 hour (depending on the number of unsuccessful login attempts) for the account to be unblocked.
- Total login attempts
The number of failed login attempts.
- Last attempt
The date and time of the last login attempt.
- IP address
The IP address from which the last login attempt was made.
To activate a blocked user account, choose Unblock and activate. Once unblocked, your user can log in again without waiting for the system to unblock the user after a certain period of time.
Sessions block
The Sessions block shows a list of currently active sessions for the user. For example, the same user might have logged in with different browsers, having multiple sessions open at the same time. The list shows:
- Application
The apps where the user is logged in within the session. For example, the user might have FA Back and FA Front open in different tabs in the same browser, accessing both applications with a single login and a single session.
- Last access
The date and time the user accessed an app within the session. If the user accesses only one app, this shows the time they logged in, or if your user accesses multiple apps, this shows the time the user last opened a new app.
- IP address
Shows the IP address the user is logged in from.
You can log the user out of all sessions by clicking Logout user from all sessions. The user will be able to use FA for a short time until their authentication expires, then they will get a "communication problem" and will be taken to the login page.
Last logins block
The Last logins block shows date and time of the five last user logins.